

Table of Contents
Master Your DSLR Presets: Unlock Jaw-Dropping 10 Camera Hacks
In the world of digital photography, DSLR cameras are highly regarded for their versatility and ability to capture stunning images. While mastering the intricacies of manual mode is essential for any serious photographer, DSLRs also come equipped with a range of presets that can help simplify the shooting process and yield impressive results. In this comprehensive guide, we’ll explore the various DSLR presets, how they work, and when to use them to enhance your photography.
Understanding DSLR Presets
DSLR presets, also known as shooting modes or scene modes, are pre-configured settings on your camera that are optimized for specific types of photography scenarios. These presets are designed to make it easier for photographers, especially beginners, to capture great shots without diving into the complexities of manual settings like aperture, shutter speed, and ISO.
Here are some common DSLR presets you’ll find on most cameras:
1. Auto Mode
Auto mode, the most user-friendly setting on your DSLR, is like your trusty safety net when you’re short on time or photography expertise. This mode is perfect for those spontaneous moments that demand quick action without the fuss of adjusting settings. With a simple click, your camera takes the reins, automatically calibrating aperture, shutter speed, and ISO to deliver a well-exposed shot. It’s a lifesaver for beginners, but keep in mind that creative control is limited here.
When to use Auto Mode: Auto mode is best suited for quick snapshots and situations where you don’t have time to adjust settings, such as capturing candid moments or when handing your camera to someone unfamiliar with photography. Consider auto mode your go-to for candid snapshots, family gatherings, or when handing your camera to someone unfamiliar with the intricacies of photography. While it may not unleash your full artistic potential, it ensures you won’t miss those precious moments when time is of the essence. With auto mode, your DSLR becomes a point-and-shoot marvel, ready to capture memories at the press of a button.
2. Portrait Mode
For those captivating close-ups and stunning portraits that make your subject pop, portrait mode is your ally. Represented by an iconic silhouette of a person, this mode transforms your DSLR into a portrait powerhouse. It ingeniously wields a wide aperture (small f-number) to craft a shallow depth of field, leaving your background beautifully blurred while your subject stands in sharp focus. This is the mode that elevates your people photography to professional levels.
When to use Portrait Mode: Choose portrait mode when taking photos of individuals or small groups, as it helps create pleasing, professionally focused portraits. Think of portrait mode as your secret weapon for capturing the essence of your subjects. Whether it’s a single person or a small group, this setting delivers that sought-after creamy background bokeh that accentuates your subject’s beauty. Ideal for family portraits, engagement photos, or any scenario where you want your subjects to shine, portrait mode transforms ordinary shots into timeless treasures.
3. Landscape Mode
When your photographic journey leads you to breathtaking vistas, expansive landscapes, or scenes teeming with depth, landscape mode is your ticket to spectacular shots. Illustrated by an unmistakable mountain icon, this mode tailors your DSLR to encapsulate the grandeur of nature’s wonders. It achieves this by employing a smaller aperture (larger f-number) that ensures both the foreground and distant elements are crisply in focus.
When to use Landscape Mode: Opt for landscape mode when photographing natural landscapes, cityscapes, or any scenario where you want to showcase the environment’s beauty. Picture landscape mode as your portal to picturesque panoramas. It’s the perfect companion for capturing the allure of serene sunsets, majestic mountain ranges, or the hustle and bustle of a bustling cityscape. So, the next time you find yourself in the midst of awe-inspiring scenery, don’t forget to dial in landscape mode for images that encapsulate the full scope of your visual journey.
4. Macro Mode
For photographers who yearn to delve into the enchanting world of minuscule marvels, macro mode is the gateway to intricate detail and captivating close-ups. Signified by a delicate flower or close-up symbol, this mode is engineered to uncover the hidden beauty in the tiniest of subjects. It achieves this by narrowing the depth of field, allowing you to reveal the exquisite textures and intricacies of your chosen subjects, be it delicate flowers, tiny insects, or intricate objects.
When to use Macro Mode: Use macro mode when you want to explore the intricate details of small subjects, like capturing the fine textures of a flower petal or the tiny world of insects.
Imagine macro mode as your microscope for the miniature, revealing the world’s hidden treasures that often escape the naked eye. It’s a must for nature enthusiasts seeking to capture the intricate patterns of a butterfly’s wing or the delicate curves of a dew-kissed flower petal. So, when you’re ready to embark on a journey into the diminutive, make macro mode your trusted companion, and prepare to unveil the extraordinary in the ordinary.
5. Sports Mode
Sports mode, often represented by a running person icon, is designed to capture fast-moving subjects. It utilizes a fast shutter speed to freeze action and reduce motion blur. When the action is fast and furious, and you need to capture every thrilling moment with precision and clarity, sports mode emerges as your ultimate tool. Depicted by the iconic running person symbol, this mode is tailored for those high-speed scenarios where milliseconds matter. It harnesses the power of a rapid shutter speed to freeze action and minimize motion blur, ensuring your shots of fast-moving subjects are razor-sharp.
When to use Sports Mode: Select sports mode when photographing sports events, wildlife in motion, or any situation with rapid subject movement.
Think of sports mode as your front-row ticket to adrenaline-pumping events and dynamic subjects. Whether you’re photographing sports competitions, wildlife in motion, or kids on a playground, this mode empowers you to seize the peak of action with ease. So, when the game is on, and you’re chasing that perfect shot, trust sports mode to deliver images that encapsulate the energy and excitement of the moment.
6. Night Mode
Night mode, indicated by a moon and star icon, is tailored for low-light photography. It uses a slower shutter speed to allow more light into the sensor, making it suitable for capturing scenes in low-light conditions. When the sun sets, and the world transforms into a canvas of darkness with pockets of shimmering light, night mode takes the reins to create mesmerizing low-light masterpieces. Characterized by a moon and star icon, this mode is your guide to capturing the magic of nocturnal landscapes. It achieves this by employing a slower shutter speed, allowing more light to kiss the camera sensor, thus illuminating your shots in even the dimmest of environments.
When to use Night Mode: Night mode is perfect for photographing cityscapes at night, starry skies, or any situation where the available light is limited.
Imagine night mode as your key to unlocking the secrets of cityscapes bathed in the soft glow of streetlights or the celestial spectacle of star-studded skies. It’s tailor-made for nighttime photography, making it ideal for capturing the urban pulse after dark, astrophotography adventures, or any scenario where the darkness serves as your canvas. So, when the world takes on a different character under the moon’s gentle gaze, turn to night mode to paint your photographic masterpiece.
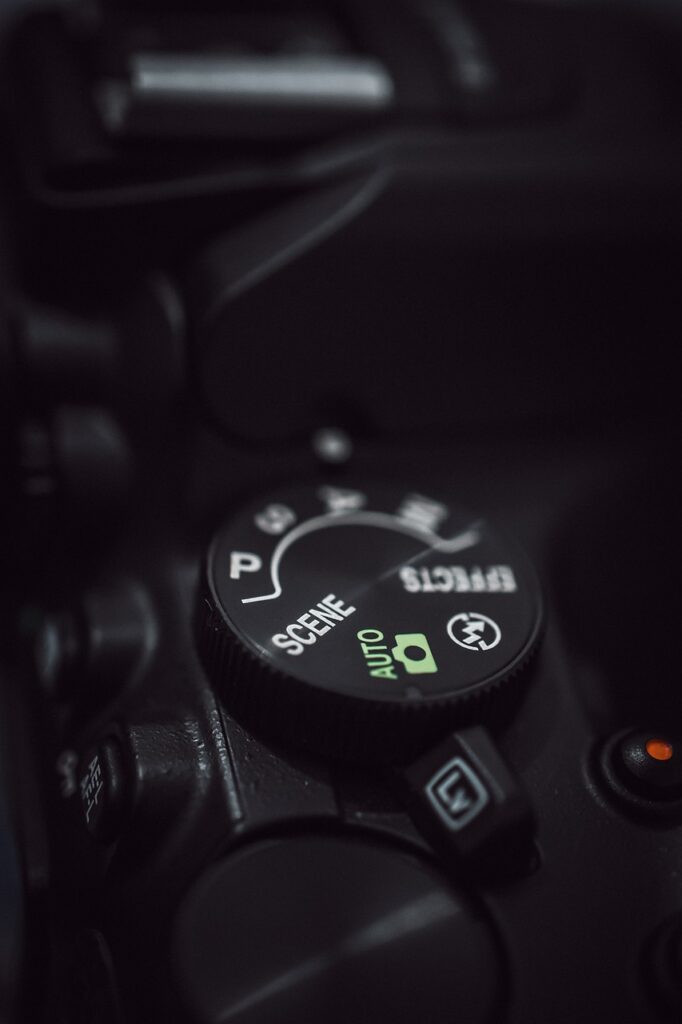
7. Program Mode
Program mode, often marked as “P” on your camera’s mode dial, offers a balance between automation and user control. It sets the exposure parameters like aperture and shutter speed for you but allows you to make adjustments if needed. In the realm of DSLR presets, program mode offers a delightful blend of convenience and creative control. Marked simply as “P” on your camera’s mode dial, this setting is your versatile companion for a wide range of photographic scenarios. Program mode allows you to enjoy the benefits of automation while still retaining the ability to make manual adjustments when the need arises.
When to use Program Mode: Program mode is versatile and can be used in various situations where you want some creative control without diving into full manual settings.
Think of program mode as your adaptable canvas, ready to accommodate your photographic vision with a simple twist of the dial. Whether you’re capturing the lively energy of a bustling city street or the serene beauty of a tranquil forest, program mode strikes a balance between ease of use and the freedom to fine-tune your settings. So, when you’re in search of a versatile preset that empowers your creativity, program mode stands as your dependable ally.
8. Aperture Priority Mode (A or Av)
Aperture Priority mode allows you to control the aperture while the camera adjusts the shutter speed and ISO to maintain proper exposure. This mode is great for controlling depth of field. Aperture priority mode, denoted as “A” or “Av” on your camera, is a favorite among photographers who relish control over depth of field and creative focus. This mode hands you the reins over one of the fundamental exposure parameters: the aperture. By allowing you to set the desired f-number, it enables you to control how much light enters the lens and how much of your scene remains in sharp focus.
When to use Aperture Priority Mode: Use aperture priority when you want to control the background blur (bokeh) or need to adjust the exposure for creative effects.
Visualize aperture priority mode as your key to crafting captivating bokeh-filled backgrounds or maximizing the depth of field to capture intricate foreground details. Whether you’re immersing yourself in portrait photography, seeking to isolate a subject against a dreamy backdrop, or diving into macro photography to unveil the tiniest textures, aperture priority mode grants you the creative latitude to make your vision a reality. When it’s time to shape the essence of your shots through precise control of aperture, trust in “A” or “Av” mode to unlock your artistic potential.
9. Shutter Priority Mode (S or Tv)
Shutter Priority mode enables you to set the shutter speed while the camera adjusts the aperture and ISO. This is useful when you want to control motion blur or freeze fast-moving subjects. Shutter priority mode, represented by “S” or “Tv” on your camera’s mode dial, is the realm of photographers who wish to seize the essence of motion in their images. This mode grants you mastery over the shutter speed, a crucial element in freezing fast-paced action or adding artistic motion blur to your shots.
When to use Shutter Priority Mode: Choose shutter priority when you need to control the motion in your shots, such as capturing flowing water with a slow shutter speed or freezing fast action with a high shutter speed.
Imagine shutter priority mode as your gateway to a world where you have the power to freeze the flutter of a bird’s wings, capture the silky flow of a waterfall, or paint streaks of light from speeding cars in the night. Whether you’re aiming to convey the dynamism of a bustling urban street or the tranquility of a flowing stream, “S” or “Tv” mode empowers you to dictate how motion is portrayed in your photography. When precision in shutter control is paramount, this mode awaits your creative direction.
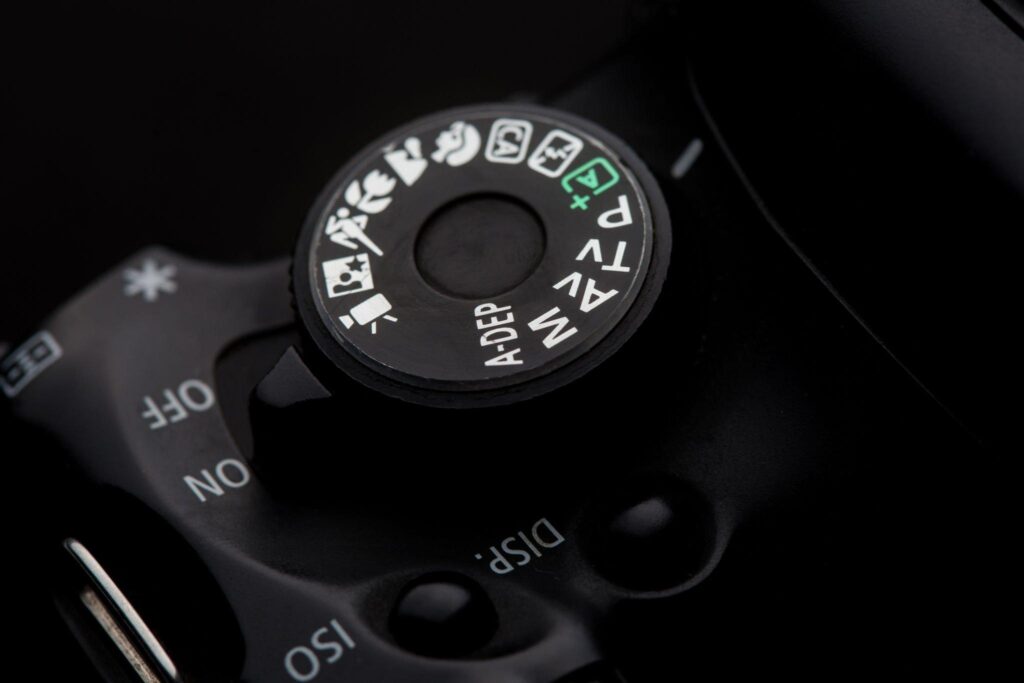
10. Manual Mode (M)
Manual mode gives you complete control over all exposure settings, including aperture, shutter speed, and ISO. It’s the most versatile mode but requires a good understanding of photography fundamentals. At the pinnacle of DSLR presets lies manual mode, aptly labeled “M.” This is where you become the maestro, orchestrating every aspect of your exposure settings. Manual mode hands you full control over aperture, shutter speed, and ISO, providing an immersive canvas for your creative vision to flourish.
When to use Manual Mode: Use manual mode when you want precise control over every aspect of your shot, especially in challenging lighting conditions or when experimenting with creative techniques.
Picture manual mode as your blank canvas, where you paint with light, crafting images with absolute precision. Whether you’re navigating the challenges of intricate lighting situations, experimenting with creative techniques, or pushing the boundaries of your photography skills, “M” mode is your trusted companion. When mastery of exposure parameters is your goal, and you’re ready to embark on a journey to capture the world exactly as you envision it, manual mode is where your photographic adventure truly begins.
Making the Most of DSLR Presets
While DSLR presets offer convenience and ease of use, it’s crucial to understand their limitations and when to rely on them. Here are some tips to help you make the most of DSLR presets:
1. Know Your Camera
Familiarize yourself with your camera’s presets and their corresponding icons. Understanding what each mode does will help you choose the right one for a given situation.
2. Experiment and Learn
Don’t be afraid to experiment with different presets and see how they affect your photos. Learning through trial and error is an essential part of improving your photography skills.
3. Use Presets as Starting Points
Consider presets as starting points for your creative process. While they can help you achieve the desired results quickly, don’t hesitate to make manual adjustments if the preset settings aren’t quite right.
4. Be Mindful of Limitations
Presets are not a one-size-fits-all solution. They are designed for specific scenarios, so they may not always produce the best results in every situation. For instance, portrait mode may not work well for a group shot.
5. Understand Exposure Compensation
In some presets, you can use exposure compensation to adjust the brightness of your image. Use this feature when the preset’s exposure setting doesn’t match your creative vision.
6. Evolve Your Skills
While presets are useful, don’t rely on them exclusively. To become a versatile photographer, invest time in learning manual photography techniques. This will allow you to tackle challenging situations with confidence.
Beyond the Basics: Customizing DSLR Presets
Many DSLR cameras allow you to customize presets to better suit your shooting style. Customizing presets enables you to have more control over the settings while maintaining the convenience of scene modes. Here’s how you can customize DSLR presets:
1. Access the Custom Settings
Navigate to your camera’s menu and look for the custom settings or user modes section. This is where you can create and modify presets.
2. Choose a Base Preset
Start by selecting a preset that closely matches your intended shooting scenario. For example, if you want a preset for indoor sports photography, choose the sports mode as your base.
3. Adjust Settings
Once you’ve selected a base preset, you can tweak the settings to your liking. For instance, you can change the default shutter speed, aperture, or ISO settings to better suit your needs.
4. Save the Custom Preset
After making the desired adjustments, save the custom preset. Give it a descriptive name, so you can easily identify it in the future.
5. Use Your Custom Preset
Now that you have a customized preset, you can use it just like any other preset mode on your camera. It will apply the settings you configured, making it easier to capture the shots you want.
Customized presets are especially useful when you frequently shoot in specific conditions or have a preferred style that differs from the camera’s default presets.
Going Beyond the DSLR: Post-Processing and Editing
While DSLR presets can significantly improve the quality of your photos straight out of the camera, post-processing and editing play a crucial role in taking your images to the next level. Here are some essential post-processing techniques to consider:
1. Adjusting Exposure
Software like Adobe Lightroom or Photoshop allows you to fine-tune exposure settings, including brightness, contrast, and shadows, to enhance your photos.
2. Correcting Colors
You can adjust the color balance, saturation, and vibrance of your images to ensure accurate and appealing colors.
3. Sharpening and Noise Reduction
Sharpening tools help enhance the details in your photos, while noise reduction tools can reduce unwanted grain or noise in low-light shots.
4. Cropping and Composition
Cropping can improve the composition of your photos and remove distracting elements. It also allows you to experiment with different aspect ratios.
5. Adding Filters and Presets
Many photo editing applications offer a wide range of filters and presets that can give your images a unique and artistic look.
Remember that post-processing should enhance your photos, not completely transform them. The goal is to bring out the best in your images while maintaining their authenticity.
DSLR Presets for Creative Photography
While DSLR presets are often associated with simplifying photography for beginners, they can also be valuable tools for creative photographers. By using presets as a foundation and then making manual adjustments or combining multiple presets, you can achieve unique and artistic results. Here are some creative applications of DSLR presets:
1. Double Exposure
Combine two different presets to create a double exposure effect. For example, use a portrait preset for the foreground subject and a landscape preset for the background.
2. HDR Photography
High Dynamic Range (HDR) photography involves merging multiple shots taken at different exposures to capture a wide range of tones. Some DSLR presets are designed specifically for HDR photography, simplifying the process.
3. Vintage and Retro Effects
Experiment with presets that emulate vintage or retro film styles to give your photos a nostalgic or timeless feel.
4. Creative Bokeh
Combine portrait mode with manual adjustments to control the shape and size of the background bokeh, allowing for creative and eye-catching backgrounds.
5. Long Exposure Effects
Use a combination of presets and manual settings to create long exposure effects like light trails, star trails, or silky waterfalls.
6. Artistic Filters
Apply artistic filters like monochrome, sepia, or cross-processing to achieve unique and striking visual effects.
DSLR Presets: A Tool for Every Photographer
Whether you’re a beginner looking to simplify the photography process or an experienced photographer seeking creative inspiration, DSLR presets have a place in your toolkit. Understanding how to use them effectively, customize them to your needs, and incorporate them into your creative process will help you capture stunning images with ease.
However, it’s important to remember that presets are not a substitute for learning the fundamentals of photography. They are tools that can assist you in specific scenarios, but true mastery of photography comes from a deeper understanding of exposure, composition, and creative vision.
As you continue your photographic journey, use DSLR presets as a stepping stone to greater creativity and technical expertise. By combining the convenience of presets with your growing knowledge and artistic sensibilities, you’ll be well on your way to capturing images that truly stand out.