

Table of Contents
Why Shooting RAW is Better Than JPEG: Exploring the Benefits of Shooting Raw Photos
Demystifying JPEG and RAW Image Formats
Before we dive into the advantages of shooting in RAW format, let us first understand what JPEG and RAW image formats are and how they differ from each other.
Understanding JPEG Image Format
JPEG is the most common and widely used image format in digital photography. It stands for Joint Photographic Experts Group, which is the name of the committee that created the standard in 1992. JPEG is a compressed image format, which means that it reduces the file size by discarding some of the image data that is not visible to the human eye. This process is called lossy compression, and it results in a smaller file size but also a loss of quality and detail.
JPEG is a popular image format because it is compatible with almost every device and software, and it allows you to store more images on your memory card or computer. However, JPEG also has some limitations that affect the quality and flexibility of your images. For example, JPEG uses a fixed color space (usually sRGB) that limits the range of colors and tones that can be reproduced. JPEG also applies some processing (such as sharpening, contrast, saturation, etc.) to the image data before saving it, which means that you have less control over the final image.
Introduction to RAW Image Format
RAW is not a single image format, but rather a generic term that refers to the unprocessed data captured by the sensor of your digital camera. Unlike JPEG, RAW does not compress or process the image data in any way, but rather saves it as it is. This means that RAW files contain all the information and detail that the sensor recorded, without any loss or alteration.
RAW is a preferred image format for many professional photographers and enthusiasts because it offers superior image quality and flexibility. However, RAW also has some drawbacks that make it less convenient and accessible than JPEG. For example, RAW files are much larger than JPEG files, which means that they take up more space on your memory card and computer. RAW files also require specific software to open and edit them, and they are not compatible with most devices and software. Moreover, RAW files look flat and dull when viewed without any processing, which means that they need to be adjusted and enhanced before they can be used or shared.
Differences between the JPEG and RAW Image Formats
To summarize, here are some of the main differences between the JPEG and RAW image formats:
| JPEG | RAW |
|---|---|
| Compressed and processed image format | Uncompressed and unprocessed image format |
| Smaller file size | Larger file size |
| Compatible with most devices and software | Requires specific software to open and edit |
| Fixed color space (usually sRGB) | Variable color space (depending on the camera) |
| Some processing applied before saving (sharpening, contrast, saturation, etc.) | No processing applied before saving |
| Less control over the final image | More control over the final image |
| Lower image quality and detail | Higher image quality and detail |
The Intricacies of Shooting in RAW Format
Now that we have a clear idea of what JPEG and RAW image formats are and how they differ from each other, let us explore how to shoot in RAW format and what are the benefits of doing so.
The Mechanism of Shooting RAW Photos
When you shoot with a digital camera, you have two options: you can either shoot in JPEG or shoot in RAW. The choice depends on your camera settings and preferences. If you choose to shoot in JPEG, your camera will process the image data captured by the sensor according to some predefined parameters (such as white balance, exposure, contrast, etc.) and save it as a compressed JPEG file. If you choose to shoot in RAW, your camera will save the image data as it is without any processing or compression.
How to Enable RAW Mode in Your Camera
To enable RAW mode in your camera, you need to access your camera menu menu and look for an option that allows you to change the file format or quality settings. Depending on your camera model, this option may be called differently (such as Image Quality, File Format, Picture Style, etc.). Once you find this option, you need to select RAW or a combination of RAW+JPEG (which will save both formats simultaneously).
Some cameras may also offer different types of RAW formats (such as CR2 for Canon cameras, NEF for Nikon cameras, etc.), which are proprietary raw formats specific to each camera manufacturer. Alternatively, some cameras may also offer a universal raw format (such as DNG for Digital Negative), which is compatible with most software.
Managing RAW Files on Your Memory Card
Once you enable RAW mode in your camera, you will notice that your memory card will fill up faster than usual. This is because RAW files are much larger than JPEG files, and they take up more space on your memory card. For example, a 24-megapixel JPEG file may be around 6 MB, while a 24-megapixel RAW file may be around 30 MB.
Therefore, you need to make sure that you have enough memory space on your card before you start shooting in RAW format. You may also want to carry extra memory cards with you or transfer your files to your computer regularly to avoid running out of space.
Examining the Advantages of Shooting in RAW Format
Shooting in RAW format has many advantages that can improve the quality and flexibility of your images. Here are some of the main benefits of shooting in RAW format:
Superior Image Quality and Detail
One of the most obvious advantages of shooting in RAW format is that it preserves the image quality and detail that the sensor captured. Unlike JPEG, RAW does not discard any image data or apply any processing that may degrade the image quality. This means that RAW files contain more information and detail than JPEG files, and they can be enlarged or cropped without losing quality.
Moreover, RAW files have a higher bit depth than JPEG files, which means that they can record more shades of colors and tones. For example, a JPEG file has a bit depth of 8 bits, which means that it can record 256 levels of brightness for each color channel (red, green, and blue). A RAW file, on the other hand, has a bit depth of 12 or 14 bits, which means that it can record 4096 or 16384 levels of brightness for each color channel.
This results in a smoother and richer gradation of colors and tones, especially in areas of the image that have high contrast or low light.
Greater Flexibility in Post-Processing
Another major advantage of shooting in RAW format is that it gives you more flexibility and control over the final image. Unlike JPEG, RAW does not lock you into the camera settings that you used when you took the photo, but rather allows you to adjust and fine-tune them later in post-processing.
For example, you can change the white balance, exposure, contrast, saturation, sharpness, noise reduction, lens correction, and many other parameters without affecting the original raw file. You can also recover more details from the highlights and shadows that may be clipped or lost in JPEG files. Furthermore, you can apply different styles and effects to your RAW files without losing quality or detail. For instance, you can convert your RAW files to black and white, sepia, or other color modes with ease.
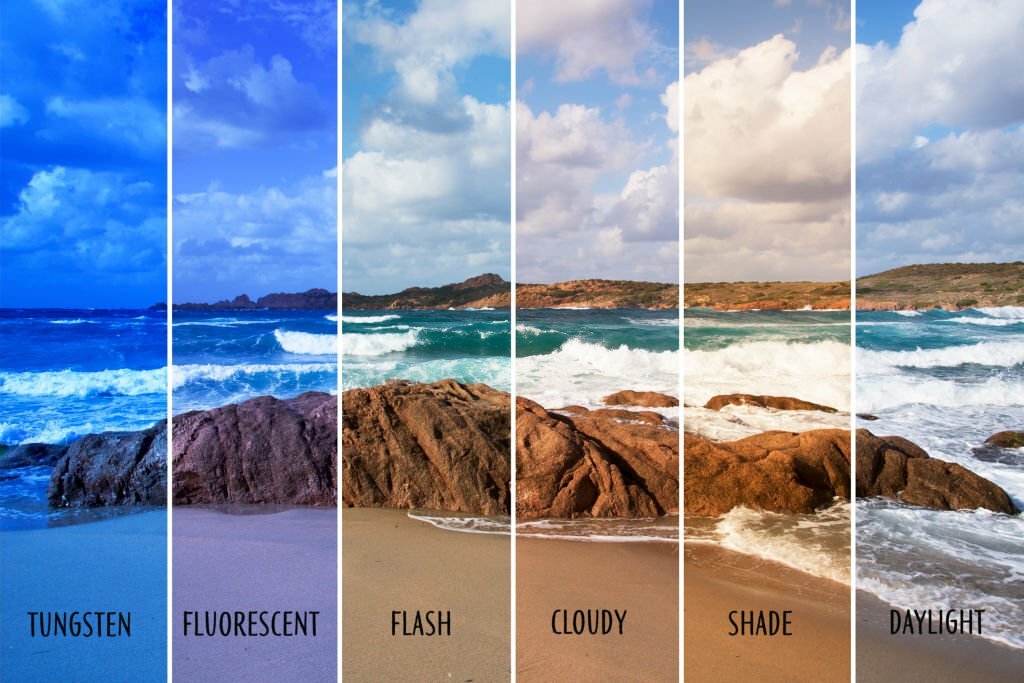
Achieving Optimal White Balance
One of the most important parameters that you can adjust in post-processing is the white balance. The white balance is the process of adjusting the color temperature and tint of your image to make it look natural and accurate. The color temperature refers to how warm or cool the light source is, while the tint refers to how green or magenta the light source is.
Different light sources have different color temperatures and tints, which affect how the colors appear in your image. For example, sunlight has a high color temperature (around 5500 K) and a neutral tint (neither green nor magenta), while tungsten light has a low color temperature (around 3200 K) and a warm tint (slightly orange). If you do not adjust the white balance correctly, your image may look too warm or too cool, too green or too magenta.
When you shoot in JPEG mode, your camera will automatically adjust the white balance according to the preset modes (such as Auto, Daylight, Cloudy, Shade, Tungsten, Fluorescent, etc.) or according to your custom settings. However, this may not always result in an accurate or pleasing white balance. Moreover, once you save your image as a JPEG file, you cannot change the white balance significantly without affecting the quality and detail of your image.
When you shoot in RAW mode, however, you can adjust the white balance as much as you want in post-processing without affecting the original raw file. You can use the preset modes or custom settings as a starting point, but you can also fine-tune them by using sliders or color pickers to achieve the optimal white balance for your image. You can also experiment with different white balance settings to create different moods and effects for your image.
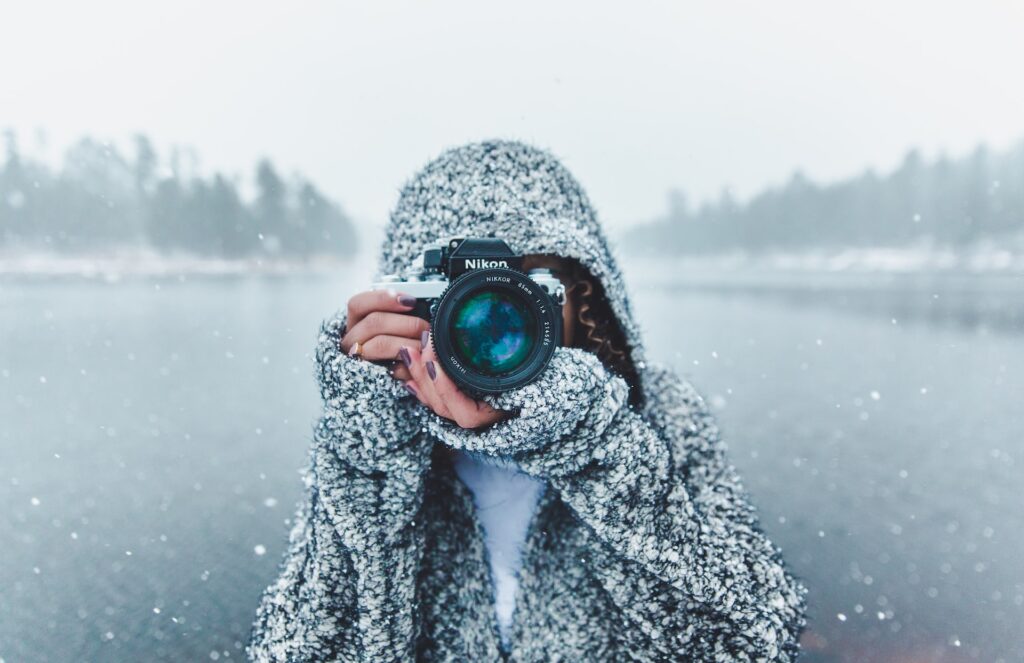
Advantages of Shooting RAW in Travel Photography
Shooting in RAW format is especially beneficial for travel photography because it allows you to capture the beauty and diversity of different places and cultures with more accuracy and flexibility. Travel photography often involves challenging lighting conditions (such as harsh sunlight, dim interiors, mixed lighting sources), diverse subjects (such as landscapes, architecture, people), and limited time (such as golden hour, blue hour).
Shooting in RAW format can help you overcome these challenges by giving you more control over the final image.
For example,
- Shooting in RAW format can help you capture more details and colors from landscapes that have high dynamic range (such as mountains
- Use software that is compatible with universal raw format, such as DNG Converter, RawTherapee, etc.
- Use software that is compatible with your operating system and device, such as Windows, Mac, iOS, Android, etc.
Helping Your RAW Images Stand Out: Tools and Techniques
Shooting in RAW format can help you capture more information and detail from your images, but it also means that you need to process your images to make them look better and more appealing. Unlike JPEG format, which already applies some processing to your images before saving them, RAW format does not apply any processing to your images before saving them.
This means that your RAW images may look flat and dull when viewed without any processing. Therefore, you need to use some tools and techniques to enhance and optimize your RAW images in post-processing. Here are some of the main tools and techniques that you can use to help your RAW images stand out:
Bespoke Software for RAW Image Editing
One of the most important tools that you need to edit your RAW images is a software that can read and process your RAW files. As we discussed earlier, RAW files are not compatible with most devices and software, so you need to use dedicated software that can handle your RAW files. There are many software options available for RAW image editing, but some of the most popular and powerful ones are:
- Adobe Photoshop: This is the industry-standard software for image editing, which offers a wide range of tools and features for enhancing and manipulating your images. You can use Photoshop to open and edit your RAW files using the Camera Raw plugin, which allows you to adjust various parameters such as exposure, white balance, contrast, saturation, sharpness, noise reduction, lens correction, and more. You can also use Photoshop to apply different filters, effects, styles, layers, masks, and more to your images.
- Adobe Lightroom: This is a software designed specifically for photo management and editing, which offers a streamlined and intuitive workflow for organizing and processing your images. You can use Lightroom to import and edit your RAW files using the Develop module, which allows you to adjust the same parameters as Camera Raw but in a more user-friendly interface. You can also use Lightroom to apply presets, profiles, brushes, gradients, and more to your images. Moreover, you can use Lightroom to export and share your images in various formats and platforms.
- Adobe Camera Raw: This is a software that works as a plugin for Photoshop or as a standalone application for opening and editing your RAW files. You can use Camera Raw to adjust the same parameters as Photoshop or Lightroom but in a simpler and faster interface. You can also use Camera Raw to apply some basic filters and effects to your images.
Essential Techniques in RAW Image Post-Processing
One of the most important techniques that you need to edit your RAW images is post-processing, which is the process of adjusting and enhancing your images after capturing them. Post-processing can help you improve the quality and appearance of your images by correcting any errors or flaws that may have occurred during shooting or by adding any creative or artistic touches that may enhance the mood or effect of your images.

There are many techniques that you can use to post-process your RAW images, but some of the most essential ones are:
- Exposure: This is the technique of adjusting the brightness or darkness of your image by changing the amount of light that reaches the sensor or the image data. You can use exposure to correct any underexposed or overexposed areas of your image that may have lost details or colors. You can also use exposure to create different effects such as high-key or low-key images.
- White Balance: This is the technique of adjusting the color temperature and tint of your image by changing the balance of colors in the image data. You can use white balance to correct any color casts or shifts that may have occurred due to different light sources or camera settings. You can also use white balance to create different effects such as warm or cool tones.
- Contrast: This is the technique of adjusting the difference between the lightest and darkest areas of your image by changing the distribution of tones in the image data. You can use contrast to enhance or reduce the depth and dimension of your image by making it more or less dramatic. You can also use contrast to create different effects such as soft or hard edges.
- Saturation: This is the technique of adjusting the intensity or purity of colors in your image by changing the amount of color in the image data. You can use saturation to enhance or reduce the vibrancy and richness of colors in your image by making them more or less colorful. You can also use saturation to create different effects such as muted or vivid colors.
- Sharpness: This is the technique of adjusting the clarity or detail of your image by changing the amount of edge contrast in the image data. You can use sharpness to enhance or reduce the definition and texture of your image by making it more or less crisp. You can also use sharpness to create different effects such as smooth or rough surfaces.
- Noise Reduction: This is the technique of reducing the amount of random pixels or grains that appear in your image due to high ISO, low light, or long exposure. You can use noise reduction to improve the smoothness and cleanliness of your image by removing or minimizing the noise. You can also use noise reduction to create different effects such as soft or sharp focus.
- Lens Correction: This is the technique of correcting the distortion, vignetting, chromatic aberration, or other optical flaws that may occur due to your lens or camera settings. You can use lens correction to improve the accuracy and realism of your image by fixing or compensating for these flaws. You can also use lens correction to create different effects such as fisheye or tilt-shift
Conclusion: Should You Shoot in RAW Format?
Shooting in RAW format is a powerful and flexible way of capturing and processing your images, but it is not a magic bullet that will automatically make your images better. Shooting in RAW format has its advantages and disadvantages, and it requires more skills and resources than shooting in JPEG format.
Therefore, you should consider the pros and cons of shooting in RAW format before deciding whether it is right for you.
Here are some questions that you can ask yourself to help you decide whether you should shoot in RAW format:
- What is your purpose and goal for shooting? Are you shooting for professional or personal reasons? Are you shooting for web or print purposes? Are you shooting for artistic or documentary purposes?
- What is your level of skill and experience in photography? Do you have a good understanding of exposure, white balance, contrast, saturation, sharpness, noise reduction, lens correction, and other parameters? Do you enjoy editing your photos and experimenting with different settings and effects?
- What are your resources and limitations in photography? Do you have enough memory cards or storage devices to store your images? Do you have access to specific software to open and edit your images? Do you have enough time and patience to process your images?
Depending on your answers to these questions, you may find that shooting in RAW format is more suitable or beneficial for you than shooting in JPEG format, or vice versa. Alternatively, you may find that shooting in RAW+JPEG mode is a good compromise that offers you both options for each image.
Ultimately, the choice of whether to shoot in RAW format or not depends on your personal preferences and needs. There is no right or wrong answer, only what works best for you. The most important thing is to enjoy shooting and creating beautiful images with whatever format you choose. Happy shooting!