

Table of Contents
Using Aperture Priority Mode: The Secret Weapon of Professional Photographers
Aperture priority mode is one of the most useful and versatile camera modes that can help you take your photography to the next level. In this article, you will learn what aperture priority mode is, how it works, when to use it, and how to use it effectively. You will also learn how aperture priority mode compares to other modes, such as shutter priority, manual, and program mode. By the end of this article, you will have a clear understanding of aperture priority mode and how it can make your photography easier and more creative.
Deciphering Aperture Priority Mode
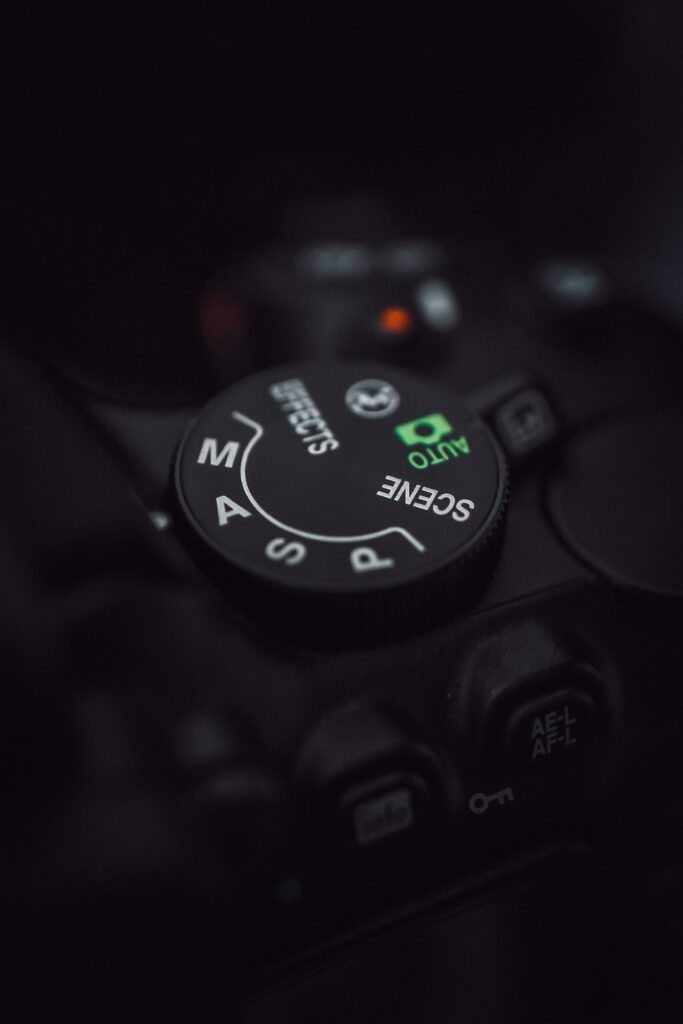
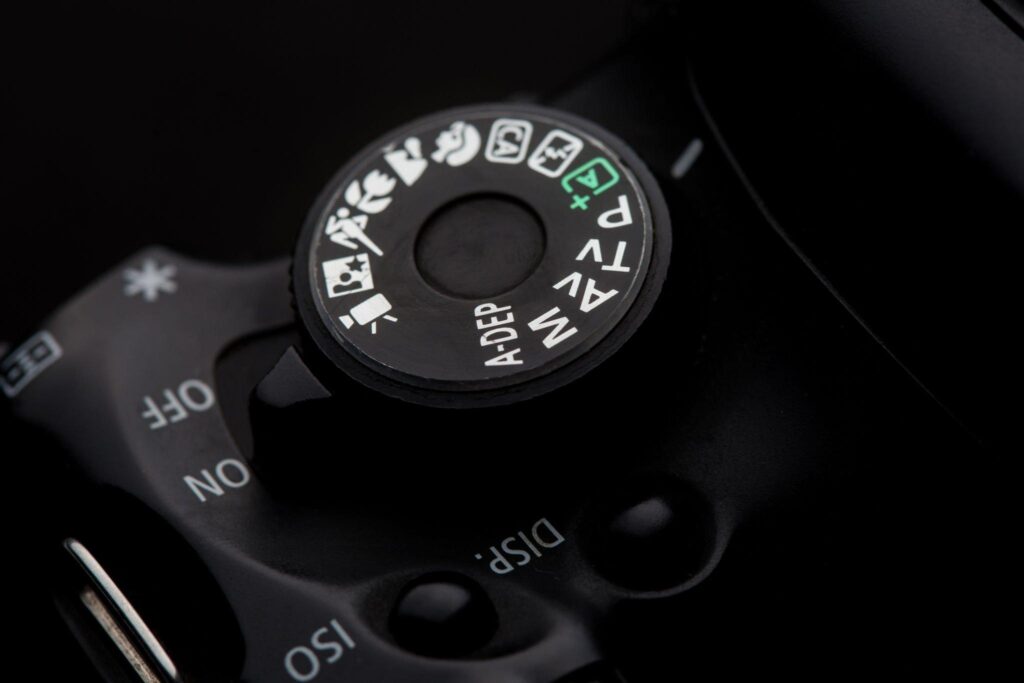
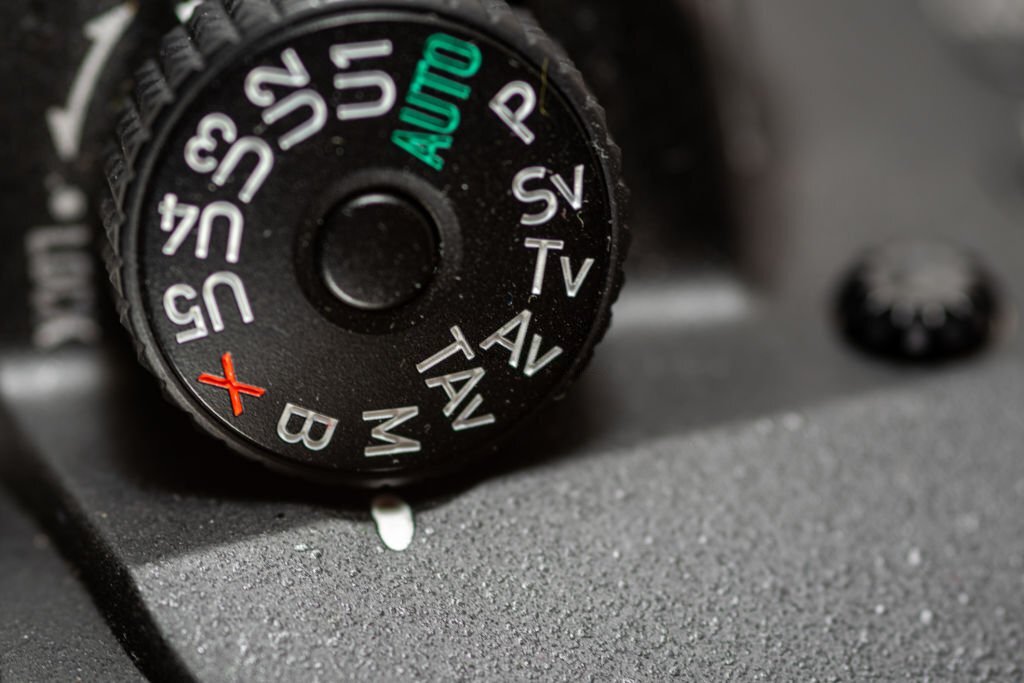
Aperture priority mode, often abbreviated as A or Av (for aperture value) on a camera mode dial, is a semi-automatic mode that allows you to set a specific aperture value (f-number) while the camera selects a shutter speed to match it that will result in proper exposure based on the lighting conditions as measured by the camera’s light meter1. Aperture is the hole that lets light pass through the lens into the camera. You can change the size of the hole with the diaphragm. An f-number represents this size. For example, f/2.8 is a large aperture (wide hole) that lets in more light, while f/16 is a small aperture (narrow hole) that lets in less light.
The advantage of using aperture priority mode is that it gives you full control over the aperture, which is the single most important setting in all of photography. Aperture affects not only the exposure, but also the depth of field, which is the range of distance in front of and behind the focus point that appears sharp in an image.
A large aperture (low f-number) creates a shallow depth of field, which means only a small portion of the image is in focus, while the rest is blurred. This is useful for isolating your subject from the background or creating a bokeh effect. A small aperture (high f-number) creates a deep depth of field, which means most or all of the image is in focus. This is useful for capturing landscapes or scenes with multiple elements that need to be sharp.
By using aperture priority mode, you can choose the desired depth of field for your image without worrying about turning your image too bright or too dark. The camera will automatically adjust the shutter speed to compensate for the amount of light that enters through the aperture. For example, if you use a large aperture (f/2.8), the camera will select a fast shutter speed (1/500s) to prevent overexposure. If you use a small aperture (f/16), the camera will select a slow shutter speed (1/15s) to prevent underexposure.
The Concept of Aperture
Aperture is measured in f-stops, which are fractions of the focal length of the lens. For example, if you have a 50mm lens and set the aperture to f/2, it means that the diameter of the hole is 25mm (50/2). If you set the aperture to f/4, it means that the diameter of the hole is 12.5mm (50/4). The smaller the f-number, the larger the aperture, and vice versa.
Each full stop of aperture either doubles or halves the amount of light that enters through the lens. For example, if you change the aperture from f/4 to f/2.8, you are increasing the size of the hole by 1.4 times, which means you are letting in twice as much light. If you change the aperture from f/4 to f/5.6, you are decreasing the size of the hole by 0.7 times, which means you are letting in half as much light.
The standard full stops of aperture are: f/1.4, f/2, f/2.8, f/4, f/5.6, f/8, f/11, f/16, and f/22. Some lenses have intermediate stops between these values, such as f/1.8, f/3.5, or f/6.3. These are usually marked on the lens barrel or displayed on the camera screen.
The maximum and minimum aperture values depend on the lens you are using. The maximum aperture is the largest opening that your lens can achieve at a given focal length. The minimum aperture is the smallest opening that your lens can achieve at any focal length. For example, if you have a 18-55mm zoom lens with a maximum aperture range of f/3.5-5.6, it means that at 18mm you can use an aperture as large as f/3.5, but at 55mm you can only use an aperture as large as f/5.6. The minimum aperture for this lens is usually around f/22 or f/32.
The maximum aperture of a lens is often used to indicate its quality and speed. A lens with a large maximum aperture (such as f/1.4 or f/2.8) is considered a fast lens, because it can capture more light in a shorter time, which allows you to use faster shutter speeds or lower ISO values. A fast lens is also more expensive and heavier than a slow lens with a small maximum aperture (such as f/4 or f/5.6). A fast lens is useful for low-light situations, action photography, or creating shallow depth of field effects.
The Role of Aperture Priority in Photography

Aperture priority mode is a great mode for photographers who want to have creative control over the depth of field in their images. By choosing the appropriate aperture value, you can create different effects that suit your vision and style. For example, you can use a large aperture (f/2.8) to blur the background and make your subject stand out, or you can use a small aperture (f/16) to keep everything in focus and show the details of the scene.
Aperture priority mode is also useful for maintaining consistency in your exposure and depth of field across different shots. For example, if you are shooting a series of portraits with the same lighting conditions, you can set the aperture to f/4 and let the camera adjust the shutter speed accordingly.
This way, you can ensure that all your images have the same brightness and depth of field, without having to change the settings manually for each shot.
Aperture priority mode can also help you achieve optimal sharpness and image quality for your lens. Each lens has a sweet spot, which is the aperture value that produces the sharpest results with minimal distortion and diffraction. The sweet spot is usually around two or three stops smaller than the maximum aperture of the lens.
For example, if your lens has a maximum aperture of f/2.8, the sweet spot is likely to be around f/5.6 or f/8. By using aperture priority mode, you can set the aperture to the sweet spot and let the camera select the best shutter speed for the exposure.
Comparing Aperture Priority Mode with Other Modes
Aperture priority mode is not the only mode that you can use on your camera. There are other modes that offer different levels of control and automation over the exposure settings. Here are some of the most common modes and how they compare to aperture priority mode:
Shutter Priority vs Aperture Priority Mode
Shutter priority mode, often abbreviated as S or Tv (for time value) on a camera mode dial, is another semi-automatic mode that allows you to set a specific shutter speed while the camera selects an aperture value to match it that will result in proper exposure based on the lighting conditions as measured by the camera’s light meter. Shutter speed is the duration of time that the shutter remains open to expose the sensor to light. Shutter speed is measured in seconds or fractions of seconds, such as 1s, 1/60s, or 1/1000s.
The advantage of using shutter priority mode is that it gives you full control over the shutter speed, which affects not only the exposure, but also the motion blur or freeze in your image. A fast shutter speed (such as 1/1000s) freezes any movement in your image, while a slow shutter speed (such as 1/15s) creates motion blur or allows you to capture long exposures. This is useful for conveying a sense of movement or creating artistic effects.
By using shutter priority mode, you can choose the desired shutter speed for your image without worrying about turning your image too bright or too dark. The camera will automatically adjust the aperture to compensate for the amount of light that enters through the shutter. For example, if you use a fast shutter speed (1/1000s), the camera will select a large aperture (f/2.8) to prevent underexposure. If you use a slow shutter speed (1/15s), the camera will select a small aperture (f/16) to prevent overexposure.
The main difference between shutter priority and aperture priority mode is that in shutter priority mode, you have no control over the depth of field in your image. The camera will choose whatever aperture value it needs to achieve proper exposure, regardless of how it affects your image’s focus range. This means that you may end up with an unwanted shallow or deep depth of field that does not suit your subject or style.
The best way to decide whether to use shutter priority or aperture priority mode is to ask yourself what is more important for your image: motion or focus? If motion is more important, use shutter priority mode and set the shutter speed according to how you want to capture or freeze movement. If focus is more important, use aperture priority mode and set the aperture according to how much depth of field you want in your image.
Manual Mode vs Aperture Priority Mode
Manual mode, often abbreviated as M on a camera mode dial, is a fully manual mode that allows you to set both the aperture value and the shutter speed independently, without any input from the camera’s light meter. You can also set the ISO value manually or leave it on auto. Manual mode gives you complete control over the exposure settings and the creative effects they produce.
The advantage of using manual mode is that it allows you to fine-tune the exposure and depth of field according to your preference and vision, regardless of the lighting conditions or the camera’s metering mode. You can also override the camera’s limitations and achieve results that are not possible in other modes. For example, you can use a very slow shutter speed (such as 30s) to capture star trails or light painting, or you can use a very fast shutter speed (such as 1/8000s) to freeze a hummingbird’s wings.
By using manual mode, you can also achieve consistent exposure across different shots, especially in situations where the lighting is changing rapidly or unevenly, such as sunrise, sunset, or concerts. You can also use manual mode to deliberately underexpose or overexpose your image for artistic purposes, such as creating silhouettes or high-key images.
The main challenge of using manual mode is that it requires a lot of practice and experience to master. You need to have a good understanding of the exposure triangle, which is the relationship between aperture, shutter speed, and ISO, and how they affect each other and the image quality. You also need to have a good eye for judging the exposure by looking at the histogram or the live view on your camera screen. You need to be able to adjust the settings quickly and accurately without missing any shots.
The best way to decide whether to use manual mode or aperture priority mode is to ask yourself how much control and flexibility you need for your image. If you need full control and flexibility over the exposure settings and the creative effects they produce, use manual mode and set the aperture, shutter speed, and ISO according to your preference and vision. If you only need control over the depth of field and want the camera to handle the exposure for you, use aperture priority mode and set the aperture according to how much focus range you want in your image.
Program Mode and its Relationship with Aperture Priority
Program mode, often abbreviated as P on a camera mode dial, is a fully automatic mode that allows the camera to select both the aperture value and the shutter speed based on the lighting conditions as measured by the camera’s light meter. You can also set the ISO value manually or leave it on auto. Program mode gives you no control over the exposure settings and the creative effects they produce.
The advantage of using program mode is that it is simple and easy to use, especially for beginners who are not familiar with the exposure settings and how they affect the image. You can just point and shoot without worrying about turning your image too bright or too dark. The camera will choose the best combination of aperture and shutter speed for you, based on its own algorithm and metering mode.
By using program mode, you can also focus more on the composition, framing, and timing of your image, rather than the technical aspects of the exposure. You can also use some of the other features of your camera, such as white balance, flash, or scene modes, to enhance your image.
The main drawback of using program mode is that it gives you no control over the depth of field or the motion blur or freeze in your image. The camera will choose whatever aperture and shutter speed values it thinks are appropriate, regardless of how they affect your image’s focus range or movement. This means that you may end up with an unwanted shallow or deep depth of field that does not suit your subject or style, or a blurred or frozen image that does not convey your intention.
The best way to decide whether to use program mode or aperture priority mode is to ask yourself how much simplicity and convenience you need for your image. If you need simplicity and convenience over the exposure settings and the creative effects they produce, use program mode and let the camera handle everything for you. If you need control over the depth of field and want to choose how much focus range you want in your image, use aperture priority mode and set the aperture according to your preference and vision.
Proper Situations to Use Aperture Priority Mode
Aperture priority mode is a versatile mode that can be used in many situations and genres of photography. However, there are some situations where aperture priority mode works particularly well and can help you achieve better results. Here are some of the most common situations where you should use aperture priority mode:
Using Aperture Priority Mode in Landscape Photography

Landscape photography is one of the genres where aperture priority mode is most useful and popular. This is because landscape photography usually requires a deep depth of field to capture all the details and elements of the scene in sharp focus. By using aperture priority mode, you can set a small aperture (such as f/11 or f/16) to achieve a deep depth of field, while letting the camera select a suitable shutter speed for proper exposure.
Using aperture priority mode in landscape photography also allows you to control how much foreground and background you want to include in your image. By changing the aperture value, you can change how much of the scene appears in focus. For example, if you want to emphasize a foreground element, such as a flower or a rock, you can use a large aperture (such as f/4 or f/5.6) to create a shallow depth of field that blurs the background. If you want to show more of the background, such as a mountain or a sky, you can use a small aperture (such as f/16 or f/22) to create a deep depth of field that keeps everything in focus.
Using aperture priority mode in landscape photography also allows you to create different effects with light sources, such as the sun or stars. By changing the aperture value, you can change how these light sources appear in your image. For example, if you want to create a starburst effect with the sun, you can use a small aperture (such as f/16 or f/22) to create diffraction spikes around the sun. If you want to create a smooth bokeh effect with stars, you can use a large aperture (such as f/2.8 or f/4) to blur them into circles.
Aperture Priority in Portrait Photography
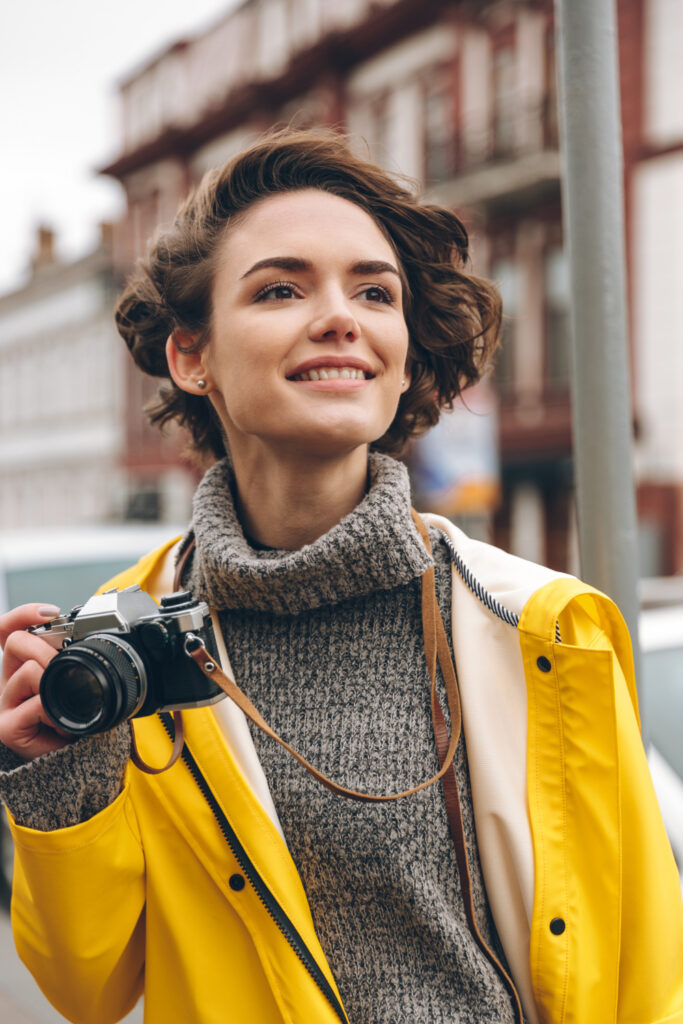
Portrait photography is another genre where aperture priority mode is very useful and popular. This is because portrait photography usually requires a shallow depth of field to isolate the subject from the background and make them stand out. By using aperture priority mode, you can set a large aperture (such as f/2.8 or f/4) to achieve a shallow depth of field, while letting the camera select a suitable shutter speed for proper exposure.
Using aperture priority mode in portrait photography also allows you to control how much of the subject’s face and body you want to include in focus. By changing the aperture value, you can change how much of the subject appears sharp in your image.
For example, if you want to focus on the subject’s eyes, you can use a very large aperture (such as f/1.4 or f/1.8) to create a very shallow depth of field that blurs everything else. If you want to show more of the subject’s face or body, you can use a smaller aperture (such as f/4 or f/5.6) to create a wider depth of field that keeps more of the subject in focus.
Using aperture priority mode in portrait photography also allows you to create different effects with the background, such as colors or shapes. By changing the aperture value, you can change how the background appears in your image.
For example, if you want to create a smooth and creamy background, you can use a very large aperture (such as f/1.4 or f/1.8) to blur the background into a uniform color. If you want to create a more textured and interesting background, you can use a smaller aperture (such as f/4 or f/5.6) to keep some of the background details visible.
Advantages of Using Aperture Priority in Sports and Wildlife Shooting
Sports and wildlife photography are genres where aperture priority mode can also be very helpful and effective. This is because sports and wildlife photography usually require a fast shutter speed to freeze the action and capture sharp images of moving subjects.
By using aperture priority mode, you can set a large aperture (such as f/2.8 or f/4) to achieve a fast shutter speed, while letting the camera select an appropriate ISO value for proper exposure.
Using aperture priority mode in sports and wildlife photography also allows you to control how much of the subject and the background you want to include in focus. By changing the aperture value, you can change how much of the scene appears sharp in your image. For example, if you want to isolate the subject from the background and make them stand out, you can use a large aperture (such as f/2.8 or f/4) to create a shallow depth of field that blurs the background.
If you want to show more of the background and the context of the scene, you can use a smaller aperture (such as f/8 or f/11) to create a deeper depth of field that keeps more of the scene in focus.
Using aperture priority mode in sports and wildlife photography also allows you to create different effects with light sources, such as the sun or flashes. By changing the aperture value, you can change how these light sources appear in your image.
For example, if you want to create a silhouette effect with the sun, you can use a small aperture (such as f/16 or f/22) to underexpose the subject and make them appear dark against the bright sun. If you want to create a fill-flash effect with flashes, you can use a large aperture (such as f/2.8 or f/4) to balance the ambient light and the flash light and make the subject appear bright and natural.
Guide on How to Use Aperture Priority Mode

Aperture priority mode is easy to use and can help you achieve great results in many situations. Here are some steps on how to use aperture priority mode effectively:
How to Set Up Aperture Priority Mode
To set up aperture priority mode on your camera, follow these steps:
- Turn on your camera and attach your lens.
- Set your camera mode dial to A or Av (for aperture value).
- Set your ISO value manually or leave it on auto.
- Set your metering mode according to your preference and scene.
- Set your focus mode according to your preference and subject.
- Set your white balance according to your preference and lighting.
- Set any other features or settings that you want to use, such as flash, exposure compensation, or bracketing.
Choice between Manual and Automatic ISO in Aperture Priority
One of the choices that you have to make when using aperture priority mode is whether to use manual or automatic ISO. ISO is the sensitivity of your camera’s sensor to light. A higher ISO value means that your sensor is more sensitive and can capture more light in less time, while a lower ISO value means that your sensor is less sensitive and needs more light or time to capture an image.
The advantage of using manual ISO is that it gives you more control over the exposure and image quality. You can choose an ISO value that suits your lighting conditions and desired shutter speed, without letting the camera decide for you. You can also avoid using very high ISO values that may introduce noise or grain into your image.
The advantage of using automatic ISO is that it gives you more convenience and flexibility. You don’t have to worry about changing the ISO value every time the lighting changes, as the camera will do it for you automatically based on its own algorithm and metering mode. You can also use very high ISO values that may allow you to use faster shutter speeds or smaller apertures without compromising exposure.
The best way to decide whether to use manual or automatic ISO is to ask yourself how much control and convenience you need for your image. If you need more control over the exposure and image quality, use manual ISO and set it according to your preference and lighting conditions.
If you need more convenience and flexibility, use automatic ISO and let the camera handle it for you automatically. You can also set a maximum ISO limit to prevent the camera from using very high ISO values that may degrade your image quality.
Practice with Varying Aperture Values
One of the best ways to learn how to use aperture priority mode effectively is to practice with varying aperture values and see how they affect your image. By experimenting with different aperture values, you can see how they change the depth of field, the shutter speed, and the image quality. You can also see how different aperture values suit different subjects and situations.
To practice with varying aperture values, follow these steps:
- Find a subject that you want to photograph, such as a person, an animal, a flower, or a building.
- Set your camera to aperture priority mode and choose an ISO value that is appropriate for the lighting conditions.
- Set your focus mode to single or continuous, depending on whether your subject is stationary or moving.
- Set your metering mode to evaluative or matrix, which are the most common and reliable modes for most situations.
- Choose an initial aperture value that you want to start with, such as f/8 or f/11.
- Frame your subject and press the shutter button halfway to focus and meter the scene. Note the shutter speed that the camera selects for you based on the aperture value you chose.
- Press the shutter button fully to take the picture. Review the image on your camera screen and check the histogram, the exposure, and the depth of field.
- Change the aperture value by one stop (either larger or smaller) and repeat steps 6 and 7. Compare the new image with the previous one and see how they differ in terms of brightness, sharpness, and focus range.
- Repeat step 8 until you have tried all the possible aperture values that your lens can offer at that focal length. Compare all the images and see how they differ in terms of exposure and depth of field.
By practicing with varying aperture values, you can learn how to use aperture priority mode effectively and creatively. You can also discover which aperture values work best for different subjects and situations.
Final Thoughts on Aperture Priority Mode
Aperture priority mode is a powerful and versatile mode that can help you take your photography to the next level. By using aperture priority mode, you can control one of the most important aspects of photography: depth of field. You can also let the camera handle the exposure for you automatically based on its own algorithm and metering mode.
Aperture priority mode can be used in many situations and genres of photography, such as landscape, portrait, sports, wildlife, macro, street, or night photography. However, there are some situations where other modes may be more suitable or preferable, such as shutter priority, manual, or program mode. The best mode is the one that suits your style and vision.
To use aperture priority mode effectively, you need to understand the concept of aperture and how it affects the exposure and depth of field. You also need to practice with varying aperture values and see how they affect your image. You also need to be aware of some of the common misconceptions and frequently asked questions on aperture priority mode and their answers.
By mastering aperture priority mode, you can improve your photography skills and creativity. You can also have more fun and enjoyment in taking pictures.
I hope this article has helped you understand and use aperture priority mode better. Aperture priority mode is a powerful and versatile mode that can help you take amazing pictures in many situations. By mastering aperture priority mode, you can improve your photography skills and creativity.