

Table of Contents
Ultimate Guide to Light Painting Photography: From Start to Successful Light Art
Light painting is a fascinating and creative photographic technique that allows you to create stunning images using light sources and long exposure settings. In this article, you will learn everything you need to know about light painting photography, from its history and evolution to the tools and equipment you need to start your own light art journey. You will also discover some tips and tricks to help you master the art of painting with light and create amazing light trails, shapes, and effects.
Understanding the Art of Light Painting
What is Light Painting?
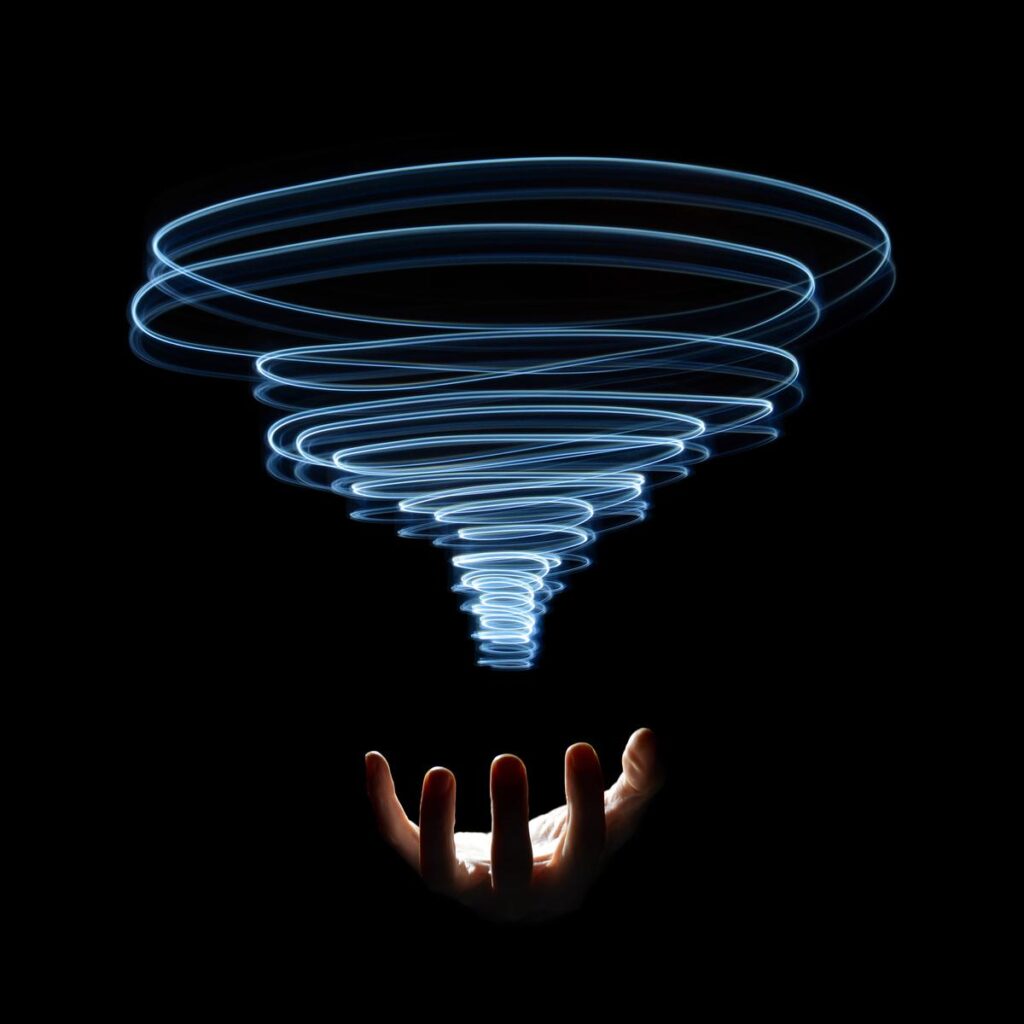
Light painting is a photographic technique that involves using a light source to create shapes, patterns, or effects in a dark environment while the camera captures the image with a long exposure setting. The result is a dynamic and colorful image that shows the movement of light in the scene.
Light painting can be done in two ways: by moving the light source or by moving the camera. The first method is more common and involves using a handheld light source, such as a flashlight, a LED light, or a light pen, to draw or paint light onto the scene while the camera remains still on a tripod. The second method involves moving the camera while keeping the light source fixed or stationary, creating abstract and artistic images.
The Charm and Appeal of Painting with Light
Light painting is a fun and exciting way to express your creativity and imagination through photography. It allows you to experiment with different light sources, colors, shapes, and effects, and create unique and original images that reflect your vision and style.
Light painting also challenges you to think outside the box and explore new possibilities with your camera. You can use light painting to enhance your existing subjects, such as landscapes, portraits, or architecture, or create entirely new ones with light alone. You can also combine light painting with other techniques, such as kinetic light painting, which involves adding movement to your subject while painting with light.
Light painting is also a rewarding and satisfying experience that can improve your photography skills and knowledge. You can learn more about how light works, how to control your camera settings, how to compose your shots, and how to edit your images. You can also learn from other light painters who share their work and tips online or join local or online communities of light painting enthusiasts.
The History and Progression of Light Painting
Light Painting: A Brief History
Light painting is not a new phenomenon. It has been around since the invention of photography itself. The first known light painting photograph was taken by Étienne-Jules Marey and Georges Demenÿ in 1889. They used a device called a chronophotographic gun to capture the movement of a man running with small lights attached to his body.
The first person to use the term “light painting” was Man Ray, an American artist who experimented with light painting in his series “Space Writing” in 1935. He used a penlight to create abstract shapes in front of his camera.
Another pioneer of light painting was Pablo Picasso, who collaborated with photographer Gjon Mili in 1949. Mili showed Picasso some of his photographs of ice skaters with lights attached to their skates, and Picasso was inspired to create his own light drawings using a flashlight. Mili captured Picasso’s movements with a long exposure camera, creating some of the most famous light paintings in history.
Modern Developments in Light Painting Photography
Since then, light painting has evolved and expanded as a photographic technique and an art form. Many photographers and artists have experimented with different light sources, tools, techniques, and styles, creating diverse and innovative works of light art.
Some examples of modern light painters are:
- Eric Staller, who used various light sources, such as umbrellas, sparklers, fireworks, and custom-made devices, to create geometric shapes and patterns in urban settings in the 1970s and 1980s.
- David Lebe, who used colored flashlights and strobes to create surreal images of himself and his partner in their home in the 1970s and 1980s.
- Dean Chamberlain, who used long exposure times and colored lights to create portraits of celebrities and friends in the 1980s and 1990s.
- Vicki DaSilva, who used fluorescent tubes and LED lights to create large-scale messages and symbols in public spaces since the 1980s.
- Michael Bosanko, who used various light sources, such as torches, glow sticks, lasers, and fire, to create intricate scenes and characters in natural and urban environments since the 2000s.
- JanLeonardo Wöllert, who used LED lights and fiber optic cables to create complex shapes and structures in abandoned buildings and industrial sites since the 2000s.
Tools and Equipment for Light Painting Photography
Choosing the Right Camera
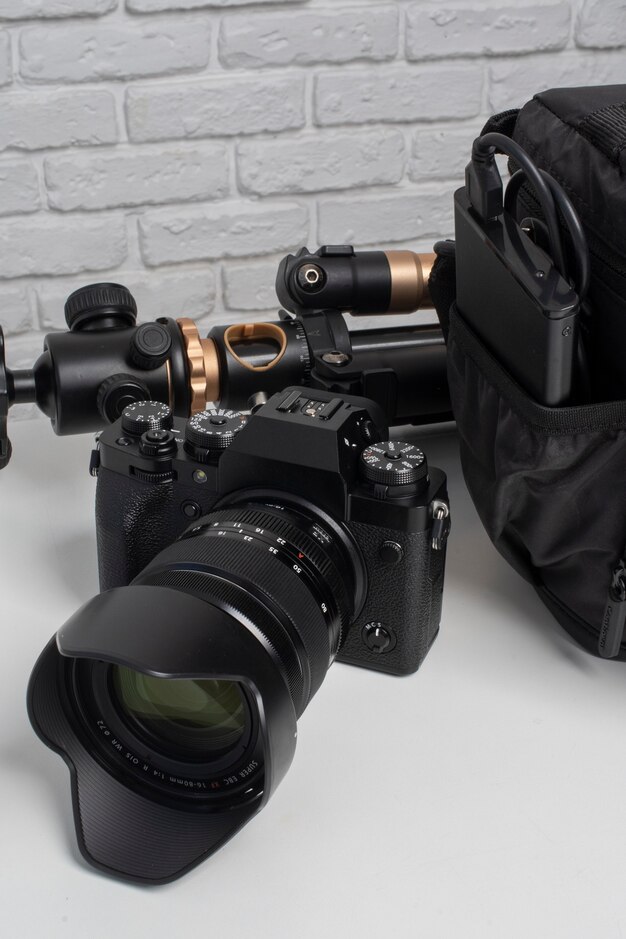
To start your light painting journey, you will need a camera that allows you to control the exposure settings manually. This means that you can adjust the aperture, shutter speed, and ISO according to your needs and preferences. You will also need a camera that has a bulb mode, which allows you to keep the shutter open for as long as you press the shutter release button or use a remote control.
The type of camera you use is not very important, as long as it has these features. You can use a DSLR, a mirrorless, a compact, or even a smartphone camera, as long as you can access the manual mode and the bulb mode. However, some cameras may have better performance and quality than others, especially in low-light situations. You may want to consider factors such as sensor size, megapixels, noise reduction, battery life, and durability when choosing your camera.
Importance of a Steady Tripod
Another essential piece of equipment for light painting photography is a tripod. A tripod is a device that holds your camera steady and prevents it from moving or shaking during the long exposure time. This is important because any movement or vibration of the camera can result in blurry or shaky images.
A tripod also allows you to compose your shots more precisely and accurately, and to keep your framing consistent throughout your light painting session. You can also use a tripod to adjust the height and angle of your camera according to your desired perspective and viewpoint.
When choosing a tripod, you may want to consider factors such as weight, size, stability, durability, and ease of use. You may also want to look for features such as quick-release plates, ball heads, bubble levels, and hooks for extra stability.
Selecting the Perfect Light Sources
The most important and fun part of light painting photography is choosing your light sources. These are the devices that you will use to create your light art. There are many types of light sources that you can use for light painting, depending on the effect and style you want to achieve. Some examples are:
- Flashlights: These are the most common and versatile light sources for light painting. You can use them to create simple or complex shapes, patterns, or effects by moving them in front of your camera. You can also use them to illuminate or highlight parts of your scene or subject. You can choose from different sizes, shapes, colors, and brightness levels of flashlights.
- LED lights: These are similar to flashlights, but they use light-emitting diodes (LEDs) instead of bulbs. They are usually more energy-efficient, durable, and colorful than flashlights. You can find LED lights in various forms, such as strips, ropes, wires, rings, wands, or panels. You can also use LED lights to create different effects, such as fading, flashing, or changing colors.
- Light pens: These are special devices that are designed for light painting. They are usually small and thin devices that emit a narrow beam of light from one end. They are ideal for creating fine lines and details in your light art. You can also find light pens that have different colors or patterns of light.
- Glow sticks: These are plastic tubes that contain chemicals that produce light when activated by bending or breaking them. They are usually cheap and easy to find in various colors and sizes. You can use glow sticks to create smooth and continuous lines or curves in your light art. You can also attach them to other objects or subjects to create interesting effects.
- Fire: This is a natural and powerful light source that can create dramatic and dynamic images. You can use fire in various forms, such as candles, matches, sparklers, fireworks, or fire poi. You can use fire to create bright and warm colors and textures in your light art. However, you should be careful when using fire and follow safety precautions to avoid accidents or injuries.
Useful Light Drawing Tools
In addition to the light sources mentioned above, you may also want to use some tools or accessories that can help you create more diverse and creative light art. Some examples are:
- Light modifiers: These are devices that can change the shape, size, color, or direction of your light source. For example, you can use diffusers, filters, gels, lenses, or reflectors to soften, tint, focus, or bounce your light source.
- Light painting brushes: These are devices that can attach to your light source and create different shapes or patterns of light. For example, you can use brushes, tubes, fibers, or blades to create circles, orbs, spirals, or waves of light.
- Light stencils: These are devices that can block part of your light source and create silhouettes or outlines of objects or shapes in your light art. For example, you can use cardboard, paper, metal, or plastic to cut out letters, numbers, symbols, or logos and place them in front of your light source.
- Light masks: These are devices that can cover part of your camera lens and create shapes or patterns on your image. For example, you can use cardboard, paper, metal, or plastic to cut out stars, hearts, flowers, or any other shape and place them over your lens.
- Light projectors: These are devices that can project images or patterns onto your scene or subject using light. For example, you can use a slide projector, a video projector, a laser pointer, or a smartphone to display photos, videos, texts, or graphics on your scene or subject.
Camera Settings for Successful Light Painting
Best Camera Settings for Light Paint Photography
To capture your light painting images, you will need to adjust your camera settings according to the light conditions and the effect you want to achieve. There is no fixed rule or formula for the best camera settings for light painting, as they may vary depending on your light source, your scene, your subject, and your personal preference. However, here are some general guidelines and tips to help you find the optimal settings for your light painting photography:
- Aperture: The aperture is the opening in your lens that controls how much light enters your camera. The aperture is measured in f-stops, such as f/2.8, f/4, f/8, etc. The smaller the f-number, the larger the aperture and the more light enters your camera. The larger the f-number, the smaller the aperture and the less light enters your camera.
The aperture also affects the depth of field of your image, which is the range of distance that appears sharp and in focus in your image. The smaller the f-number, the shallower the depth of field and the more blurred the background and foreground are. The larger the f-number, the deeper the depth of field and the more sharp the background and foreground are.
For light painting photography, you will usually want to use a small aperture (large f-number) to reduce the amount of ambient light that enters your camera and to increase the depth of field of your image. This will help you create darker backgrounds and sharper images. However, you may also want to experiment with different apertures to create different effects and moods in your images.
A good starting point for your aperture setting is between f/8 and f/16. You can then adjust it according to your light source and scene.
- Shutter speed: The shutter speed is the length of time that your camera’s shutter stays open and exposes your sensor to light. The shutter speed is measured in seconds or fractions of seconds, such as 1/60s, 1/4s, 10s, etc. The faster the shutter speed, the shorter the exposure time and the less light enters your camera. The slower the shutter speed, the longer the exposure time and the more light enters your camera.
The shutter speed also affects the motion blur of your image, which is the amount of blur that results from moving objects or subjects in your image. The faster the shutter speed, the less motion blur and the more frozen and sharp the moving objects or subjects are. The slower the shutter speed, the more motion blur and the more blurred and smooth the moving objects or subjects are.
For light painting photography, you will usually want to use a slow shutter speed (long exposure time) to capture the movement and shape of your light source and to create light trails, shapes, or effects in your image. However, you may also want to experiment with different shutter speeds to create different levels of brightness and contrast in your images.
A good starting point for your shutter speed setting is between 10s and 30s. You can then adjust it according to your light source and scene.
- ISO: The ISO is the sensitivity of your camera’s sensor to light. The ISO is measured in numbers, such as 100, 200, 400, etc. The lower the ISO number, the less sensitive your sensor is to light and the less noise or grain your image has. The higher the ISO number, the more sensitive your sensor is to light and the more noise or grain your image has.
The ISO also affects the brightness of your image, which is the amount of light that is recorded by your sensor. The lower the ISO number, the darker your image is. The higher the ISO number, the brighter your image is.
For light painting photography, you will usually want to use a low ISO (low sensitivity) to reduce the amount of noise or grain in your image and to create cleaner and smoother images. However, you may also want to experiment with different ISOs to create different effects and moods in your images.
A good starting point for your ISO setting is between 100 and 400. You can then adjust it according to your light source and scene.
Finding the Balance Between Ambient Light and Light Source
One of the challenges of light painting photography is finding the right balance between the ambient light and the light source. The ambient light is the natural or artificial light that is present in your scene or environment. The light source is the device that you use to create your light art.
The ambient light and the light source can affect each other in different ways, depending on their intensity, color, direction, and distance. For example, if the ambient light is too bright, it can overpower or wash out your light source. If the ambient light is too dark, it can make your image too noisy or grainy. If the ambient light and the light source have different colors, they can create unwanted color casts or contrasts in your image.
To find the optimal balance between the ambient light and the light source, you will need to adjust your camera settings accordingly. You will also need to consider factors such as:
- The time of day: The time of day can affect the amount and color of ambient light in your scene. For example, during sunrise or sunset, you can find warm and soft ambient light that can create beautiful backgrounds and atmospheres for your light art. During night time, you can find dark and cool ambient light that can create dramatic and mysterious backgrounds and contrasts for your light art.
- The location: The location can affect the type and quality of ambient light in your scene. For example, in urban areas, you can find artificial ambient light from street lamps, buildings, cars, or signs that can create colorful and dynamic backgrounds and effects for your light art. In natural areas, you can find natural ambient light from stars, moon, or fireflies that can create serene and magical backgrounds and effects for your light art.
- The weather: The weather can affect the mood and tone of ambient light in your scene. For example, on cloudy days, you can find diffused and soft ambient light that can create smooth and even backgrounds and tones for your light art. On clear days, you can find direct and harsh ambient light that can create sharp and contrasty backgrounds and tones for your light art.
Focusing Techniques for Low-Light Photography
Another challenge of light painting photography is focusing in low-light situations. Focusing is the process of adjusting your lens to make your subject or scene appear sharp and clear in your image. Focusing can be difficult in low-light situations, because your camera may not have enough light or contrast to detect and lock on your subject or scene.
To overcome this challenge, you will need to use some techniques and tips to help you focus in low-light situations. Some examples are:
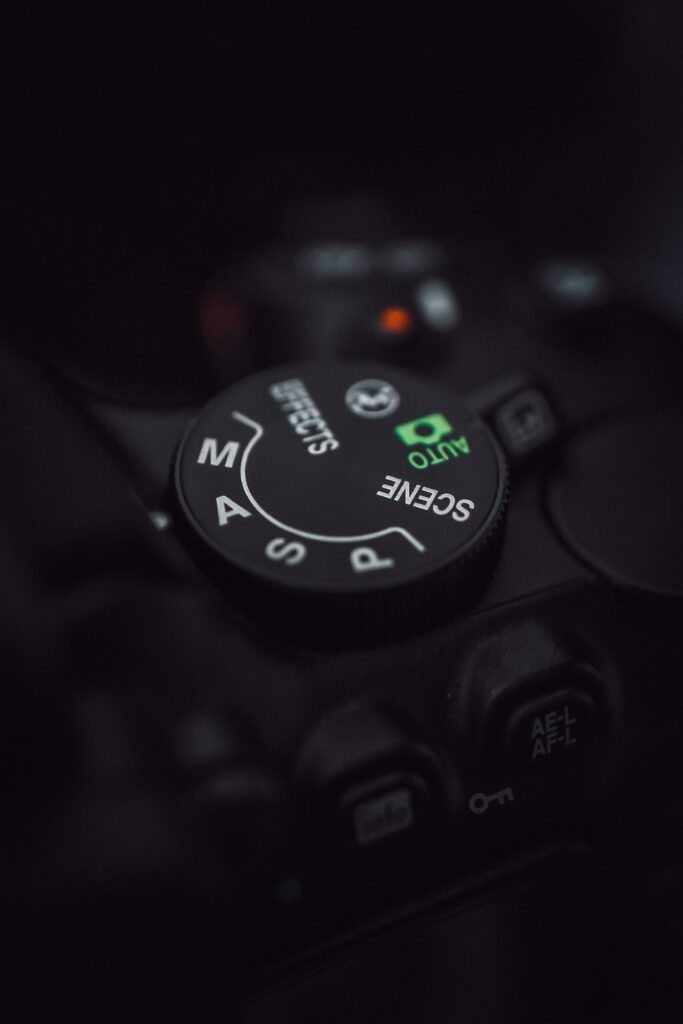
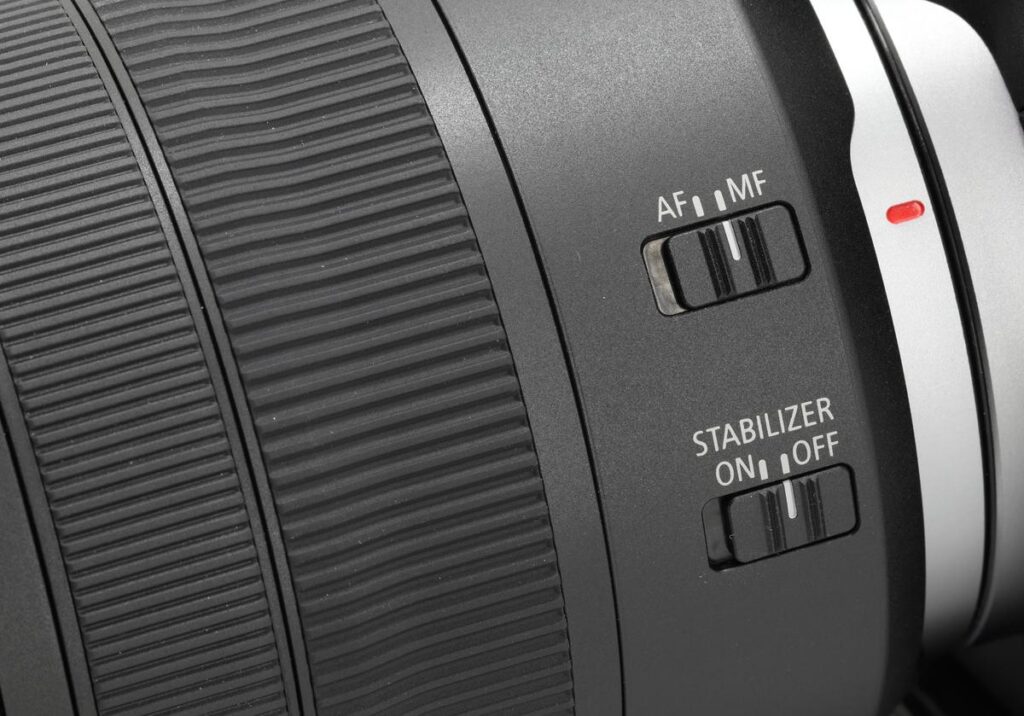
- Manual focus: Manual focus is the mode that allows you to adjust your lens manually by turning a ring on your lens or using a dial on your camera. Manual focus can be more accurate and reliable than autofocus in low-light situations, because you can control and fine-tune your focus according to your vision and preference. However, manual focus can also be more challenging and time-consuming than autofocus, because you will need to use your eyes or a magnifier to check your focus on your camera’s screen or viewfinder.
To use manual focus, you will need to switch your lens or camera to manual focus mode, usually indicated by an M or MF symbol. You will then need to turn the focus ring or dial until your subject or scene appears sharp and clear on your screen or viewfinder.
To use autofocus, you will need to switch your lens or camera to autofocus mode, usually indicated by an A or AF symbol. You will then need to press the shutter release button halfway or use a dedicated button to activate the autofocus system. You may also want to use some features or tools that can help you with autofocus, such as:
- Focus points: Focus points are the areas on your screen or viewfinder that indicate where your camera will try to focus. Focus points are usually shown as small squares, circles, or crosses. Focus points can help you select and direct your camera’s focus according to your desired subject or scene.
- Focus modes: Focus modes are the options that allow you to choose how your camera will behave when using autofocus. Focus modes are usually indicated by symbols such as AF-S, AF-C, AF-A, etc. Focus modes can help you adapt and optimize your camera’s focus according to the movement and distance of your subject or scene.
- Focus assist: Focus assist is a feature that emits a beam of light from your camera or flash to illuminate your subject or scene temporarily. Focus assist can help your camera focus more easily and quickly in low-light situations.
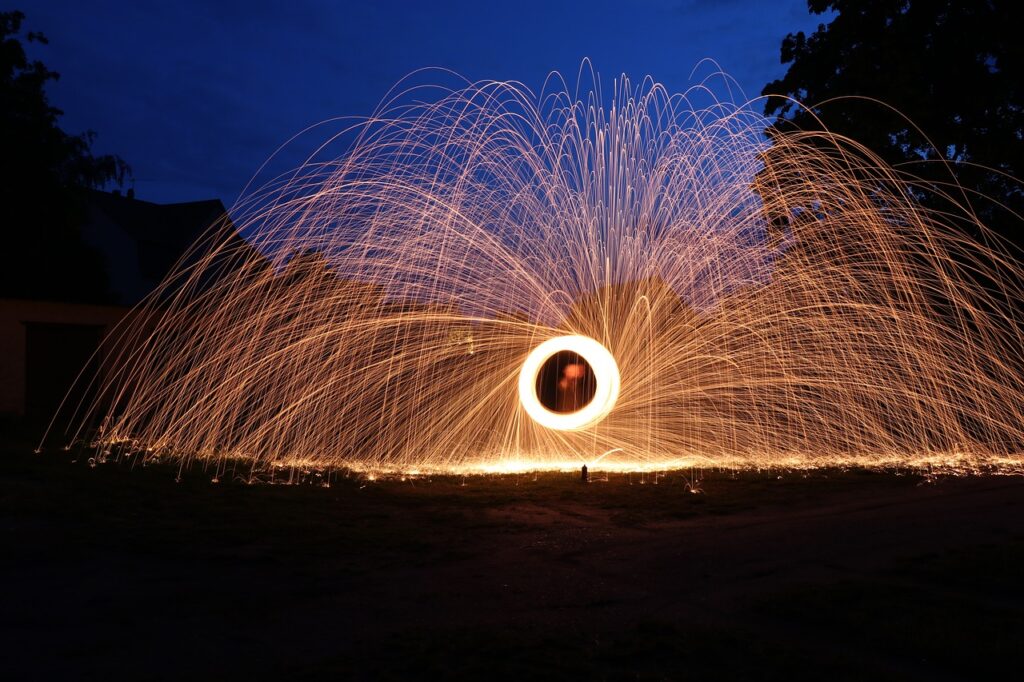
Creating your Light Art
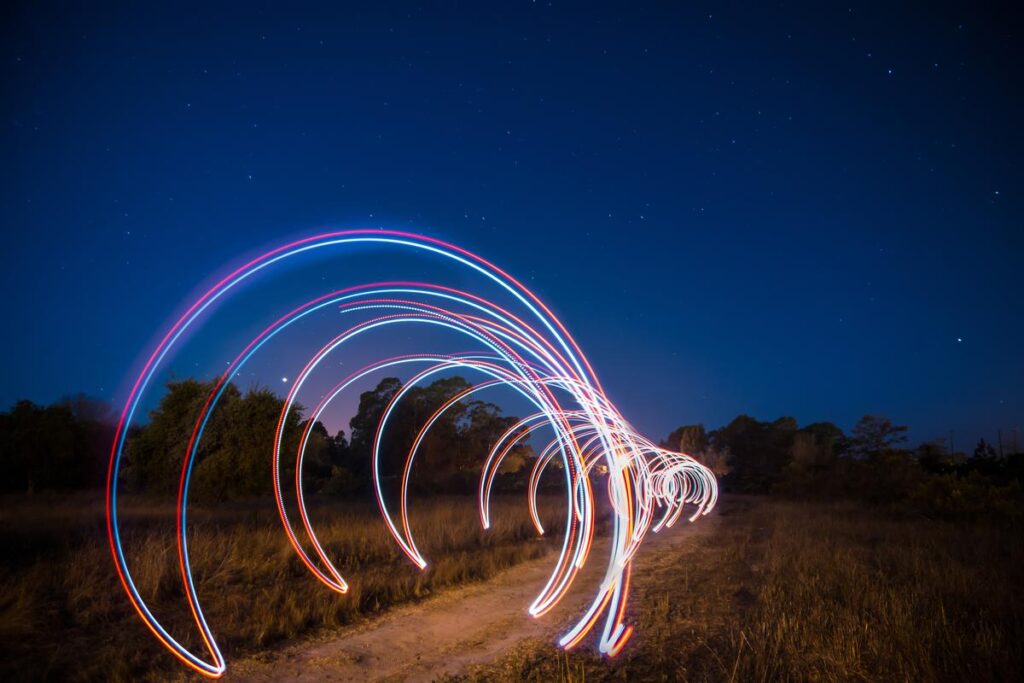
One of the simplest and most popular forms of light painting is creating light trails. Light trails are the lines or curves of light that result from moving a light source in front of your camera while using a long exposure setting. Light trails can create dynamic and colorful images that show the movement and shape of your light source.
Creating Light Trails: A Basic Introduction
To create light trails, you will need to follow these basic steps:
- Set up your camera on a tripod and adjust your camera settings according to the ambient light and the effect you want to achieve. A good starting point is to use a small aperture (large f-number), a slow shutter speed (long exposure time), and a low ISO (low sensitivity).
- Choose a light source that is bright enough to create visible light trails, such as a flashlight, a LED light, or a glow stick. You can also use different colors or shapes of light sources to create more variety and interest in your images.
- Press the shutter release button or use a remote control to start the exposure and start moving your light source in front of your camera. You can move your light source in any direction, speed, or pattern you want, as long as you keep it within the frame of your camera. You can also use different techniques to create different effects, such as:
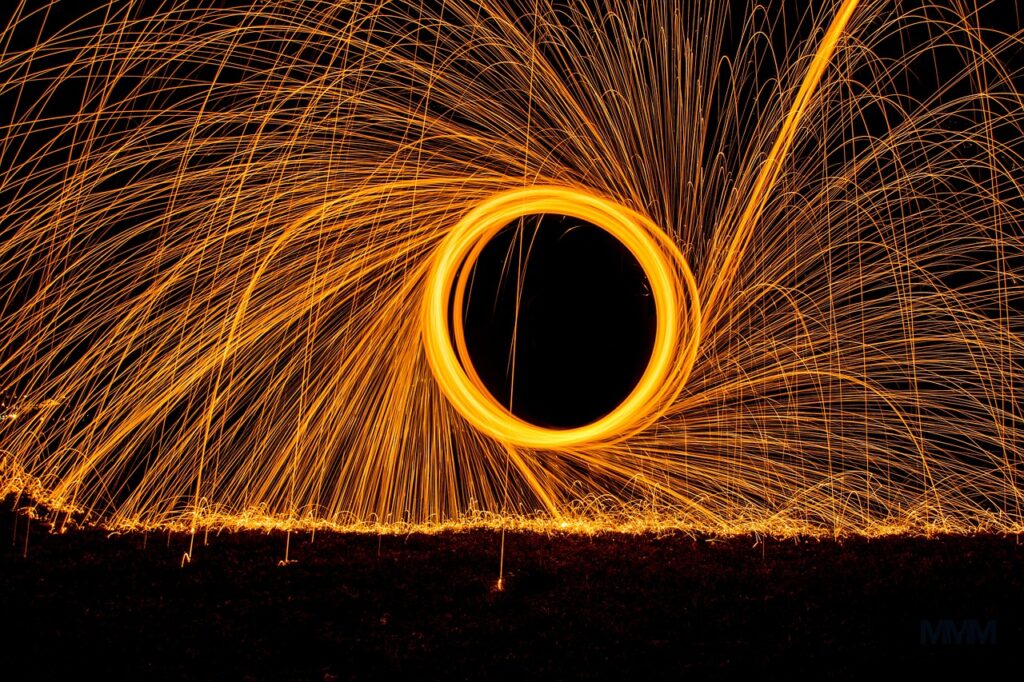
- Swinging: Swinging is the technique of moving your light source in a circular or elliptical motion around a fixed point, such as your hand or a string. Swinging can create smooth and continuous light trails that form circles, ovals, or spirals.
- Twirling: Twirling is the technique of rotating your light source around its own axis, such as by spinning it with your fingers or using a motorized device. Twirling can create thin and sharp light trails that form lines, rays, or stars.
- Zooming: Zooming is the technique of changing the focal length of your lens during the exposure, such as by turning the zoom ring on your lens or using a zoom lens. Zooming can create blurred and distorted light trails that form streaks, bursts, or tunnels.
- Release the shutter release button or use a remote control to end the exposure and check your image on your screen or viewfinder. You can then review and edit your image according to your preference.
Patiently Building Up Your Composition
Another important aspect of light painting photography is building up your composition. Composition is the arrangement and placement of elements in your image, such as your subject, your scene, your light art, and your background. Composition can affect the visual impact and appeal of your image, as well as its meaning and message.
To build up your composition, you will need to follow these basic steps:
Plan ahead: Planning ahead is the process of deciding what you want to include and exclude in your image, as well as how you want to arrange and align them. Planning ahead can help you save time and energy, as well as avoid mistakes and errors. You can plan ahead by using some tools or techniques, such as:
- Sketching: Sketching is the technique of drawing or writing down your ideas for your image on a paper or a digital device. Sketching can help you visualize and organize your composition and test different options and variations.
- Scouting: Scouting is the technique of exploring and examining your location or environment for your image. Scouting can help you find and select the best spot, angle, and perspective for your composition, as well as identify and avoid potential problems or challenges, such as obstacles, distractions, or hazards.
- Framing: Framing is the technique of using your camera’s screen or viewfinder to preview and adjust your composition before taking your image. Framing can help you fine-tune and optimize your composition according to your vision and preference, as well as apply some rules or guidelines, such as the rule of thirds, the golden ratio, or the leading lines.
- Start simple: Starting simple is the process of beginning your light painting session with a simple and basic composition, such as a single light source, a single subject, or a single background. Starting simple can help you establish a solid foundation and a clear focus for your image, as well as avoid confusion and clutter in your image. You can start simple by using some tools or techniques, such as:
- Pre-focusing: Pre-focusing is the technique of setting your focus on your subject or scene before starting your light painting session. Pre-focusing can help you ensure that your subject or scene is sharp and clear in your image, as well as avoid losing or changing your focus during your light painting session.
- Marking: Marking is the technique of using markers, such as tape, chalk, or cones, to indicate the position and direction of your light source, your subject, or your camera. Marking can help you remember and follow your planned composition, as well as avoid crossing or overlapping your light trails or elements in your image.
- Timing: Timing is the technique of using a timer, a stopwatch, or a countdown to control the duration and sequence of your light painting session. Timing can help you coordinate and synchronize your light source movements with your camera settings, as well as create consistent and balanced exposures in your image.
- Add complexity: Adding complexity is the process of enhancing and expanding your composition with more elements, layers, or effects in your image, such as multiple light sources, multiple subjects, or multiple backgrounds. Adding complexity can help you create more diverse and creative images that show more details and dimensions in your light art. You can add complexity by using some tools or techniques, such as:
- Layering: Layering is the technique of creating multiple exposures on a single image by opening and closing your shutter multiple times during your light painting session. Layering can help you combine different light sources, shapes, colors, or effects in your image, as well as create depth and perspective in your image.
- Blending: Blending is the technique of mixing different light sources or colors in your image by moving them closer or farther from each other during your light painting session. Blending can help you create smooth and seamless transitions and gradients in your image, as well as create harmony and contrast in your image.
- Masking: Masking is the technique of hiding or revealing parts of your image by using objects or tools that block or allow light to pass through during your light painting session. Masking can help you create silhouettes or outlines of objects or shapes in your image, as well as create negative or positive space in your image.
The Technique of Kinetic Light Painting
One of the most advanced and artistic forms of light painting is kinetic light painting. Kinetic light painting is a photographic technique that involves adding movement to your subject while painting with light. Kinetic light painting can create dynamic and expressive images that show the motion and emotion of your subject.
To create kinetic light painting, you will need to follow these basic steps:
- Set up your camera on a tripod and adjust your camera settings according to the ambient light and the effect you want to achieve. A good starting point is to use a small aperture (large f-number), a slow shutter speed (long exposure time), and a low ISO (low sensitivity).
- Choose a subject that can move or be moved, such as a person, an animal, or an object. You can also use yourself as your subject by using a self-timer or a remote control. You can also choose a background that can complement or contrast with your subject, such as a dark or colorful background.
- Press the shutter release button or use a remote control to start the exposure and start moving your subject in front of your camera. You can move your subject in any direction, speed, or pattern you want, as long as you keep it within the frame of your camera. You can also use different techniques to create different effects, such as:
- Panning: Panning is the technique of moving your camera horizontally along with your subject while keeping it in focus. Panning can create smooth and continuous light trails that follow your subject, as well as blur the background and foreground.
- Tilting: Tilting is the technique of moving your camera vertically along with your subject while keeping it in focus. Tilting can create smooth and continuous light trails that follow your subject, as well as blur the background and foreground.
- Zooming: Zooming is the technique of changing the focal length of your lens during the exposure, such as by turning the zoom ring on your lens or using a zoom lens. Zooming can create blurred and distorted light trails that form streaks, bursts, or tunnels.
- Spinning: Spinning is the technique of rotating your camera around its own axis during the exposure, such as by holding it with your hands or using a rotating device. Spinning can create circular or spiral light trails that form rings, orbs, or vortexes.
- Release the shutter release button or use a remote control to end the exposure and check your image on your screen or viewfinder. You can then review and edit your image according to your preference.
Concluding Tips to Start Your Light Painting Journey
Becoming One with Light and Shadows
One of the most important and rewarding aspects of light painting photography is becoming one with light and shadows. Becoming one with light and shadows means understanding and appreciating how light works, how it affects your image, and how you can use it to express yourself and create art.
To become one with light and shadows, you will need to follow these basic tips:
- Observe: Observe is the process of paying attention and noticing how light behaves in different situations and environments. Observe can help you learn more about the properties and characteristics of light, such as its intensity, color, direction, and quality.
- Comparing: Comparing is the process of looking at and evaluating how light differs in different images. Comparing can help you appreciate and recognize the diversity and beauty of light, as well as learn from other light painters and their styles. You can compare by using some sources or platforms, such as books, magazines, websites, blogs, social media, etc.
- Practice: Practice is the process of applying and improving your skills and knowledge with light. Practice can help you master the art of light painting and create stunning and successful images with light.
Never Stop Experimenting
One of the most fun and exciting aspects of light painting photography is never stop experimenting. Never stop experimenting means trying out new things and exploring new possibilities with light. Never stop experimenting can help you discover new effects and styles with light, as well as create unique and original images with light.
To never stop experimenting, you will need to follow these basic tips:
- Be curious: Be curious is the attitude of being interested and eager to learn more about light. Be curious can help you find new sources of inspiration and information about light, as well as ask new questions and hypotheses about light.
- Interviewing: Interviewing is the process of asking and answering questions about light. Interviewing can help you gain new insights and perspectives about light, as well as share your opinions and experiences about light. You can interview by using some methods or formats, such as surveys, polls, quizzes, podcasts, videos, etc.
- Be creative: Be creative is the attitude of being original and imaginative with light. Be creative can help you find new ways of using and combining light sources, tools, techniques, and settings, as well as create new shapes, patterns, or effects with light. You can be creative by using some tools or techniques, such as:
- Brainstorming: Brainstorming is the process of generating and listing ideas or solutions for light. Brainstorming can help you overcome mental blocks and limitations with light, as well as expand your options and alternatives with light. You can brainstorm by using some methods or techniques, such as mind maps, word associations, random words, etc.
- Sketching: Sketching is the process of drawing or writing down your ideas or solutions for light. Sketching can help you visualize and organize your ideas or solutions for light, as well as test different options and variations for light. You can sketch by using some tools or devices, such as paper, pencil, tablet, computer, etc.
- Be adventurous: Be adventurous is the attitude of being daring and willing to take risks with light. Be adventurous can help you find new challenges and opportunities with light, as well as discover new effects and styles with light.
Conclusion
Starting Your Journey in the World of Light Painting
Light painting photography is a fascinating and creative photographic technique that allows you to create stunning images using light sources and long exposure settings. In this article, you have learned everything you need to know about light painting photography, from its history and evolution to the tools and equipment you need to start your own light art journey. You have also discovered some tips and tricks to help you master the art of painting with light and create amazing light trails, shapes, and effects.
Now that you have the knowledge and skills, it is time to start your journey in the world of light painting. All you need is a camera, a tripod, a light source, and your imagination. You can create your own light art in any place, at any time, and with any style. You can also share your work with others and join the community of light painting enthusiasts.
Light painting photography is a fun and exciting way to express your creativity and imagination through photography. It is also a rewarding and satisfying experience that can improve your photography skills and knowledge. Light painting photography is not only a photographic technique, but also an art form and a lifestyle.
We hope that this article has inspired and motivated you to start your light painting journey. We also hope that you will enjoy and appreciate the beauty and magic of light painting photography. Remember, never stop experimenting and becoming one with light and shadows. Happy light painting!