

Table of Contents
Understanding Exposure Triangle in Photography | Explained for Beginners
Introduction to Exposure in Photography
What is exposure? Exposure is the amount of light that reaches the camera sensor when you take a photo. Exposure determines how bright or dark your image will be, and it affects the mood, tone, and detail of your photo.
Role of exposure in photography. Exposure is one of the most important aspects of photography, as it can make or break your image. A well-exposed photo will have a balanced distribution of light and dark areas, and it will capture the colors and details of the scene accurately.
A poorly exposed photo will either be too bright (overexposed) or too dark (underexposed), and it will lose detail, contrast, and color.
Key Takeaways on Exposure Triangle in Photography
- Exposure is the amount of light that reaches the camera sensor when you take a photo, and it affects the brightness, mood, and detail of your image.
- The exposure triangle is a model that shows the relationship between three elements that affect the exposure: aperture, shutter speed, and ISO.
- Aperture is the size of the opening in the lens that controls how much light enters the camera, and it also affects the depth of field, which is the area of the image that is in sharp focus.
- Shutter speed is the length of time that the shutter is open, allowing light to hit the sensor, and it also affects how motion is captured in your image.
- ISO is the sensitivity of the sensor to light, and it also affects how much noise or grain appears in your image.
- The three elements of the exposure triangle have an inverse relationship with each other when it comes to exposure. This means that if you change one element, you need to compensate by changing another element to maintain the same exposure level.
- Equivalent exposure means that there are different combinations of aperture, shutter speed, and ISO that can produce the same exposure level. However, these combinations will have different effects on your image quality and creative expression.
- You can use different camera modes and features to adjust the exposure triangle elements, such as manual mode, aperture priority mode, shutter priority mode, and auto ISO.
- You can use the exposure triangle chart to visualize how aperture, shutter speed, and ISO affect your exposure, and to find out what settings you need to balance your exposure.
- You can use the exposure triangle to achieve different creative effects in your image, such as depth of field, motion blur, and freeze motion.
Demystifying the Exposure Triangle
Concept of the exposure triangle. The exposure triangle is a simple way to understand how exposure works in photography. It is a model that shows the relationship between three elements that affect the exposure: aperture, shutter speed, and ISO. These three elements are also known as the three parameters of exposure.
Elements of the exposure triangle. Aperture is the size of the opening in the lens that controls how much light enters the camera. Shutter speed is the length of time that the shutter is open, allowing light to hit the sensor. ISO is the sensitivity of the sensor to light.
By adjusting these three elements, you can control how much light reaches the sensor, and thus how bright or dark your image will be.
Unpacking the Elements of the Exposure Triangle
Understanding aperture. Aperture is measured in f-stops, which are numbers that indicate the diameter of the aperture. The smaller the f-stop number, the larger the aperture, and vice versa. For example, f/2.8 is a larger aperture than f/8.
Aperture not only affects the exposure, but also the depth of field, which is the area of the image that is in sharp focus. A larger aperture creates a shallow depth of field, meaning that only a small part of the image is in focus, while a smaller aperture creates a deeper depth of field, meaning that more of the image is in focus.
Grasping the shutter speed. Shutter speed is measured in seconds or fractions of a second, such as 1/60 or 1/2000. Shutter speed affects how motion is captured in your image. A fast shutter speed freezes motion, while a slow shutter speed creates motion blur.
For example, if you want to capture a moving car without blur, you need a fast shutter speed, such as 1/1000 or faster. If you want to create a sense of movement or show some blur, you need a slow shutter speed, such as 1/15 or slower.
Interpreting ISO. ISO is a number that represents the sensitivity of the sensor to light. The higher the ISO number, the more sensitive the sensor is, and vice versa. For example, ISO 100 is less sensitive than ISO 800. ISO affects how much noise or grain appears in your image.
A higher ISO produces more noise, while a lower ISO produces less noise. For example, if you shoot in low-light conditions, you may need to increase the ISO to get a proper exposure, but this will also increase the noise level in your image.
How the Exposure Triangle Works
Role of each element in balancing your exposure. Each element of the exposure triangle has a different impact on your image quality and creative expression. However, they also have an inverse relationship with each other when it comes to exposure.
This means that if you change one element, you need to compensate by changing another element to maintain the same exposure level. For example, if you increase the aperture (lower f-stop number), you let more light into the camera, which makes your image brighter.

To balance this out, you need to either decrease the shutter speed (faster) or decrease the ISO (lower number), which both reduce the amount of light reaching the sensor.
Equivalent exposure in the exposure triangle. Equivalent exposure means that there are different combinations of aperture, shutter speed, and ISO that can produce the same exposure level. For example, f/4 at 1/125 and ISO 200 will give you the same exposure as f/8 at 1/60 and ISO 400.
However, these combinations will have different effects on your image quality and creative expression. For example, f/4 will give you a shallower depth of field than f/8, while ISO 400 will give you more noise than ISO 200.
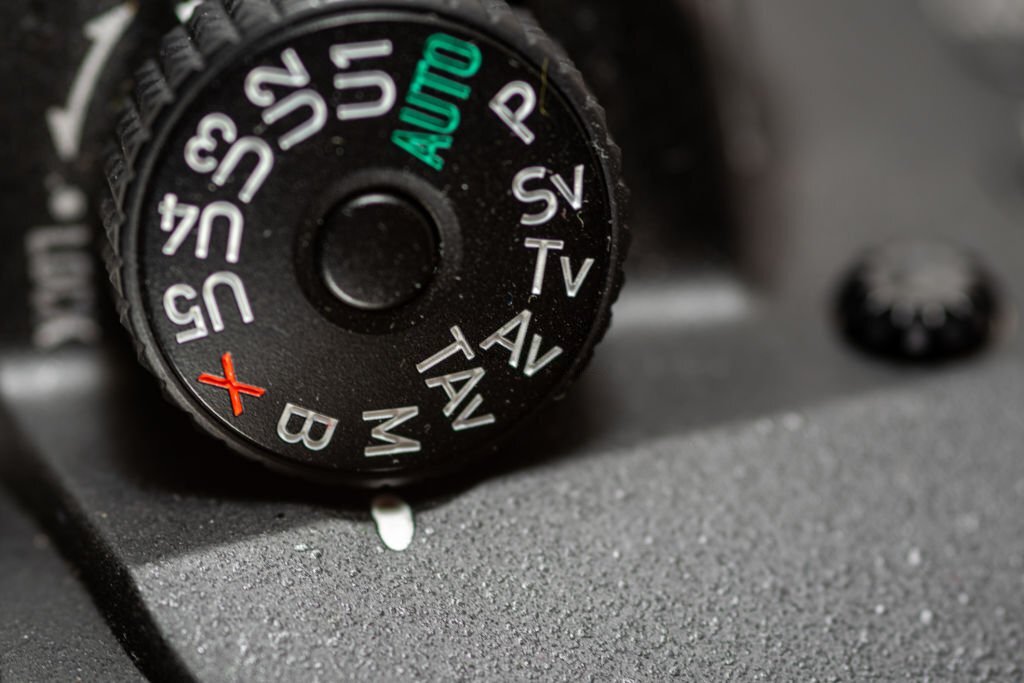
How to adjust aperture, shutter speed, and ISO. Depending on your camera model, you may have different modes and buttons to adjust the exposure triangle elements. However, the most common modes are:
- Manual mode (M): This mode allows you to control all three elements manually. You can use the exposure meter in your viewfinder or on your screen to check if your exposure is correct.
- Aperture priority mode (A or Av): This mode allows you to set the aperture manually, while the camera automatically adjusts the shutter speed and ISO to match the exposure. This mode is useful when you want to control the depth of field in your image.
- Shutter priority mode (S or Tv): This mode allows you to set the shutter speed manually, while the camera automatically adjusts the aperture and ISO to match the exposure. This mode is useful when you want to control the motion in your image.
- Auto ISO: This feature allows you to set a range of ISO values that the camera can choose from automatically, depending on the lighting conditions. This feature is useful when you want to avoid changing the ISO manually, or when you want to limit the noise level in your image.
Practical camera settings tips for beginners. Here are some general tips to help you choose the right settings for your exposure triangle:
- Start with a low ISO, such as ISO 100 or 200, and only increase it when necessary. A low ISO will give you the best image quality and the least noise.
- Choose an aperture that suits your creative vision. A large aperture (small f-stop number) will give you a shallow depth of field, which is good for portraits, landscapes, and low-light situations. A small aperture (large f-stop number) will give you a deep depth of field, which is good for architecture, macro, and bright situations.
- Choose a shutter speed that suits your subject. A fast shutter speed (short exposure time) will freeze motion, which is good for sports, wildlife, and action. A slow shutter speed (long exposure time) will create motion blur, which is good for waterfalls, light trails, and panning.
- Use a tripod or a stabilizer when using a slow shutter speed or a telephoto lens. This will help you avoid camera shake, which can ruin your image quality and sharpness.
Visualizing the Exposure Triangle
Understanding the exposure triangle chart. The exposure triangle chart is a visual tool that helps you understand how aperture, shutter speed, and ISO affect your exposure. The chart shows different combinations of settings that produce equivalent exposures.
The chart has three sides, each representing one element of the exposure triangle. The chart also has diagonal lines that connect equivalent exposures. For example, if you look at the chart below, you can see that f/2.8 at 1/500 and ISO 100 is equivalent to f/4 at 1/250 and ISO 100, or f/5.6 at 1/125 and ISO 100.

Examples and usage of the exposure triangle chart. The exposure triangle chart can help you choose the best settings for your situation and creative vision. For example, if you want to take a portrait in low-light conditions, you may want to use a large aperture (small f-stop number) to let more light into the camera and create a shallow depth of field.
You can use the chart to find out what shutter speed and ISO you need to balance your exposure. For example, if you set your aperture to f/2.8, you can see from the chart that you need either 1/60 and ISO 400, or 1/30 and ISO 800, or 1/15 and ISO 1600. However, if you want to avoid noise and camera shake, you may prefer to use 1/60 and ISO 400 over the other options.
Bringing it Together: Mastering the Exposure Triangle
How to achieve depth of field with the exposure triangle. Depth of field is one of the most creative aspects of photography, as it allows you to control what is in focus and what is blurred in your image. Depth of field is mainly affected by aperture, but also by focal length and distance from the subject.
To achieve a shallow depth of field, you need to use a large aperture (small f-stop number), a long focal length (telephoto lens), and a close distance from the subject. To achieve a deep depth of field, you need to use a small aperture (large f-stop number), a short focal length (wide-angle lens), and a far distance from the subject.
However, changing these factors will also affect your exposure level, so you need to adjust your shutter speed and ISO accordingly.
FAQs
Q: What is the Exposure Triangle?
A: The Exposure Triangle is a visual representation of the three elements of the exposure that control the amount of light entering your camera and ultimately the image you capture. These three elements are aperture, shutter speed, and ISO.
Q: How does understanding the exposure triangle help me as a photographer?
A: Understanding the exposure triangle allows you to have greater control over your images by controlling how much light enters your camera. This allows you to create more dynamic photos with better composition and improved technical quality.
Q: What is aperture in terms of understanding exposure?
A: Aperture refers to the size of the opening in your lens which controls how much light reaches your digital sensor. It’s measured in “f-stops” and expressed as a fraction like f/4 or f/8. Wider apertures (lower f-stop numbers) let in more light while narrower apertures (higher f-stop numbers) allow less light.
Q: How do I use aperture to control my overall exposure?
A: You can use aperture to control your overall exposure by adjusting it up or down. A wider aperture will allow more light into your camera and result in a brighter image; whereas, a narrower aperture will let less light into your camera resulting in a darker image.
Q: What is shutter speed and how does it affect my photos?
A: Shutter speed is the length of time that your camera’s shutter stays open when taking an image. Slower shutter speeds allow more light into your camera while faster shutter speeds reduce the amount of light entering your camera. The longer (slower) shutter speeds can also be used to create interesting motion effects such as blurring moving objects.
Q: What is ISO and what effect does it have on my photos?
A: ISO measures your digital sensor’s sensitivity to light. Higher ISOs mean that less light is needed for correct exposure, while lower ISOs mean that more light is needed for correct exposure. Higher ISOs also come with increased noise or graininess so balancing this with other settings such as aperture or shutter speed can be key for achieving optimal results.
Q: What are equivalent exposures?
A: Equivalent exposures refer to when two different combinations of settings produce the same overall result in terms of brightness (or darkness). For example, if you increase both your shutter speed and ISO by one stop each, then you have achieved an equivalent exposure as they both doubled the amount of light entering the camera.
Q: What’s an easy way to remember what each side of the triangle controls?
A: An easy way to remember what each side of the triangle controls is by using mnemonics such as “AVI” (aperture, value, iso) or “SAS” (shutter speed, aperture, sensitivity). This will help you quickly recall which setting affects which part when adjusting them for proper exposure.
Q: Is there any easier way than manually adjusting settings for balance my exposure?
A : Yes! You can take advantage of automatic modes on most cameras today which allow you adjust settings without having to manually adjust each one individually depending on lighting conditions. It’s important however not just rely on these modes alone as they may not always produce optimal results under all situations.