

Table of Contents
Mastering Manual Mode: Essential Camera Settings for Beginner DSLR Photographers
If you have a DSLR camera, you might have heard of the term “manual mode”. But what is it exactly, and why should you use it? In this article, I will explain the basics of manual mode, how to set up your camera in manual mode, and why it can help you take better photos.
I will also share some tips and tricks for shooting in manual mode successfully, and when to use alternatives to manual mode.
By the end of this article, you will have a better understanding of manual mode and how to master it.
Understanding Manual Mode: What Is It?
Manual mode is one of the modes on your DSLR camera that allows you to control all the settings of your camera manually. Unlike auto mode, where the camera decides the best settings for you based on the lighting and scene, manual mode lets you adjust the settings yourself to achieve the desired effect.
The main settings that you can control in manual mode are ISO, shutter speed, aperture, and white balance. These settings affect how much light enters your camera, how long the shutter stays open, how wide the lens opening is, and how the colors are rendered in your photos.
Making the switch: From Auto to Manual mode
If you are used to shooting in auto mode, switching to manual mode might seem daunting at first. You might wonder why you should bother with manual mode when auto mode can do everything for you. However, there are many benefits of using manual mode that auto mode cannot offer.
For example, manual mode gives you more creative freedom, more control over your camera settings, and more learning opportunities. You can experiment with different settings and see how they affect your photos. You can also fine-tune your settings to match your vision and style.
You can also overcome some of the limitations and challenges that auto mode might face, such as low-light situations, fast-moving subjects, or complex scenes.
Key Takeaways
- Manual mode is a mode on your DSLR camera that allows you to control all the settings of your camera manually, such as ISO, shutter speed, aperture, and white balance.
- Manual mode has many benefits over auto mode, such as giving you more creative freedom, more control over your camera settings, and more learning opportunities.
- Manual mode requires you to learn how to use it effectively and when to use alternatives to it.
- Manual mode affects different aspects of your photos such as exposure, white balance, depth of field, etc.
- Manual mode differs from manual focus, which is a feature that allows you to control the focus of your lens manually.
- Manual mode can help you tailor your photos to your unique photography needs and preferences depending on what type of photography you are interested in or what kind of photos you want to take.
- Manual mode can help you improve your skills and creativity as a photographer by experimenting with different settings and effects.
Key features of Manual mode in DSLR cameras
To use manual mode effectively, you need to understand the key features of manual mode in DSLR cameras. These are:
ISO:
This is a measure of how sensitive your camera sensor is to light. The higher the ISO setting, the more light your camera can capture, but also the more noise or grain your photos will have. The lower the ISO setting, the less light your camera can capture, but also the less noise or grain your photos will have.
You can use ISO to adjust the brightness of your photos depending on the lighting conditions. For example, if you are shooting in low light, you might want to increase your ISO setting to make your photos brighter. However, you should also be aware of the trade-off between brightness and noise.
Ideally, you want to use the lowest ISO setting possible that still gives you enough light.
Shutter speed:
This is a measure of how long your camera shutter stays open when you take a photo. The longer the shutter speed, the more light your camera can capture, but also the more motion blur your photos will have.
The shorter the shutter speed, the less light your camera can capture, but also the less motion blur your photos will have. You can use shutter speed to control how much movement you want to show or freeze in your photos.
For example, if you are shooting a moving subject, such as a car or a bird, you might want to use a fast shutter speed to freeze its motion and avoid blur. However, if you want to create a sense of motion or drama in your photos, such as a waterfall or a spinning wheel, you might want to use a slow shutter speed to show some blur.
Aperture:
This is a measure of how wide your lens opening is when you take a photo. The wider the aperture (represented by a lower f-number), the more light your camera can capture, but also the shallower your depth of field will be.
The narrower the aperture (represented by a higher f-number), the less light your camera can capture, but also the deeper your depth of field will be. Depth of field is the area of your photo that is in focus relative to your subject.
You can use aperture to control how much background and foreground detail you want to show or blur in your photos. For example, if you are shooting a portrait or a flower, you might want to use a wide aperture to blur out the background and make your subject stand out.
However, if you are shooting a landscape or a group photo, you might want to use a narrow aperture to keep everything in focus.
White balance:
This is a measure of how warm or cool your colors are in your photos. The warmer the white balance (represented by a higher Kelvin number), the more yellow or orange your colors will be. The cooler the white balance (represented by a lower Kelvin number), the more blue or purple your colors will be.
You can use white balance to adjust the color temperature of your photos depending on the lighting conditions. For example, if you are shooting in daylight, you might want to use a neutral or slightly cool white balance to match the natural light.
However, if you are shooting in tungsten or fluorescent light, you might want to use a warmer or cooler white balance to correct the color cast.
Why manual mode is preferred by professional photographers
Manual mode is preferred by professional photographers because it gives them more control over their camera settings and more creative freedom. By using manual mode, they can:
Achieve the exact exposure they want:
Exposure is how bright or dark your photos are. In auto mode, the camera might overexpose or underexpose your photos depending on the lighting and scene. In manual mode, you can adjust the settings to get the right exposure for your photos.
You can use a tool called a light meter or a histogram to help you gauge the exposure level. You can also use exposure compensation to fine-tune your exposure if needed.
Create the desired mood and effect:
Manual mode allows you to manipulate the settings to create different moods and effects in your photos. For example, you can use a slow shutter speed to create a sense of motion or drama, a wide aperture to create a shallow depth of field or a bokeh effect, a high ISO to create a grainy or vintage look, or a warm or cool white balance to create a warm or cool tone.
Overcome challenging situations:
Manual mode helps you overcome some of the situations that auto mode might struggle with, such as low-light situations, fast-moving subjects, or complex scenes.
For example, in low-light situations, auto mode might use a flash or a high ISO setting that might ruin your photos. In manual mode, you can use a tripod or a remote shutter release to stabilize your camera and use a longer shutter speed or a wider aperture to capture more light without using a flash or increasing the noise.
In fast-moving situations, auto mode might use a slow shutter speed that might cause blur in your photos. In manual mode, you can use a fast shutter speed to freeze the motion and avoid blur. In complex scenes, auto mode might get confused by the contrast or the colors and choose the wrong settings for your photos.
In manual mode, you can use spot metering or manual white balance to get the correct exposure and color for your photos.
The Art of Setting Up Your DSLR Camera in Manual Mode
Setting up your DSLR camera in manual mode is not as hard as it sounds. You just need to follow these steps:
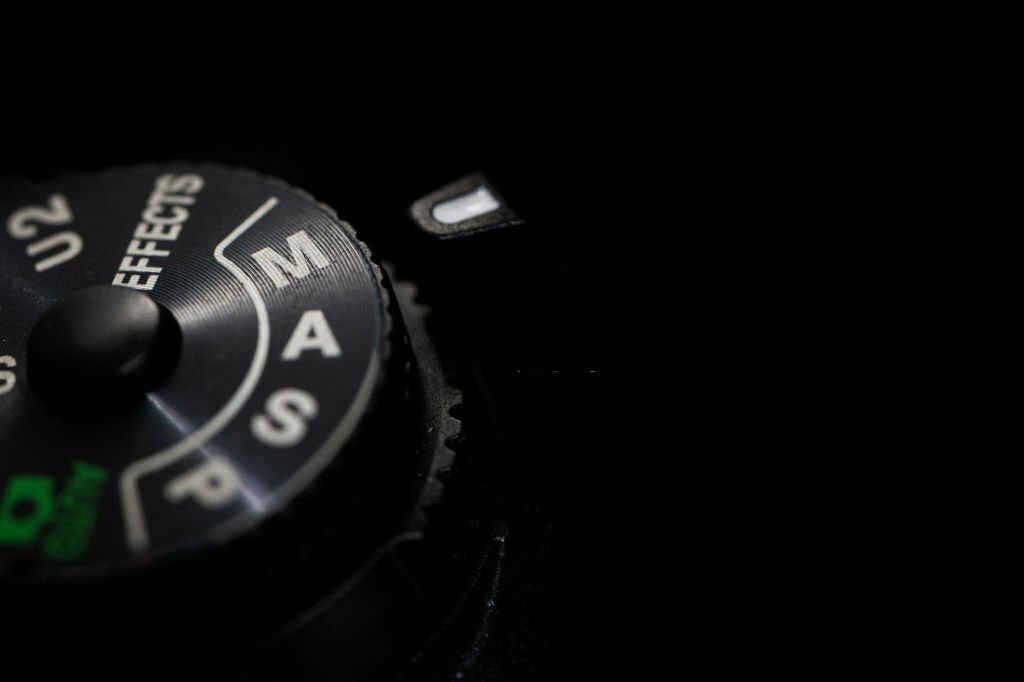
- Turn your camera dial to M (manual) mode.
- Set your ISO setting according to the lighting conditions and the desired noise level. Start with the lowest ISO setting possible and increase it gradually if needed.
- Set your shutter speed according to the amount of movement you want to show or freeze in your photos. Start with a shutter speed that is fast enough to avoid camera shake (usually 1 over your focal length) and adjust it accordingly if needed.
- Set your aperture according to the depth of field you want to achieve in your photos. Start with an aperture that is wide enough to let enough light in (usually f/8) and adjust it accordingly if needed.
- Set your white balance according to the color temperature of the light source. Start with an auto white balance setting and change it manually if needed.
- Check your exposure level using the light meter or the histogram on your camera screen. Adjust any of the settings if needed until you get the desired exposure level.
- Take a test shot and review it on your camera screen. Check if everything is in focus, if the colors are accurate, and if there are any unwanted elements in your frame. Adjust any of the settings if needed until you get the desired result.
- Repeat steps 6 and 7 until you are satisfied with your photo.
Exploring the role of white balance in manual mode
White balance is one of the settings that you can control in manual mode that can make a big difference in your photos. White balance affects how warm or cool your colors are in your photos, which can affect the mood and tone of your photos. White balance also affects how accurate your colors are in your photos, which can affect how realistic or artistic your photos are.
In auto mode, the camera tries to guess the best white balance setting for you based on the lighting conditions and scene. However, sometimes the camera might get it wrong and give you an incorrect white balance setting that might make your colors look too yellow, too blue, too green, or too magenta.
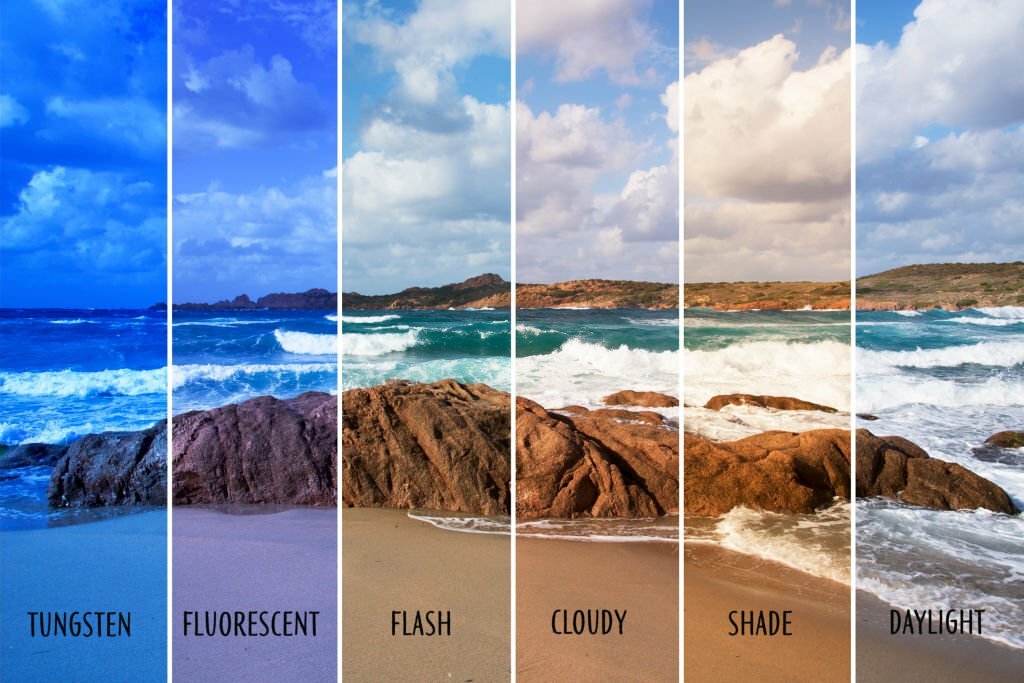
In manual mode, you can choose from several preset white balance settings that correspond to different types of light sources, such as daylight, cloudy, shade, tungsten, fluorescent, flash, etc. You can also adjust the white balance manually using a Kelvin scale that ranges from 2000K to 10000K. You can use white balance to correct the color cast of your photos or to create a certain mood or effect in your photos.
For example, if you are shooting in tungsten light, which is a warm light source, you might want to use a tungsten white balance setting to neutralize the yellow color cast and make your colors more accurate.
However, if you want to create a warm and cozy mood in your photos, you might want to use a daylight white balance setting to enhance the yellow color cast and make your colors more warm.
The Bigger Picture: Manual Focus Vs. Manual Mode
One of the common misconceptions that beginners have is that manual focus and manual mode are the same thing. However, this is not true. Manual focus and manual mode are two different features of your DSLR camera that have different purposes and functions.
Manual focus is a feature that allows you to control the focus of your lens manually. Unlike auto focus, where the camera decides what to focus on based on the contrast and distance, manual focus lets you decide what to focus on by turning the focus ring on your lens. You can use manual focus to achieve precise and sharp focus on your subject, especially when auto focus might fail or be inaccurate.
Manual mode is a feature that allows you to control all the settings of your camera manually. Unlike auto mode, where the camera decides the best settings for you based on the lighting and scene, manual mode lets you adjust the settings yourself to achieve the desired effect.
You can use manual mode to achieve the exact exposure, mood, and effect that you want in your photos, especially when auto mode might overexpose or underexpose your photos or give you an incorrect white balance.
You can use manual focus and manual mode independently or together depending on your needs and preferences. For example, you can use manual focus with auto mode if you want to have precise control over your focus but let the camera handle the other settings for you.
You can also use auto focus with manual mode if you want to have precise control over your settings but let the camera handle the focus for you. Or you can use both manual focus and manual mode if you want to have complete control over everything in your photos.
Why You Should Shoot in Manual Mode: Top Reasons
Shooting in manual mode might seem intimidating at first, but it has many advantages that make it worth learning and using. Here are some of the top reasons why you should shoot in manual mode:
- Gaining complete control over your camera settings: Shooting in manual mode gives you complete control over your camera settings and lets you adjust them according to your needs and preferences. You can choose how bright or dark, how sharp or blurry, how warm or cool, and how realistic or artistic your photos are by manipulating the settings yourself. You can also fine-tune your settings to match your vision and style.
- Expanding your creativity as a photographer: Shooting in manual mode expands your creativity as a photographer and lets you experiment with different settings and effects. You can try different combinations of settings and see how they affect your photos. You can also create different moods and effects by changing the settings yourself. You can also overcome some of the limitations and challenges that auto mode might face, such as low-light situations, fast-moving subjects, or complex scenes.
- Learning from Others: Tips for Shooting in Manual Mode Successfully: Shooting in manual mode also helps you learn more about photography and improve your skills as a photographer. You can learn how different settings work together and how they affect your photos. You can also learn from other photographers who shoot in manual mode and get inspired by their work. You can also get feedback from others who can help you improve your photos.
Learning from Others: Tips for Shooting in Manual Mode Successfully
Shooting in manual mode can be rewarding and fun, but it can also be challenging and frustrating at times. To help you shoot in manual mode successfully, here are some tips and tricks that you can follow:
How to gauge the right exposure while photographing in manual mode:
One of the most important skills that you need to master when shooting in manual mode is how to gauge the right exposure for your photos. Exposure is how bright or dark your photos are, and it depends on the combination of settings that you use.
To get the right exposure, you need to balance the amount of light that enters your camera using the ISO, shutter speed, and aperture settings. You can use a tool called a light meter or a histogram on your camera screen to help you gauge the exposure level.
A light meter is a scale that shows you how underexposed or overexposed your photos are based on the settings that you use. A histogram is a graph that shows you how many pixels are in each brightness level in your photos. You can adjust any of the settings until you get the desired exposure level on the light meter or the histogram. You can also use exposure compensation to fine-tune your exposure if needed.
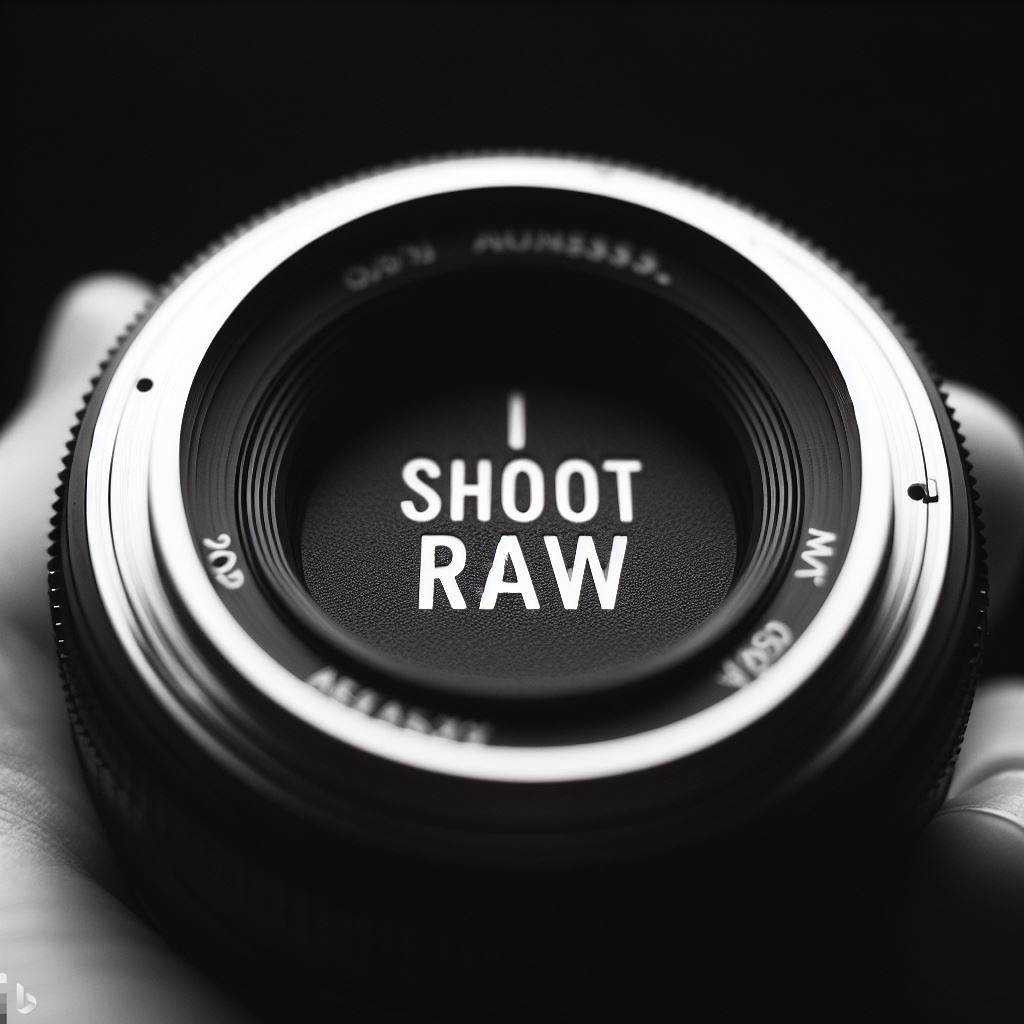
Embracing shooting in RAW for maximum editing flexibility:
Another tip that can help you shoot in manual mode successfully is to embrace shooting in RAW format. RAW format is a file format that captures all the data from your camera sensor without any compression or processing.
Unlike JPEG format, which is a compressed and processed file format that loses some data and quality, RAW format preserves all the data and quality of your photos. Shooting in RAW gives you more editing flexibility and allows you to correct any mistakes or enhance any aspects of your photos later on.
You can use a software program such as Adobe Photoshop or Lightroom to edit your RAW files and adjust the settings such as exposure, white balance, contrast, saturation, sharpness, noise reduction, etc. You can also convert your RAW files to JPEG files after editing them if you want to share them online or print them out.
Keeping the image right in-camera for superior output:
While shooting in RAW and editing your photos later can help you improve your photos, it is still better to keep the image right in-camera as much as possible. Keeping the image right in-camera means getting the best possible result from your camera without relying too much on post-processing.
This will save you time and effort in editing your photos later and also give you a superior output. To keep the image right in-camera, you need to pay attention to several aspects of your photos, such as focus, composition, framing, lighting, angle, perspective, etc.
You also need to check your photos on your camera screen and review them for any errors or flaws. You can also use some tools such as a tripod, a remote shutter release, a lens hood, a polarizing filter, etc. to help you keep the image right in-camera.
Shooting in DSLR Manual Mode: Tailoring to Your Unique Photography Needs
Shooting in manual mode can help you tailor your photos to your unique photography needs and preferences. Depending on what type of photography you are interested in or what kind of photos you want to take, you can use manual mode to achieve different results.
For example, if you are interested in portrait photography, you might want to use manual mode to create a shallow depth of field or a bokeh effect that blurs out the background and makes your subject stand out. You can do this by using a wide aperture setting (such as f/2.8 or f/4) and a fast shutter speed setting (such as 1/250s or 1/500s) and focusing on your subject’s eyes.
If you are interested in landscape photography, you might want to use manual mode to create a deep depth of field that keeps everything in focus from near to far. You can do this by using a narrow aperture setting (such as f/11 or f/16) and a slow shutter speed setting (such as 1/30s or 1/15s) and focusing on a point about one-third into the scene.
If you are interested in food photography, you might want to use manual mode to create a bright and colorful photo that makes your food look appetizing. You can do this by using a high ISO setting (such as ISO 800 or ISO 1600) and a wide aperture setting (such as f/2.8 or f/4) and using natural light or a flash.
You can also do some practical exercises to get better at using manual mode for different photography genres. Here are some examples of exercises that you can try:
- Portrait: Find a friend or a family member who is willing to pose for you and take their portrait in manual mode. Try to use different settings and angles to create different effects and moods in your photos. For example, you can use a wide aperture to blur out the background, a fast shutter speed to freeze their expression, a warm white balance to create a cozy tone, etc. Compare your photos and see which ones you like best and why.
- Landscape: Go to a scenic location and take some landscape photos in manual mode. Try to use different settings and times of the day to capture different aspects and colors of the landscape. For example, you can use a narrow aperture to keep everything in focus, a slow shutter speed to show some motion or drama, a cool white balance to create a crisp tone, etc. Compare your photos and see which ones you like best and why.
- Food: Prepare or order some delicious food and take some food photos in manual mode. Try to use different settings and lighting sources to make your food look appetizing and colorful. For example, you can use a high ISO to brighten up your food, a wide aperture to create a shallow depth of field, a flash or a natural light source to enhance the colors, etc. Compare your photos and see which ones you like best and why.
These are just some examples of exercises that you can do to practice shooting in manual mode for different photography genres. You can also come up with your own exercises or challenges and have fun with them. The more you practice, the more confident and comfortable you will become with using manual mode.
Beyond Basics: When Not to Use Manual Mode
While manual mode is a great feature that can help you take better photos, it is not always the best option for every situation. Sometimes, using alternatives to manual mode might be more convenient or effective for your photos. Here are some situations that might demand alternatives to manual mode:

When you need speed and accuracy:
Manual mode requires you to adjust the settings yourself, which might take some time and effort. If you are shooting in a fast-paced or unpredictable situation, such as sports, wildlife, or street photography, you might not have enough time or opportunity to change the settings manually.
In this case, using auto mode or semi-auto modes such as aperture priority mode or shutter priority mode might be more suitable for your photos. These modes allow you to control one setting (such as aperture or shutter speed) while the camera automatically adjusts the other settings for you.
This way, you can still have some control over your photos while letting the camera handle the rest for you.
When you want consistency and simplicity:
Manual mode allows you to change the settings according to your needs and preferences, which might result in different outcomes for your photos. If you are shooting in a consistent or simple situation, such as studio, product, or macro photography, you might want to have consistent and simple results for your photos.
In this case, using auto mode or preset modes such as portrait mode or landscape mode might be more suitable for your photos. These modes apply predefined settings that are optimized for specific types of photography.
This way, you can have consistent and simple results for your photos without having to worry about changing the settings yourself.
In Conclusion: Embracing Manual Mode for a Creative Leap in Photography
Manual mode is one of the most powerful and versatile features of your DSLR camera that can help you take better photos. By using manual mode, you can gain complete control over your camera settings, expand your creativity as a photographer, and tailor your photos to your unique photography needs.
However, manual mode also requires you to learn how to use it effectively and when to use alternatives to it.
I hope this article has helped you understand manual mode better and inspired you to embrace it for a creative leap in photography. Happy shooting!