

Table of Contents
Mastering Exposure Compensation: A Comprehensive ISO Guide
Exposure compensation is one of the most useful features of modern digital cameras. It allows you to adjust the brightness of your photos without changing the aperture or shutter speed settings. In this article, you will learn what exposure compensation is, how it works, and how to use it effectively in different scenarios. You will also learn how exposure compensation affects ISO, and how to balance the exposure variables to achieve the perfect shot.
By the end of this article, you will have a better understanding of exposure compensation and ISO, and how to master them for your photography.
Understanding Exposure Compensation
What is Exposure Compensation?
Exposure compensation is a way of telling your camera to change the exposure of an image by making it brighter or darker than what the camera’s meter thinks is correct. The camera’s meter measures the light in the scene and tries to find an exposure that will produce a well-balanced image.
However, sometimes the camera’s meter can be fooled by very bright or very dark scenes, resulting in overexposed or underexposed images. Exposure compensation allows you to override the camera’s meter and adjust the exposure according to your preference.
Key Takeaways
- Exposure compensation and ISO let you adjust the brightness of your photos without changing the aperture or shutter speed.
- Exposure compensation changes the amount of light that reaches the sensor or film, by changing the aperture or shutter speed automatically.
- ISO changes the sensitivity of your sensor or film to light, by changing a numerical value manually or automatically.
- Exposure compensation and ISO can be used in different camera modes, scenarios, and effects, depending on your preference and vision.
- Exposure bracketing and exposure compensation settings are advanced techniques that can help you improve your exposure skills and creativity.
How Does Exposure Compensation Work?
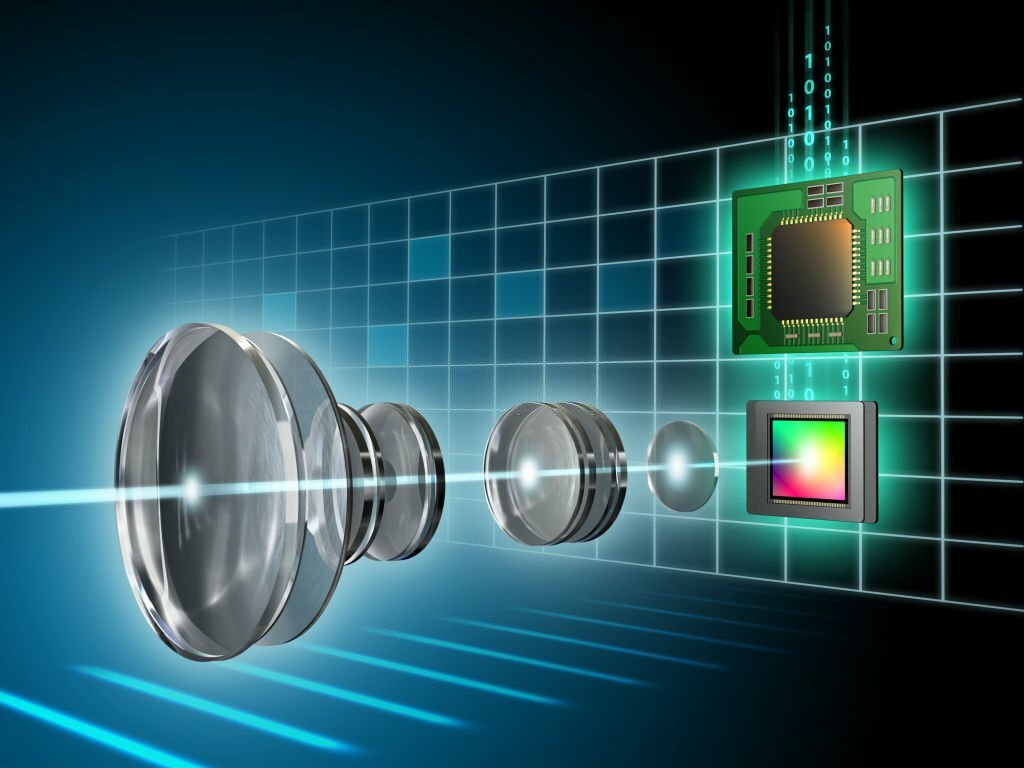
Exposure compensation works by changing the amount of light that reaches the sensor or film. This can be done by either changing the aperture, which controls how much light enters the lens, or changing the shutter speed, which controls how long the light stays on the sensor or film.
Exposure compensation does not change these settings directly, but rather tells the camera to change them automatically according to a scale called exposure value (EV). EV is a unit that measures the difference in exposure between two images. One EV is equal to one stop of exposure, which means doubling or halving the amount of light. For example, if you increase the exposure by one EV, you are doubling the amount of light, and if you decrease it by one EV, you are halving it.
Exposure compensation is usually expressed in terms of plus or minus EV. For example, if you set your exposure compensation to +1 EV, you are telling your camera to increase the exposure by one stop, or double the amount of light. If you set it to -1 EV, you are telling your camera to decrease the exposure by one stop, or halve the amount of light. Most cameras allow you to adjust the exposure compensation in increments of 1/3 or 1/2 EV, giving you more control over the exposure.
Exposure compensation can be used in different camera modes, depending on how much control you want over the exposure settings. However, not all camera modes allow you to use exposure compensation. In this section, we will look at which camera modes are compatible with exposure compensation, and how to switch from automatic exposure to manual mode.
Identifying Shooting Modes to Which Exposure Compensation Applies
Exposure compensation can be used in any camera mode that allows you to change the aperture or shutter speed settings automatically. These modes are usually called semi-automatic or creative modes, and they include aperture priority mode (A or Av), shutter priority mode (S or Tv), and program mode (P). In these modes, you can choose one of the exposure variables (aperture or shutter speed), and let the camera choose the other one for you. You can then use exposure compensation to fine-tune the exposure by making it brighter or darker.
Exposure compensation cannot be used in fully automatic mode (Auto) or manual mode (M). In automatic mode, the camera chooses both the aperture and shutter speed settings for you, and does not let you change them. In manual mode, you choose both the aperture and shutter speed settings yourself, and have full control over the exposure. In these modes, you cannot use exposure compensation because there is nothing for it to adjust.
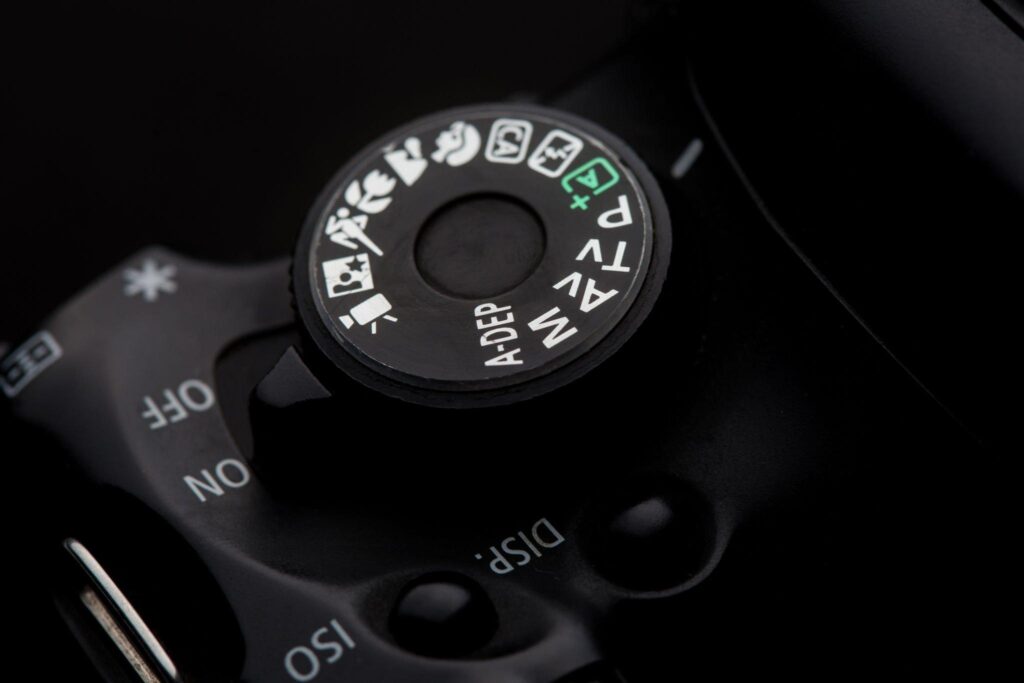
Switching from Automatic Exposure to Camera Mode
If you want to use exposure compensation, you need to switch from automatic mode to one of the semi-automatic modes. To do this, you need to find your camera’s mode dial, which is usually located on top of your camera. The mode dial lets you choose between different shooting modes by rotating it. You can see what mode you are in by looking at the symbols or letters on the dial or on your camera’s screen.
| Mode | Procedure | Description |
|---|---|---|
| Aperture Priority Mode | Rotate the dial until you see A or Av. | Choose your desired aperture setting using a dial or a button, and let the camera choose an appropriate shutter speed for you. Then, use your exposure compensation dial or button to adjust image brightness. |
| Shutter Priority Mode | Rotate the dial until you see S or Tv. | Choose your desired shutter speed setting using a dial or a button, and let the camera choose an appropriate aperture for you. Then, use your exposure compensation dial or button to adjust image brightness. |
| Program Mode | Rotate the dial until you see P. | The camera chooses both the aperture and shutter speed settings for you but allows flexibility to change them. Use a dial or a button on your camera to adjust aperture and shutter speed settings while maintaining the same exposure value. Then, use your exposure compensation dial or button to adjust image brightness. |
When It’s Necessary to Shift to Auto ISO Mode
Auto ISO mode is a feature that allows your camera to automatically adjust the ISO setting according to the lighting conditions. ISO is a measure of how sensitive your sensor or film is to light. The higher the ISO, the more sensitive it is, and the brighter your image will be. However, higher ISO also means more noise or grain in your image, which can reduce the image quality. Therefore, you want to use the lowest ISO possible for your desired exposure.
Auto ISO mode can be useful when you are using exposure compensation in semi-automatic modes, and you want to maintain a certain aperture or shutter speed setting. For example, if you are using aperture priority mode, and you want to use a large aperture (small f-number) to create a shallow depth of field effect, but the scene is too bright for your desired exposure.
You can use exposure compensation to decrease the exposure, but this will also decrease the shutter speed, which can result in motion blur if your subject or camera is moving. To avoid this, you can switch to auto ISO mode, which will increase the ISO setting to compensate for the lower shutter speed, and keep your image sharp.
To switch to auto ISO mode, you need to find your camera’s ISO button or menu, which is usually located on the back of your camera or on your camera’s screen. You can then choose auto ISO from the options available, or set a range of ISO values that you want your camera to use. You can also set a minimum shutter speed that you want your camera to maintain when using auto ISO mode.
The Science Behind Exposure Compensation and ISO
Managing the Relationship Between Exposure and ISO
Exposure and ISO are two of the three main factors that determine the brightness of your image. The third factor is light, which is determined by the scene and the lighting conditions. Exposure is controlled by aperture and shutter speed, which are measured in stops. ISO is controlled by a numerical value that represents the sensitivity of your sensor or film to light. The relationship between exposure and ISO can be summarized by this formula:
Exposure = Aperture + Shutter Speed + ISO
This means that if you change one of these variables, you need to change one or both of the others to maintain the same exposure. For example, if you increase the aperture by one stop (letting in more light), you need to decrease the shutter speed by one stop (letting in less light) or decrease the ISO by one stop (making the sensor less sensitive) to keep the same exposure.
Interplay of Exposure Variables in Achieving the Perfect Shot
The interplay of exposure variables is not only important for maintaining the same exposure, but also for achieving different creative effects in your photography. Aperture, shutter speed, and ISO affect not only the brightness of your image, but also other aspects such as depth of field, motion blur, and noise. By changing these variables, you can change how your image looks and feels.
Aperture affects depth of field, which is how much of your image is in focus. A large aperture (small f-number) creates a shallow depth of field, which means that only a small part of your image is in focus, while everything else is blurred. This can be used to isolate your subject from the background or foreground, or create a bokeh effect. A small aperture (large f-number) creates a deep depth of field, which means that most or all of your image is in focus. This can be used to capture more details in your scene, or create a sharp and crisp image.

Shutter speed affects motion blur, which is how much movement is captured in your image. A fast shutter speed (short duration) freezes motion, which means that everything in your image is sharp and clear. This can be used to capture fast-moving subjects or action scenes, or create a dynamic and dramatic image. A slow shutter speed (long duration) blurs motion, which means that anything that moves in your image will appear as streaks or trails. This can be used to create a sense of movement or speed in your image, or create an artistic and abstract image.
ISO affects noise, which is how much grain or speckles appear in your image. A low ISO (small number) produces less noise, which means that your image quality. This can be used to produce a clean and smooth image, or create a realistic and natural image. A high ISO (large number) produces more noise, which means that your image will have more grain or speckles. This can be used to create a gritty and textured image, or create a vintage and nostalgic image.
By changing the exposure variables, you can change the mood and style of your image, as well as the exposure. However, you need to be careful not to overdo it, as too much or too little of any variable can ruin your image. For example, if you use too large an aperture, you might lose important details in the background or foreground. If you use too slow a shutter speed, you might introduce camera shake or unwanted blur. If you use too high an ISO, you might introduce too much noise or lose color accuracy.
Therefore, you need to find a balance between the exposure variables, and use exposure compensation to fine-tune the exposure according to your vision. Exposure compensation can help you achieve the perfect exposure for your image, without compromising the other aspects of your image.
Practical Guide to Using Exposure Compensation and Adjusting ISO
Now that you have learned how exposure compensation and ISO work in different camera modes, it is time to put them into practice. In this section, we will look at how to adjust exposure compensation and ISO on your camera, and when to use them in different scenarios and examples. We will also give you some tips on adjusting exposure for landscape photography, and introduce some advanced techniques such as exposure bracketing and exposure compensation settings.
How to Adjust Exposure Compensation on Your Camera
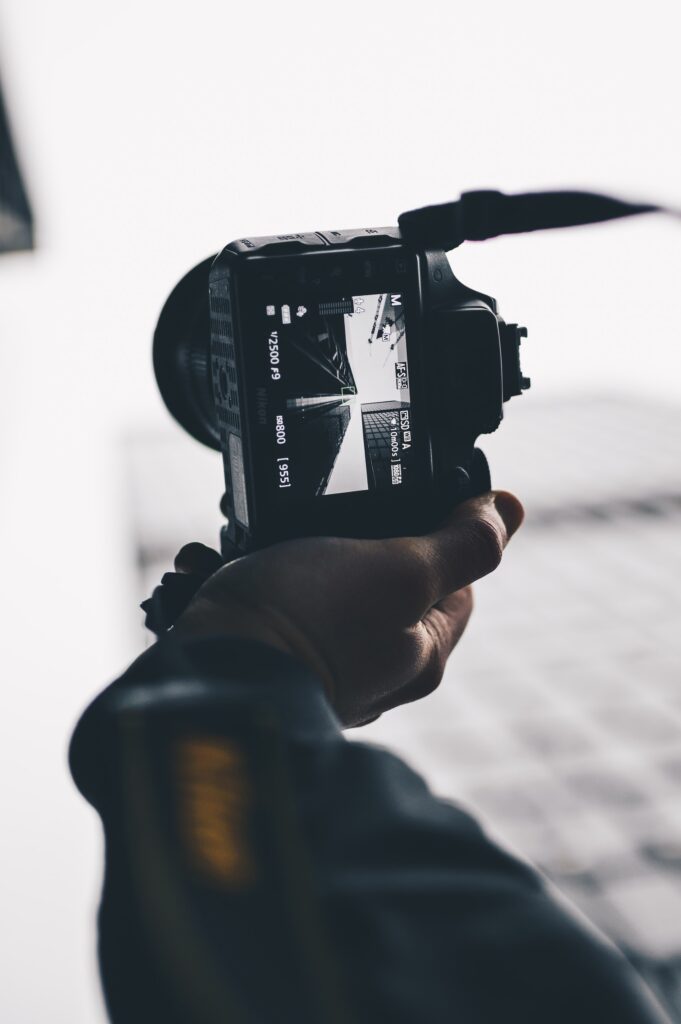
To adjust exposure compensation on your camera, you need to find your camera’s exposure compensation dial or button, which is usually located on top or on the back of your camera. The exposure compensation dial or button lets you increase or decrease the exposure by rotating it or pressing it. You can see how much exposure compensation you are applying by looking at a scale on your camera’s screen or viewfinder that shows plus or minus EV values.
To increase the exposure by one EV, for example, you need to rotate the dial or press the button until you see +1 EV on the scale. This means that your image will be one stop brighter than what the camera’s meter suggests. To decrease the exposure by one EV, for example, you need to rotate the dial or press the button until you see -1 EV on the scale. This means that your image will be one stop darker than what the camera’s meter suggests.
You can adjust the exposure compensation in increments of 1/3 or 1/2 EV, depending on your camera model and settings. You can also reset the exposure compensation to zero by rotating the dial or pressing the button until you see 0 EV on the scale. This means that your image will have the same exposure as what the camera’s meter suggests.
When to Use Exposure Compensation: Scenarios and Examples
Exposure compensation can be used in various scenarios where you want to change the brightness of your image according to your preference or creative vision. Here are some common situations where you might want to use exposure compensation, and some examples of how to use it effectively.
Backlit Scenes
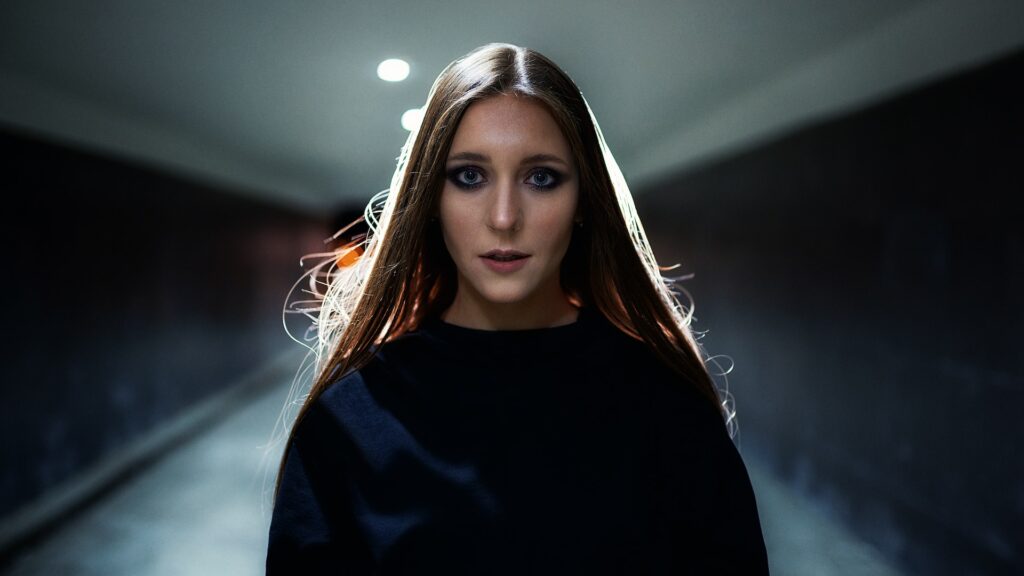
Backlit scenes are scenes where the main light source is behind your subject, such as when you are shooting against the sun or a bright window. In these situations, your camera’s meter might be fooled by the bright background, and underexpose your subject, making it too dark or silhouetted. To avoid this, you can use exposure compensation to increase the exposure and brighten your subject.
For example, if you are taking a portrait of someone with the sun behind them, and you want to capture their facial features and expressions, you can use exposure compensation to increase the exposure by one or two EV, depending on how bright the background is. This will make your subject more visible and detailed, while creating a soft and warm glow around them.
Snowy or White Scenes
Snowy or white scenes are scenes where there is a lot of snow or white objects in your frame, such as when you are shooting in winter or in a studio. In these situations, your camera’s meter might be fooled by the white color, and overexpose your image, making it too bright or washed out. To avoid this, you can use exposure compensation to decrease the exposure and darken your image.
For example, if you are taking a landscape photo of a snowy mountain, and you want to capture the texture and contrast of the snow, you can use exposure compensation to decrease the exposure by one or two EV, depending on how white the scene is. This will make your image more balanced and realistic, while preserving the details and colors of the snow.
High Contrast Scenes
High contrast scenes are scenes where there is a big difference between the brightest and darkest areas in your frame, such as when you are shooting in harsh sunlight or in a dark room with a bright window. In these situations, your camera’s meter might not be able to capture both ends of the spectrum well, and either overexpose or underexpose some parts of your image, making them too bright or too dark. To avoid this, you can use exposure compensation to adjust the exposure according to what part of the scene you want to emphasize.
For example, if you are taking a photo of a building with a bright sky behind it, and you want to capture both the details of the building and the colors of the sky, you can use exposure compensation to decrease the exposure by one or two EV, depending on how bright the sky is. This will make the sky more saturated and vivid, while creating a darker and more dramatic mood for the building.
Alternatively, if you are taking a photo of a person in a dark room with a bright window behind them, and you want to capture their facial features and expressions, you can use exposure compensation to increase the exposure by one or two EV, depending on how dark the room is. This will make the person more visible and detailed, while creating a soft and warm glow around them.
Creative Effects
Exposure compensation can also be used to create creative effects in your photography, by deliberately overexposing or underexposing your image to achieve a certain mood or style. For example, you can use exposure compensation to overexpose your image to create a high-key effect, which is a bright and airy image with minimal shadows and contrast. This can be used to create a positive and cheerful image, or a dreamy and ethereal image.
Alternatively, you can use exposure compensation to underexpose your image to create a low-key effect, which is a dark and moody image with strong shadows and contrast. This can be used to create a negative and dramatic image, or a mysterious and mysterious image.
Advanced Techniques: Exposure Bracketing and Exposure Compensation Settings
Exposure bracketing and exposure compensation settings are two advanced techniques that can help you improve your exposure skills and creativity. Exposure bracketing is a technique that involves taking multiple shots of the same scene with different exposure settings, such as using exposure compensation to increase or decrease the exposure by one or two EV.
Exposure bracketing can help you capture the best exposure for your scene, as well as create HDR (high dynamic range) images by combining the different exposures in post-processing. Exposure compensation settings are settings that allow you to customize how your camera applies exposure compensation, such as changing the increment size or the metering mode.
Exposure compensation settings can help you fine-tune your exposure more precisely and accurately, as well as experiment with different effects and styles.
What is Exposure Bracketing and How Does It Relate to Exposure Compensation?
Exposure bracketing is a technique that involves taking multiple shots of the same scene with different exposure settings, such as using exposure compensation to increase or decrease the exposure by one or two EV. Exposure bracketing can help you capture the best exposure for your scene, as well as create HDR (high dynamic range) images by combining the different exposures in post-processing.
Exposure bracketing is related to exposure compensation, as it uses exposure compensation to change the exposure for each shot. Exposure compensation is a way of telling your camera to change the exposure of an image by making it brighter or darker than what the camera’s meter thinks is correct. Exposure compensation works by changing the amount of light that reaches the sensor or film, by either changing the aperture, which controls how much light enters the lens, or changing the shutter speed, which controls how long the light stays on the sensor or film.
Exposure bracketing can be done manually or automatically, depending on your camera model and settings. To do exposure bracketing manually, you need to use your exposure compensation dial or button to adjust the exposure for each shot, and take the shots one by one. For example, if you want to take three shots with different exposures, you can set your exposure compensation to -1 EV, 0 EV, and +1 EV, and take a shot at each setting.
To do exposure bracketing automatically, you need to use your camera’s bracketing feature, which allows you to set the number and range of exposures you want to take automatically. For example, if you want to take three shots with different exposures, you can set your bracketing feature to 3 shots with +/- 1 EV range, and press the shutter button once. The camera will then take three shots with -1 EV, 0 EV, and +1 EV settings.
Understanding Various Exposure Compensation Settings
Exposure compensation settings are settings that allow you to customize how your camera applies exposure compensation, such as changing the increment size or the metering mode. Exposure compensation settings can help you fine-tune your exposure more precisely and accurately, as well as experiment with different effects and styles.
Some of the common exposure compensation settings are:
- Increment size: This is the amount of exposure change that occurs when you rotate or press your exposure compensation dial or button. Most cameras allow you to choose between 1/3 or 1/2 EV increments, which means that each click or press of the dial or button will change the exposure by 1/3 or 1/2 EV. You can choose the increment size that suits your preference and needs. For example, if you want more control and accuracy over your exposure, you can choose a smaller increment size, such as 1/3 EV. If you want more speed and convenience over your exposure, you can choose a larger increment size, such as 1/2 EV.
- Metering mode: This is the mode that determines how your camera’s meter measures the light in the scene and calculates the correct exposure. Most cameras have different metering modes that use different methods and areas of measurement. Some of the common metering modes are:
- Matrix or evaluative metering: This is the default and most versatile metering mode that measures the light in multiple zones across the frame and evaluates them according to their brightness and contrast. It then calculates an average exposure that will produce a well-balanced image for most scenes.
- Center-weighted metering: This is a metering mode that measures the light in a large area around the center of the frame and gives more weight to it than the edges. It then calculates an exposure that will favor the subject in the center of the frame, while ignoring the background or foreground. This can be used to emphasize your main subject, or create a vignette effect. – Spot or partial metering: This is a metering mode that measures the light in a small area around the center of the frame or the focus point, and ignores the rest of the frame. It then calculates an exposure that will expose the spot or partial area correctly, regardless of the rest of the scene. This can be used to expose for a specific part of your scene, such as a highlight or a shadow, or create a high-contrast image.
You can choose the metering mode that suits your scene and preference. For example, if you want to capture a balanced exposure for a complex scene with different light sources and colors, you can use matrix or evaluative metering. If you want to capture a consistent exposure for a simple scene with a clear subject and background, you can use center-weighted metering. If you want to capture a precise exposure for a challenging scene with extreme brightness or darkness, you can use spot or partial metering.
You can also use exposure compensation to fine-tune the exposure after choosing your metering mode. For example, if you are using matrix or evaluative metering, and you find that your image is still too bright or too dark for your liking, you can use exposure compensation to increase or decrease the exposure accordingly.
If you are using center-weighted metering, and you find that your subject is too bright or too dark compared to the background or foreground, you can use exposure compensation to balance the exposure between them. If you are using spot or partial metering, and you find that your spot or partial area is too bright or too dark compared to the rest of the scene, you can use exposure compensation to adjust the exposure for the whole scene.
Common Challenges and Solutions in Using Exposure Compensation
Exposure compensation is a powerful tool that can help you adjust the brightness of your image according to your preference or creative vision. However, exposure compensation can also pose some challenges that you need to be aware of and overcome. Here are some common challenges and solutions in using exposure compensation:
Challenge 01: Exposure compensation does not work in automatic mode or manual mode.
Solution: Exposure compensation only works in semi-automatic or creative modes, such as aperture priority mode (A or Av), shutter priority mode (S or Tv), and program mode (P). In these modes, you can choose one of the exposure variables (aperture or shutter speed), and let the camera choose the other one for you.
You can then use exposure compensation to fine-tune the exposure by making it brighter or darker. To switch from automatic mode or manual mode to one of these modes, you need to find your camera’s mode dial, which is usually located on top of your camera. The mode dial lets you choose between different shooting modes by rotating it. You can see what mode you are in by looking at the symbols or letters on the dial or on your camera’s screen.
Challenge 02: Exposure compensation changes the aperture or shutter speed settings automatically, which affects other aspects of your image such as depth of field or motion blur.
Solution: Exposure compensation works by changing the amount of light that reaches the sensor or film, by either changing the aperture, which controls how much light enters the lens, or changing the shutter speed, which controls how long the light stays on the sensor or film.
This can affect other aspects of your image such as depth of field or motion blur, which are determined by the aperture and shutter speed settings. Depth of field is how much of your image is in focus, and motion blur is how much movement is captured in your image. To avoid unwanted changes in these aspects, you need to be aware of how exposure compensation affects the aperture or shutter speed settings, and adjust them accordingly.
For example, if you use exposure compensation to increase the exposure, and the camera increases the aperture or decreases the shutter speed, you might lose some depth of field or introduce some motion blur in your image. To prevent this, you can use a smaller aperture (larger f-number) or a faster shutter speed (shorter duration) to compensate for the exposure compensation. Alternatively, you can use auto ISO mode, which will adjust the ISO setting to maintain the same aperture or shutter speed settings.
Challenge 03: Exposure compensation does not always produce the desired exposure, as the camera’s meter might still be fooled by very bright or very dark scenes, or by different light sources and colors.
Solution: Exposure compensation is a way of overriding the camera’s meter and adjusting the exposure according to your preference. However, exposure compensation is not a magic bullet that can solve all exposure problems, as the camera’s meter might still be inaccurate or inconsistent in some situations.
To overcome this, you need to use your eyes and your judgment to evaluate the exposure of your image, and use other tools and techniques to improve it. For example, you can use the histogram, which is a graph that shows the distribution of tones in your image, from dark to light.
The histogram can help you check if your image is properly exposed or not, and guide you to adjust the exposure compensation accordingly. You can also use the exposure lock, which is a feature that allows you to lock the exposure for a specific part of your scene, and then recompose your image without changing the exposure.
This can help you expose for a specific part of your scene, such as a highlight or a shadow, or create a high-contrast image. You can also use manual mode, which gives you full control over the exposure settings, and lets you choose the aperture, shutter speed, and ISO settings yourself. This can help you achieve the exact exposure you want, without relying on the camera’s meter.
Conclusive Recap on Mastering Exposure Compensation and ISO
Exposure compensation and ISO are two of the most important and useful features of modern digital cameras. They allow you to adjust the brightness of your photos without changing the aperture or shutter speed settings. They also affect other aspects of your image such as depth of field, motion blur, and noise.
By mastering exposure compensation and ISO, you can achieve the perfect exposure for your image, as well as create different creative effects and styles.