

Table of Contents
Ultimate Guide to Photographing Lightning: How to Take Perfect Lightning Pictures
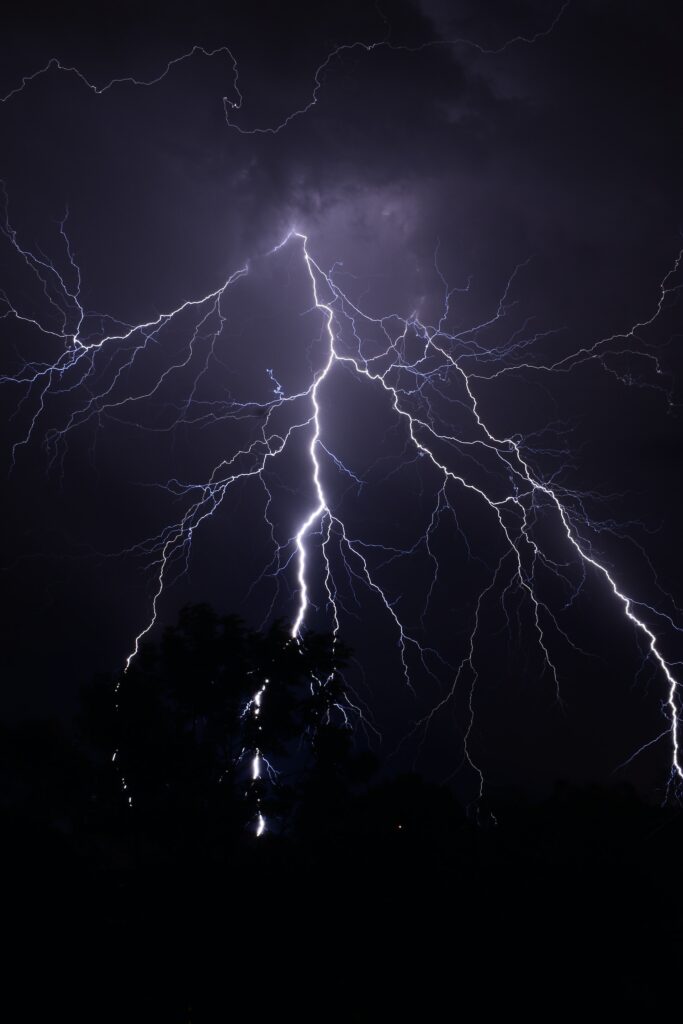
Lightning is one of the most spectacular and dangerous natural phenomena to photograph. Capturing the fleeting beauty of a lightning bolt can be a thrilling and rewarding experience, but it also requires some preparation, patience, and safety precautions.
In this article, we will show you how to photograph lightning and get amazing results, whether you are shooting at night or during the day. We will also share some tips on how to use a lightning trigger, a device that can help you catch the lightning at the right moment. Let’s get started!
How to Prepare Your Camera for Photographing Lightning
Before you head out to chase the storm, you need to make sure your camera is ready for lightning photography. Here are some things you should do:
- Charge your battery and bring a spare one. Lightning photography can be a long and unpredictable process, and you don’t want to run out of power in the middle of it.
- Bring enough memory cards. You will be taking a lot of shots, and some of them might be long exposures, so you need enough space to store them.
- Clean your lens and filter. Any dust or dirt on your lens or filter can cause unwanted spots or flares in your images, especially when shooting against a dark sky.
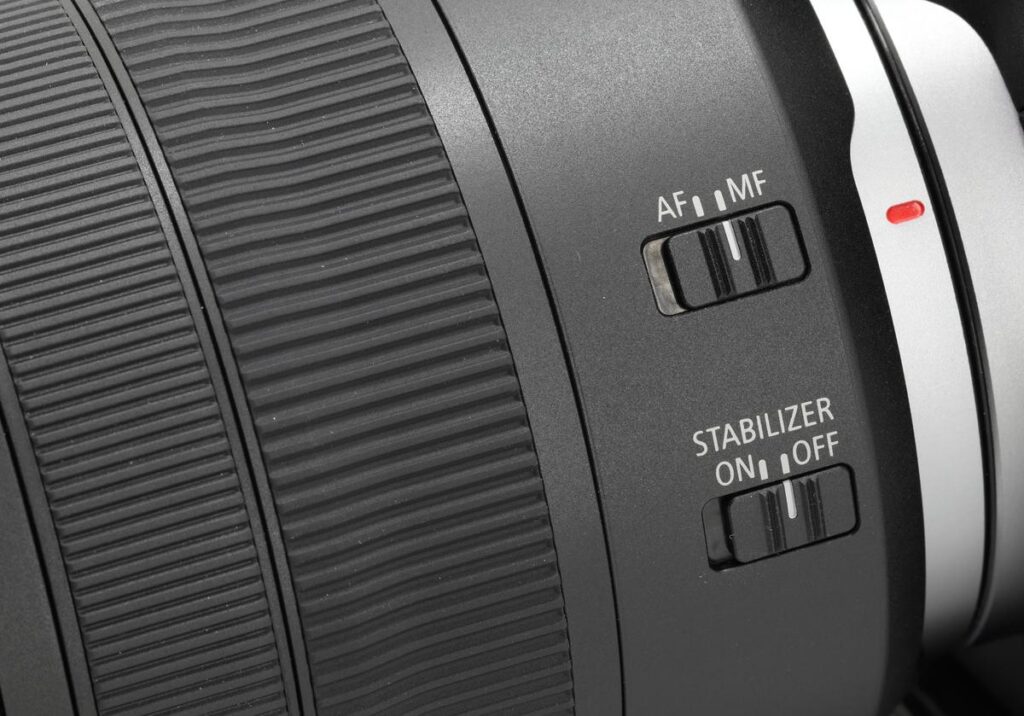
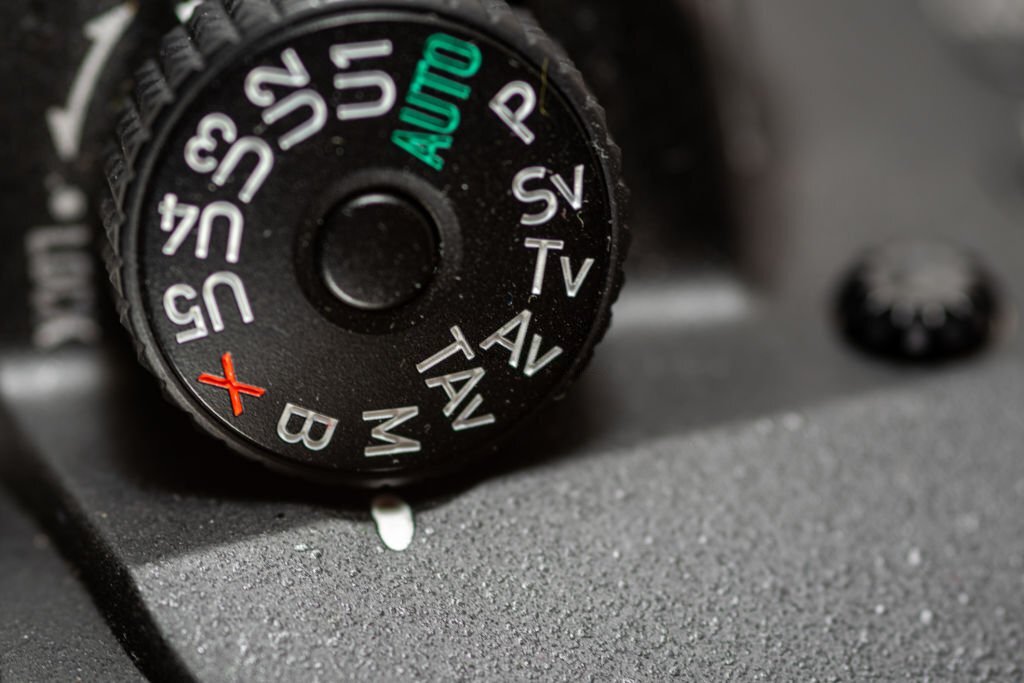
- Set your camera to manual mode. You will have more control over your exposure and focus settings, which are crucial for lightning photography.
- Turn off image stabilization. Image stabilization can interfere with the sharpness of your images when using a tripod, which you will need for lightning photography.
Tips on Manual Focus and Camera Settings for Lightning Photos
One of the biggest challenges of lightning photography is to get the focus right. Since lightning is very fast and unpredictable, you can’t rely on autofocus to catch it. Instead, you need to use manual focus and pre-focus on a distant object, such as a building, a tree, or a mountain. This way, you will ensure that the lightning bolt is in focus when it appears.
Another challenge is to choose the right camera settings for lightning photos. There is no one-size-fits-all formula, as the settings will depend on the ambient light, the distance and intensity of the lightning, and the effect you want to achieve. However, here are some general guidelines to help you get started:
- Aperture: You want to use a small aperture, such as f/8 or f/11, to get a large depth of field and a sharp image. A small aperture will also reduce the amount of light entering the camera, which will allow you to use a longer shutter speed.
- Shutter speed: You want to use a long shutter speed, such as 10 seconds or 30 seconds, to capture the lightning bolt and its branches. A long shutter speed will also create a nice contrast between the dark sky and the bright lightning. However, you don’t want to use a shutter speed that is too long, as you might get too much light or miss the best strikes. You can also use the bulb mode, which lets you keep the shutter open as long as you press the shutter button or a remote trigger.
- ISO: You want to use a low ISO, such as 100 or 200, to reduce the noise and preserve the image quality. A low ISO will also help you use a longer shutter speed without overexposing the image.
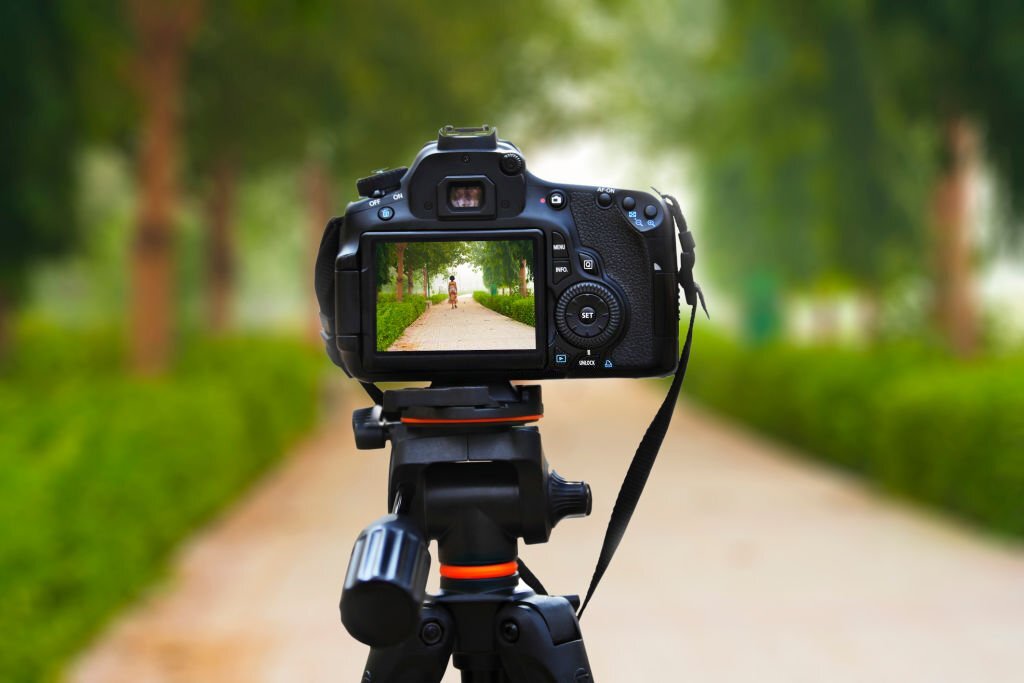
Why Using a Tripod is Essential for Lightning Shots
A tripod is a must-have accessory for lightning photography. Without a tripod, you won’t be able to use a long shutter speed without getting blurry images. A tripod will also help you keep your camera steady and your composition consistent. Here are some tips on how to use a tripod for lightning shots:
- Choose a sturdy and stable tripod that can support the weight of your camera and lens. Avoid using a lightweight or flimsy tripod that can wobble or fall over in the wind.
- Use a ball head or a pan-tilt head that allows you to adjust the angle and direction of your camera easily and quickly. You might need to change your framing depending on where the lightning strikes.
- Use a bubble level or a digital level to make sure your camera is level and your horizon is straight. A tilted horizon can ruin your image and make it look unnatural.
- Use a remote trigger or a cable release to trigger the shutter without touching the camera. This will prevent any camera shake or vibration that can blur your image. You can also use the self-timer or the exposure delay mode, but they might not be as accurate or convenient as a remote trigger or a cable release.
How to Set ISO for Nighttime and Daytime Lightning
The ISO setting is one of the most important factors that affect the exposure and the image quality of your lightning photos. The ISO determines how sensitive your camera sensor is to light, and how much noise or grain you will get in your images.
The higher the ISO, the more light your camera can capture, but also the more noise you will get. The lower the ISO, the less light your camera can capture, but also the less noise you will get.
The optimal ISO setting for lightning photography depends on whether you are shooting at night or during the day. Here are some tips on how to set ISO for nighttime and daytime lightning:
Nighttime Lightning Photography: Optimal Exposure Balancing
- ISO Management:
- Start with ISO 100 or 200 for a balanced exposure.
- Adjust ISO based on lightning and ambient light brightness.
- Use the histogram or highlight alert to avoid overexposure or underexposure.
- Histogram Guidance:
- Right-side spike or blinking on LCD? Lightning is overexposed—lower ISO.
- Left-side spike or dark LCD area? Sky is underexposed—increase ISO.
Daytime Lightning Photography: Taming the Brightness
- Light Reduction Techniques:
- Begin with the lowest ISO (50 or 100) for a bright sky and bolt.
- Employ a small aperture and fast shutter speed to control light.
- Neutral Density Filter Magic:
- Use a neutral density filter to reduce light entering the lens.
- Enhance creativity with longer shutter speeds to capture lightning.
- Exposure Checks:
- Rely on the histogram or highlight alert for exposure guidance.
- Right-side spike or blinking? Image overexposed—lower ISO or use a darker filter.
- Left-side spike or dark area? Image underexposed—increase ISO or use a lighter filter.
Achieve stunning results by mastering exposure balance for both nighttime and daytime lightning photography!
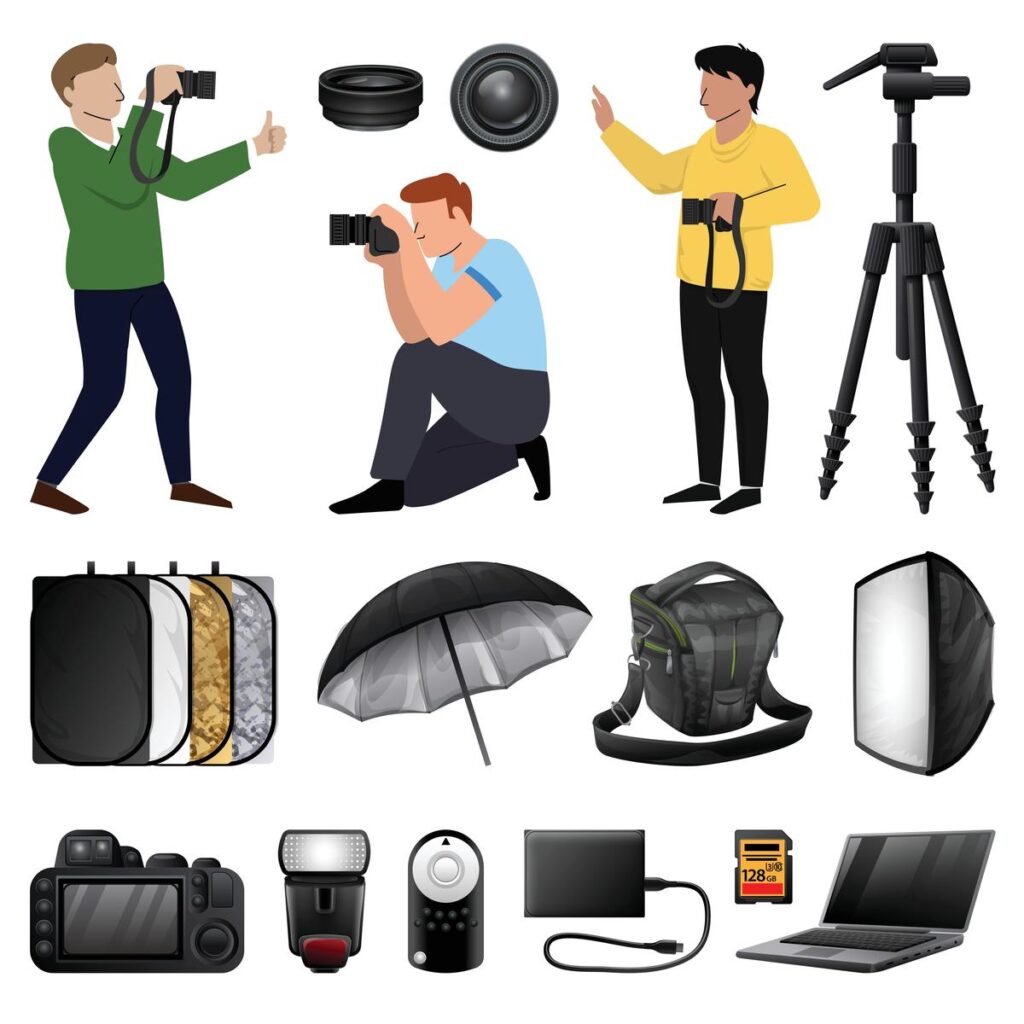
Recommended Equipment: Lightning Triggers and Remote Cable Releases
One of the biggest challenges of lightning photography is to capture the lightning at the right moment. Lightning is very fast and unpredictable, and you can’t rely on your reflexes or luck to press the shutter button when it strikes. Instead, you need to use some tools that can help you trigger the shutter automatically or remotely. Here are some of the most common and useful tools for lightning photography:
Lightning trigger:
A lightning trigger is a device that attaches to your camera and detects the change in brightness caused by the lightning. When it senses the lightning, it sends a signal to your camera and triggers the shutter. A lightning trigger can help you capture the lightning without having to keep the shutter open for a long time, which can reduce the noise and the risk of overexposure.
A lightning trigger can also help you capture daytime lightning, which is harder to see and photograph. However, a lightning trigger can also have some drawbacks, such as being expensive, battery-dependent, or incompatible with some cameras or lenses.
Remote cable release:
A remote cable release is a simple and cheap device that connects to your camera and allows you to trigger the shutter without touching the camera. A remote cable release can help you reduce the camera shake and vibration that can blur your image, especially when using a long shutter speed or a long focal length.
A remote cable release can also help you avoid the camera noise that can scare away the wildlife or the people around you.
However, a remote cable release can also have some drawbacks, such as being limited by the length of the cable, or requiring you to press the button manually, which can be tiring and inaccurate.
Capturing the Lightning Strike: Practical Tips on How to Take Perfect Lightning Pictures
Now that you have prepared your camera and your equipment, you are ready to capture the lightning strike. Here are some practical tips on how to do it:
- Choosing the Perfect Location:
- Find a spot with a clear view of the sky and horizon.
- Ensure it’s away from metal objects, power lines, and tall trees.
- Opt for a location that enhances the composition and provides a good contrast.
- Mastering the Art of Composition:
- Utilize the rule of thirds, golden ratio, or leading lines.
- Add depth with foreground elements like buildings or mountains.
- Avoid overcrowding the frame to keep the focus on the lightning.
- Setting Up Your Camera Like a Pro:
- Use a tripod for stability and consistent composition.
- Manual focus on a distant object to ensure the lightning is sharp.
- Consider taping the focus ring to prevent accidental adjustments.
- Fine-Tuning Camera Settings:
- Opt for manual mode and adjust aperture, shutter speed, and ISO.
- Experiment to find the ideal settings for ambient light and lightning intensity.
- Check exposure and focus with test shots, using tools like the histogram.
- Capturing the Perfect Shot:
- Use a remote trigger or cable release to avoid camera shake.
- Consider a lightning trigger for automatic shutter release.
- Be patient and persistent as lightning can be unpredictable.
- Review and delete unwanted shots for a streamlined collection.
- Refining Your Technique:
- Adjust settings and angles based on changing light and weather conditions.
- Monitor battery levels and memory card space regularly.
- Keep shooting until you achieve the perfect lightning bolt picture.
Remember, practice makes perfect, so don’t be afraid to experiment and refine your technique over time!
Capturing Lightning: How Long Should You Leave the Shutter Open?
One of the most common questions that beginners ask about lightning photography is how long they should leave the shutter open to capture the lightning. The answer is not simple, as it depends on several factors, such as the brightness of the lightning, the ambient light, the distance of the lightning, and the effect you want to create.
However, here are some general tips on how to choose the right shutter speed for lightning photography:
Nighttime Lightning Photography: Unleash the Power of the Night Sky
- Mastering Shutter Speed Creativity:
- Explore the world of long shutter speeds, from 10 to 30 seconds.
- Capture multiple lightning strikes in one frame for a dramatic image.
- Experiment with bulb mode to showcase the entire lightning evolution.
- Beware of overexposure and noise—maintain a balance for optimal results.
- Short Shutter Speed Magic:
- Opt for short shutter speeds (1 or 2 seconds) for clean and simple images.
- Freeze a single lightning strike in one frame for a striking effect.
- Consider using a lightning trigger for automatic shutter release.
- Be cautious of underexposure and blur, adjusting trigger settings accordingly.
Daytime Lightning Photography: Conquering the Sunlit Sky
1. Challenges of Daytime Lightning:
- Navigate limited flexibility with shutter speed during the day.
- Use short shutter speeds (1/250 or 1/500 second) for clear and sharp images.
- Employ small apertures and low ISO to control light and avoid overexposure.
- Integrate a neutral density filter to extend shutter speed possibilities.
2. Overcoming Daytime Constraints:
- Embrace the aid of a lightning trigger for automatic shutter release.
- Tackle the challenge of adjusting trigger sensitivity and delay.
- Be mindful of potential underexposure or noise—find the delicate balance.
- Invest time in understanding and adapting to the varying intensity of daytime lightning.
- Whether under the stars or the bright sun, master the nuances of nighttime and daytime lightning photography for awe-inspiring results!
Choosing the Right Exposure for Bolt of Lightning
Another common question that beginners ask about lightning photography is how to choose the right exposure for a bolt of lightning. The exposure is the amount of light that reaches the camera sensor, and it is determined by the combination of the aperture, the shutter speed, and the ISO.
The exposure affects the brightness, the contrast, and the color of the image, and it can make or break your lightning photo. Here are some tips on how to choose the right exposure for a bolt of lightning:
- Use manual mode and manual focus. You want to have full control over your exposure and focus settings, which are crucial for lightning photography. You don’t want to rely on the automatic modes or the autofocus, which can be inaccurate or inconsistent when dealing with fast and unpredictable lightning.
- Use the histogram or the highlight alert. You want to check the exposure on your camera and avoid clipping the highlights or the shadows. You can use the histogram, a graph that shows the distribution of the brightness levels in your image, or the highlight alert, a feature that shows the overexposed areas on your LCD screen. If you see a spike on the right side of the histogram, or a blinking area on your LCD screen, it means that the lightning is overexposed and you need to lower the aperture, the shutter speed, or the ISO. If you see a spike on the left side of the histogram, or a dark area on your LCD screen, it means that the sky is underexposed and you need to increase the aperture, the shutter speed, or the ISO.
- Use the exposure compensation. You want to fine-tune your exposure and adjust the brightness of your image. You can use the exposure compensation, a feature that allows you to increase or decrease the exposure by a certain amount, such as +1 or -1. You can use the exposure compensation to make your image brighter or darker, depending on your preference and the effect you want to create. However, you need to be careful not to overdo it and lose the details or the colors in your image.
- Use the bracketing. You want to increase your chances of getting a good exposure and a good image. You can use the bracketing, a feature that allows you to take multiple shots with different exposures, such as -1, 0, and +1. You can use the bracketing to capture the different variations of the lightning and the sky, and choose the best one later. You can also use the bracketing to create a high dynamic range (HDR) image, which combines the different exposures into one image with a wider range of tones and colors. However, you need to be careful not to move your camera or change your composition between the shots, or you might get misaligned or blurry images.
How to Use an Automatic Lightning Trigger
An automatic lightning trigger is your key to capturing lightning effortlessly. No need to keep your shutter open for too long—minimize noise and overexposure.
Daytime lightning? No problem. It’s harder to see and photograph, but the trigger makes it possible.
Choosing the Right Trigger
Compatibility is crucial. Don’t risk damage—opt for a trigger compatible with your camera and lens.
Say no to cheap triggers. Invest in reliability; check reviews and recommendations.
Setting Up Like a Pro
Follow the guide. Set up your camera and trigger according to manufacturer instructions.
Sensitivity matters. Adjust trigger settings to match lightning distance and intensity.
Perfect Positioning for Stunning Shots
Clear view, no distractions. Position your camera and trigger for an unobstructed view of the sky.
Balance is key. Create a compelling composition using rule of thirds or golden ratio.
Stability is a must. Use a tripod and a remote trigger to avoid camera shake.
Capturing the Thunderous Moment
Let the trigger do its job. Wait for the lightning, and revel in the thrill of capturing the moment.
Share the beauty. Show off your stunning images and gather feedback from your community.
Continuous improvement. Learn from each shot to enhance your skills for the next storm.
Taking Lightning Images: Safety Measures
Lightning photography can be a fun and rewarding hobby, but it can also be a dangerous and risky one. Lightning is a powerful and unpredictable force of nature, and it can cause serious injuries or even death.
You need to take some safety measures and precautions to protect yourself and your equipment from the lightning and the storm. Here are some of the most important safety measures for lightning photography:
Check the weather forecast and the radar
- Check the weather forecast and the radar before you go out to shoot lightning.
- Know the location, the direction, and the intensity of the storm, and plan your trip accordingly.
- Avoid shooting in areas that are prone to flooding, landslides, or strong winds.
- Avoid shooting in areas that are under severe thunderstorm warnings or tornado watches and want to have a backup plan and a safe place to go in case the weather gets worse or the storm changes course.
Keep a safe distance and a low profile
- Keep a safe distance and a low profile when shooting lightning and stay at least 10 miles away from the storm, and avoid being the highest point or the closest object to the lightning.
- Avoid standing near any metal objects, power lines, or tall trees that can attract the lightning.
- Avoid standing in open fields, on hilltops, or on water, where you have no shelter or protection.
- Find a low and sheltered place, such as a car, a building, or a cave, where you can hide or escape if the lightning gets too close or too frequent.
Follow the 30-30 rule and the flash-to-bang method
You want to follow the 30-30 rule and the flash-to-bang method to determine the distance and the danger of the lightning. The 30-30 rule states that if you see the lightning and hear the thunder within 30 seconds, you are within the strike zone and you need to seek shelter immediately.
Wait at least 30 minutes after the last thunder before you resume your activity.
The flash-to-bang method states that you can estimate the distance of the lightning by counting the seconds between the flash and the bang, and dividing them by five. For example, if you count 10 seconds between the flash and the bang, the lightning is about two miles away. You need to seek shelter if the lightning is less than six miles away, or if the time between the flash and the bang is less than 30 seconds.
Protect your equipment and yourself
- Use a surge protector or a lightning arrester to protect your camera and your trigger from the electrical surge caused by the lightning.
- Use a plastic bag or a rain cover to protect your camera and your lens from the rain, the dust, or the hail.
- Wear rubber gloves, rubber boots, and a raincoat to protect yourself from the electric shock and the wetness.
- Have a first aid kit and a cell phone with you in case of an emergency.
Taking the Perfect Lightning Bolt Picture: Step-by-Step Guide
To summarize, here is a step-by-step guide on how to take the perfect lightning bolt picture:
- Choose a good location and a good angle.
- Set up your camera and your trigger.
- Position your camera and your trigger.
- Choose your camera settings and take a test shot.
- Trigger the shutter and capture the lightning.
- Capture the lightning and enjoy the results.
- Take some safety measures and precautions.
Steps to Position Your Camera on a Tripod for Lightning Shots
To position your camera on a tripod for lightning shots, you need to follow these steps:
- Attach your camera to the tripod head and secure it firmly. Make sure the tripod head can support the weight of your camera and lens, and that it can rotate and tilt smoothly.
- Adjust the height and the angle of the tripod legs to make the tripod stable and level. You can use a bubble level or a digital level to check the levelness of the tripod. You can also use the spikes or the rubber feet on the tripod legs to grip the ground and prevent the tripod from slipping or sliding.
- Adjust the angle and the direction of the camera using the tripod head. You can use a ball head or a pan-tilt head to change the orientation of the camera easily and quickly. You can also use the live view or the viewfinder on your camera to check the framing and the composition of your image.
- Lock the tripod head and the tripod legs to prevent any movement or vibration of the camera. You can also use a sandbag or a weight to add some stability and balance to the tripod.
How to Detect Lightning and Determine Where it Will Strike
o detect lightning and determine where it will strike, you need to use your eyes, your ears, and your tools. Here are some tips on how to do it:
- Use your eyes to look for the signs of lightning, such as flashes, sparks, or streaks in the sky. You can also look for the signs of storm clouds, such as dark, towering, or anvil-shaped clouds. You can also look for the signs of rain, hail, or wind, which often accompany the lightning.
- Use your ears to listen for the sounds of thunder, which indicate the presence and the proximity of lightning. You can also use the flash-to-bang method to estimate the distance of the lightning by counting the seconds between the flash and the bang, and dividing them by five. For example, if you count 10 seconds between the flash and the bang, the lightning is about two miles away.
- Use your tools to detect and locate the lightning, such as a lightning detector, a lightning map, or a lightning app. A lightning detector is a device that senses the electromagnetic waves emitted by the lightning and alerts you with a sound or a light. A lightning map is a website or a software that shows the real-time location and frequency of the lightning strikes on a map. A lightning app is a mobile application that provides the same information as a lightning map, but on your smartphone or tablet.
Tips for Getting a Good Shot of a Lightning Bolt
To get a good shot of a lightning bolt, you need to use some techniques and tricks that can improve your chances and your results. Here are some tips for getting a good shot of a lightning bolt:
- Use a wide-angle lens or a zoom lens to capture the whole scene or to zoom in on the details. You can also use a telephoto lens or a macro lens to capture the distant or the close-up lightning, but you need to be careful not to miss the action or to get too close to the danger.
- Use a polarizing filter or a graduated neutral density filter to enhance the colors and the contrast of the sky and the lightning. You can also use a star filter or a cross filter to create some starbursts or crosses around the lightning bolt, adding some sparkle and flair to your image.
- Use a flash or a strobe to illuminate the foreground or the subject, creating some balance and interest in your image. You can also use a flash or a strobe to freeze the motion of the lightning, creating some sharpness and clarity in your image. However, you need to be careful not to overexpose the image or to distract from the lightning.
- Use a remote trigger or a cable release to trigger the shutter without touching the camera, reducing the camera shake and vibration that can blur your image. You can also use a lightning trigger, a device that detects the lightning and triggers the shutter automatically, capturing the lightning at the right moment.
- Use the continuous shooting mode or the burst mode to take multiple shots in a row, increasing your chances of getting a good shot of the lightning. You can also use the exposure bracketing mode or the HDR mode to take a series of shots with different exposures, and combine them later to get the best exposure for the lightning.
Editing your Lightning Images for Best Results
To edit your lightning images for best results, you need to use some software and tools that can enhance and improve your images. Here are some tips on how to edit your lightning images for best results:
- Use a raw converter or a photo editor to open and process your raw files, which contain more information and quality than the JPEG files. You can use a raw converter or a photo editor to adjust the exposure, the white balance, the contrast, the saturation, the sharpness, and the noise of your images, and to correct any distortion, chromatic aberration, or lens flare.
- Use a cropping tool or a perspective tool to crop and straighten your images, removing any unwanted or distracting elements and making your images more balanced and symmetrical. You can also use a cropping tool or a perspective tool to change the aspect ratio or the orientation of your images, making them more suitable for different purposes or platforms.
- Use a cloning tool or a healing tool to remove any dust, dirt, or spots on your images, making them more clean and clear. You can also use a cloning tool or a healing tool to remove any power lines, poles, or wires that can interfere with the lightning or the sky, making them more natural and realistic.
- Use a dodge tool or a burn tool to lighten or darken some areas of your images, creating some depth and drama in your images. You can also use a dodge tool or a burn tool to highlight or emphasize some parts of the lightning or the sky, making them more vivid and striking.
- Use a filter tool or an effect tool to apply some filters or effects to your images, adding some mood and style to your images. You can use a filter tool or an effect tool to change the color, the tone, the texture, or the atmosphere of your images, making them more artistic and creative.
Common Mistakes to Avoid When Shooting Lightning
To avoid ruining your lightning images, you need to avoid some common mistakes that can affect the quality and the safety of your images. Here are some of the most common mistakes to avoid when shooting lightning:
- Shooting without a tripod. Shooting without a tripod can cause your images to be blurry, shaky, or out of focus, especially when using a long shutter speed or a long focal length. You need to use a tripod to keep your camera steady and your composition consistent.
- Shooting with image stabilization. Shooting with image stabilization can interfere with the sharpness of your images when using a tripod, as the image stabilization system can try to correct the movement that is not there. You need to turn off image stabilization when using a tripod.
- Shooting with autofocus. Shooting with autofocus can cause your images to be out of focus, as the autofocus system can have trouble finding or locking on the lightning. You need to use manual focus and pre-focus on a distant object, such as a building, a tree, or a mountain, to ensure that the lightning is in focus when it appears.
- Shooting with the wrong settings. Shooting with the wrong settings can cause your images to be overexposed, underexposed, noisy, or grainy, depending on the ambient light, the distance and intensity of the lightning, and the effect you want to achieve. You need to use manual mode and choose the right aperture, shutter speed, and ISO for lightning photography.
- Shooting without checking the exposure and the focus. Shooting without checking the exposure and the focus can cause your images to be too bright, too dark, or too soft, depending on the brightness and frequency of the lightning, and the accuracy of your settings and your focus. You need to check the exposure and the focus using the histogram or the highlight alert, and adjust them accordingly.
- Shooting without taking safety measures and precautions. Shooting without taking safety measures and precautions can cause you or your equipment to be damaged or injured by the lightning or the storm. You need to take some safety measures and precautions, such as checking the weather forecast and the radar, keeping a safe distance and a low profile, following the 30-30 rule and the flash-to-bang method, and protecting your equipment and yourself from the lightning and the storm.
Key Takeaways
Here are some of the key takeaways from this article:
- Lightning photography is a challenging and rewarding hobby, but it also requires some preparation, patience, and safety precautions.
- You need to use manual mode and manual focus, and choose the right aperture, shutter speed, and ISO for lightning photography.
- You need to use a tripod, a remote trigger or a cable release, and a lightning trigger to capture the lightning at the right moment.
- You need to check the exposure and the focus using the histogram or the highlight alert, and adjust them accordingly.
- You need to keep a safe distance and a low profile, and follow the 30-30 rule and the flash-to-bang method to avoid the lightning strikes.
- You need to protect your equipment and yourself from the lightning and the storm.
We hope this article has helped you learn how to photograph lightning and get amazing results. Now it’s time to put your skills and knowledge into practice and capture some stunning and unique images of lightning. Remember to have fun and be safe, and don’t forget to share your images with us. Happy shooting!