

Table of Contents
Backlit Photography: How to Take Jaw-Dropping Photos
Backlighting is a photography technique that involves placing the main light source behind the subject of your photo. This creates a dramatic effect that can highlight the shape, texture, and details of your subject, as well as create beautiful background bokeh and silhouettes.
In this article, we will show you how to use backlighting in photography for stunning results. We will cover the following topics:
- What is backlighting and why use it?
- How to expose for backlit subjects
- How to create different effects with backlighting
- How to avoid common backlighting problems
- Some examples of backlit photography
By the end of this article, you will have a better understanding of how to use backlighting in photography and how to apply it to your own photos. Whether you are shooting portraits, landscapes, wildlife, or still life, backlighting can add a new dimension to your photography and make your photos stand out.
Key Takeaways For Backlit Photography
- Expose for your subject using spot metering, exposure compensation, or manual mode
- Create different effects by changing your position relative to the light source
- Use a lens hood, a neutral density filter, a flash, or a reflector to avoid or enhance backlighting problems
- Experiment with different light sources, such as natural or artificial light
- Have fun and be creative with backlighting!
What is Backlighting and Why Use It? | Backlit Photography
Backlighting is a lighting technique that involves placing the main light source behind the subject of your photo. This can be natural light, such as the sun or the moon, or artificial light, such as a flash or a lamp. The light source can be directly behind the subject, creating a silhouette, or slightly off-center, creating a rim light or a halo effect.
Backlighting can be used for various purposes in photography, such as:
- Creating separation from the background: By lighting the subject from behind, you can create a contrast between the subject and the background, making the subject stand out more.
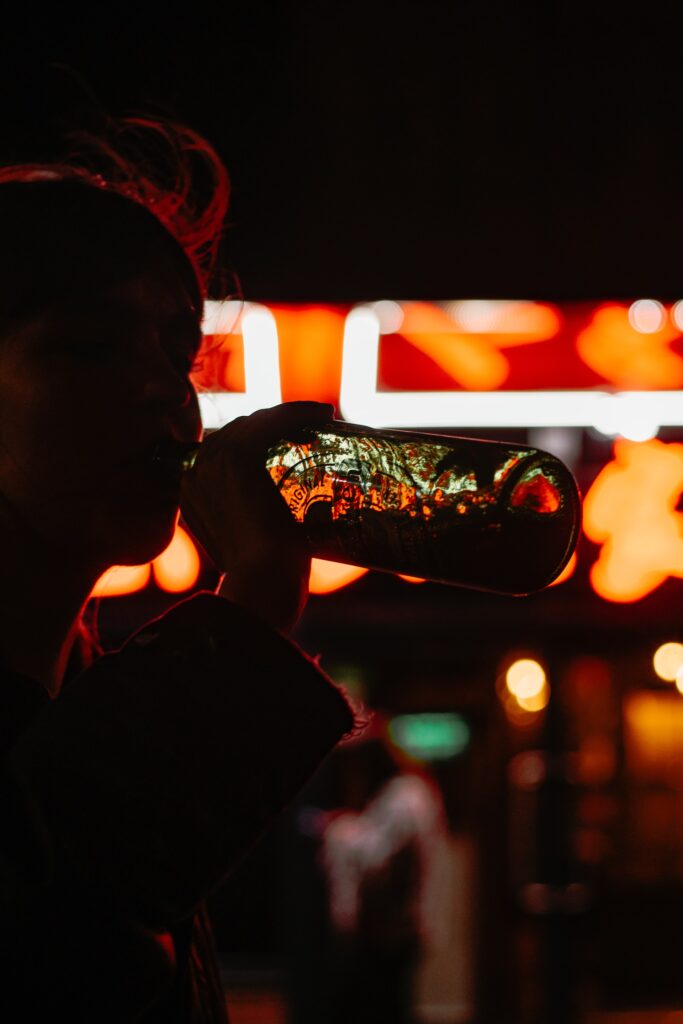
- Creating mood and atmosphere: Backlighting can create a dramatic, mysterious, or romantic mood in your photos, depending on the color and intensity of the light.
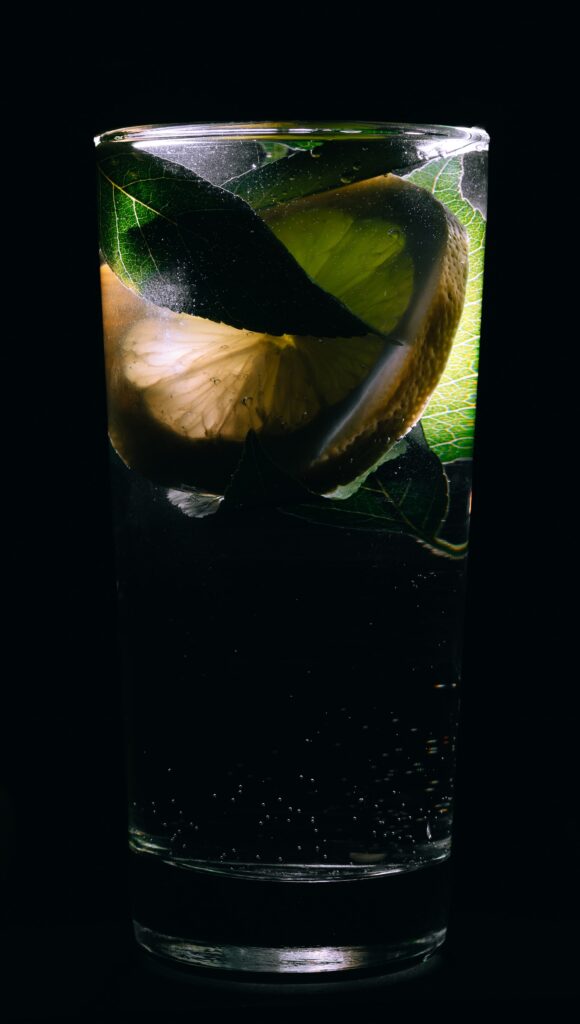
- Enhancing details and textures: Backlighting can reveal details and textures that are otherwise hidden in the shadows, such as hair, fur, feathers, leaves, etc.
- Creating beautiful background bokeh: Backlighting can create a soft and blurry background that highlights the subject and adds depth to your photos. Bokeh is especially noticeable when there are small particles or objects in the air or in the background that reflect the light, such as dust, water droplets, bubbles, etc.
- Creating stunning silhouettes: Backlighting can create silhouettes that emphasize the shape and form of your subject. Silhouettes are especially effective when there is a clear outline of your subject against a bright background.
How to Expose for Backlit Subjects | Backlit Photography
One of the main challenges of backlighting is exposing correctly for your subject. If you use the camera’s automatic exposure mode, it will likely meter for the bright background and underexpose your subject. This can result in dark and muddy shadows that lack detail and color.
To avoid this problem, you need to manually adjust your exposure settings to expose for your subject. There are several ways to do this:
- Use spot metering: Spot metering is a camera mode that measures the light only from a small area in the center of your frame. You can use this mode to meter for your subject’s face or another important part of your subject. Then lock your exposure by half-pressing the shutter button or using the exposure lock button (AE-L). This will ensure that your subject is properly exposed and ignore the background.
- Use exposure compensation: Exposure compensation is a camera function that allows you to adjust the exposure by adding or subtracting stops of light. You can use this function to increase your exposure when shooting backlit subjects. For example, you can set your exposure compensation to +1 or +2 stops to brighten up your subject and compensate for the backlight.
- Use manual mode: Manual mode is a camera mode that gives you full control over your exposure settings. You can use this mode to set your aperture, shutter speed, and ISO according to your desired outcome. For example, you can use a large aperture (small f-number) to create a shallow depth of field and blur the background. You can use a fast shutter speed to freeze motion and avoid camera shake. You can use a low ISO to reduce noise and preserve image quality.
How to Create Different Effects with Backlighting | Backlit Photography
Backlighting can create different effects depending on how you position yourself and your subject relative to the light source. Here are some tips on how to create different effects with backlighting:
- To create a silhouette effect: Place your subject directly in front of the light source and expose for the background. This will make your subject appear as a dark shape against a bright background. Make sure there is enough contrast between your subject and the background and avoid any distracting elements in the frame. You can also underexpose slightly to make your silhouette more pronounced.
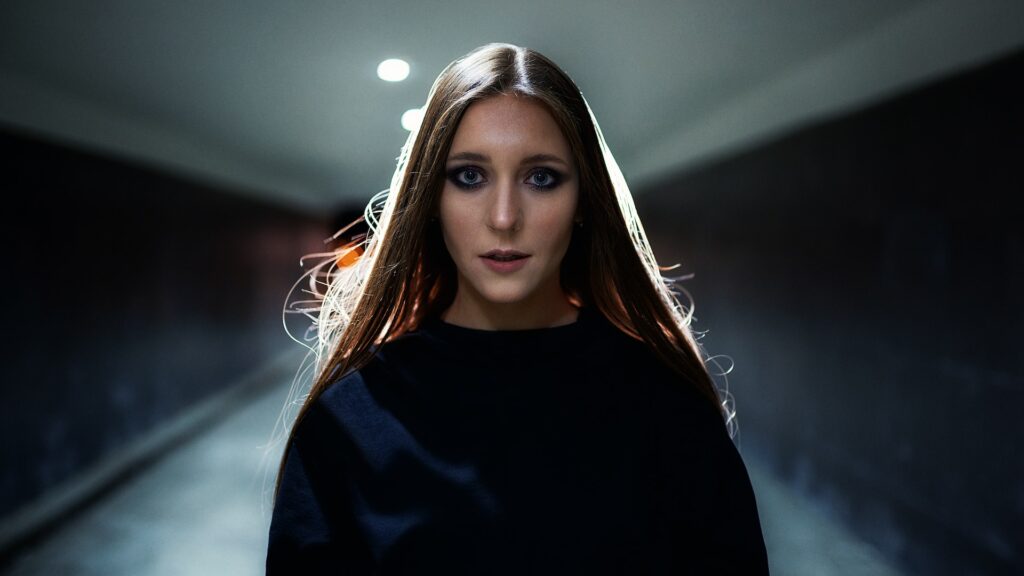
- To create a rim light effect: Place your subject slightly off-center from the light source and expose for your subject. This will create a thin line of light around the edges of your subject, creating a sense of depth and dimension. Make sure the light source is not too bright or too close to your subject, otherwise it will overpower your subject and create lens flare.
- To create a halo effect: Place your subject slightly off-center from the light source and expose for your subject. This will create a soft glow of light around your subject, creating a dreamy and ethereal effect. Make sure the light source is not too harsh or too far from your subject, otherwise it will create a hard shadow or lose its effect.
How to Avoid Common Backlighting Problems in Backlit Photography
Backlighting can also create some problems that can ruin your photos if you are not careful. Here are some tips on how to avoid common backlighting problems:
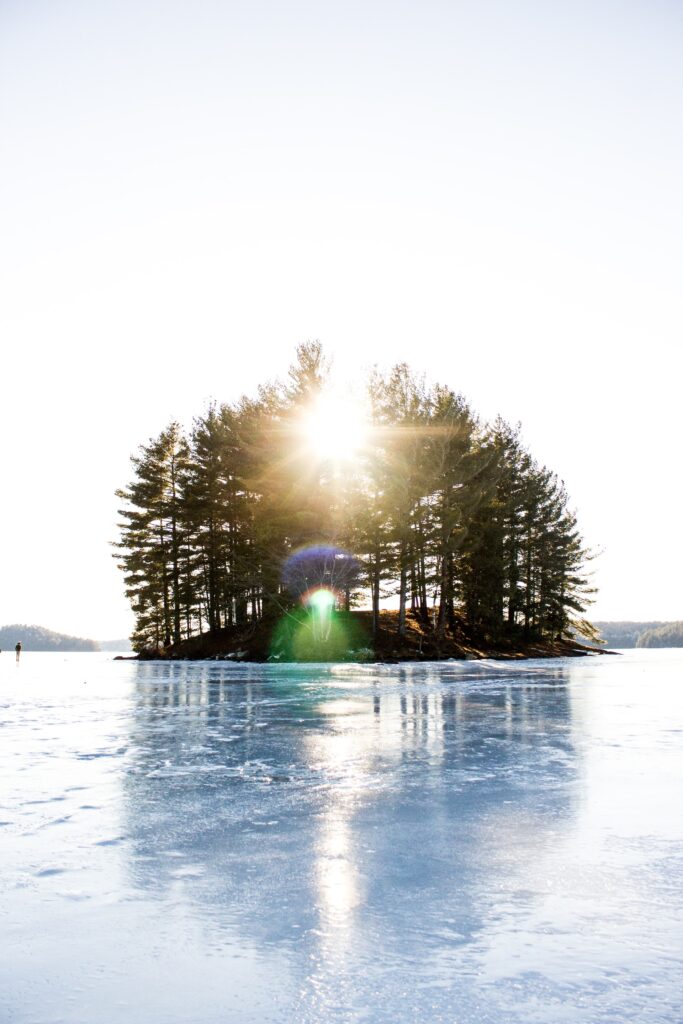
To avoid lens flare:
Lens flare is a phenomenon that occurs when the light source enters the lens and creates streaks, spots, or circles of light in your photos. Lens flare can be used creatively to add interest and drama to your photos, but it can also be distracting and reduce contrast and sharpness. To avoid lens flare, you can use a lens hood to block the unwanted light from entering the lens. You can also change your angle or position yourself in some shade to avoid the direct light. You can also use your hand or another object to shield the lens from the light.
To avoid overexposure:
Overexposure is a problem that occurs when the light source is too bright and blows out the highlights in your photos. Overexposure can result in loss of detail and color in the bright areas of your photos. To avoid overexposure, you can use a neutral density filter to reduce the amount of light entering the lens. You can also use a smaller aperture (larger f-number) to limit the amount of light reaching the sensor. You can also use a faster shutter speed to shorten the exposure time.
To avoid underexposure:
Underexposure is a problem that occurs when the light source is too dim and darkens the shadows in your photos. Underexposure can result in loss of detail and color in the dark areas of your photos. To avoid underexposure, you can use a flash or a reflector to fill in the shadows on your subject. You can also use a larger aperture (smaller f-number) to allow more light into the lens. You can also use a slower shutter speed to lengthen the exposure time.
Summary | Backlit Photography
Backlighting is a photography technique that involves placing the main light source behind the subject of your photo. Backlighting can create various effects, such as separation, mood, detail, bokeh, and silhouette. To use backlighting effectively, you need to expose correctly for your subject and avoid common problems such as lens flare, overexposure, and underexposure. Backlighting can be used for different subjects, such as portraits, landscapes, wildlife, and still life.
Here are some key points to remember when using backlighting in photography:
- Expose for your subject using spot metering, exposure compensation, or manual mode
- Create different effects by changing your position relative to the light source
- Use a lens hood, a neutral density filter, a flash, or a reflector to avoid or enhance backlighting problems
- Experiment with different light sources, such as natural or artificial light
- Have fun and be creative with backlighting!